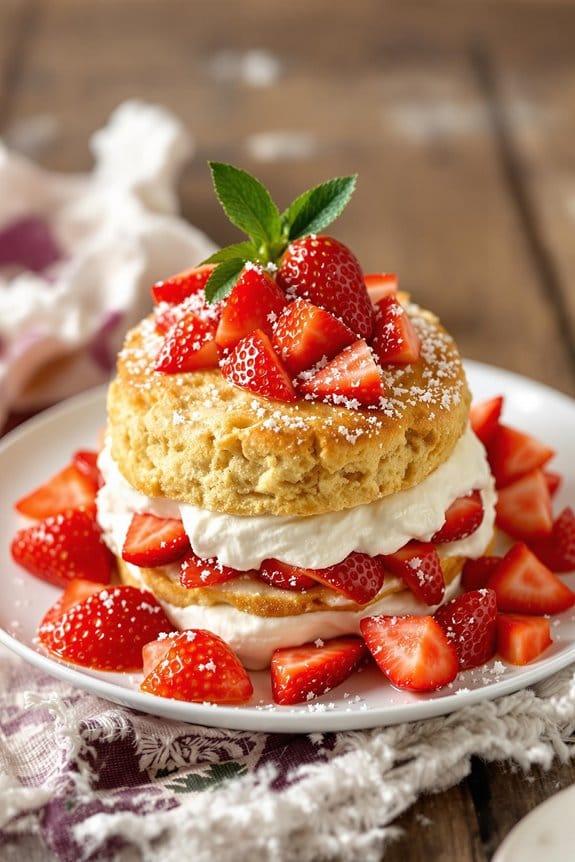
Have you ever tried making a Strawberry Shortcake Icebox Dessert? It’s a simpler, cooler alternative to the traditional baked version, ideal for those sweltering summer days. Imagine layers of creamy whipped topping, juicy strawberries, and soft shortcake biscuits all coming together without turning on your oven. The process is straightforward but leaves room for creativity in layering and presentation. Think about the delight of serving this to your friends and family as the centerpiece of your next gathering. Now, consider the key to maximizing flavor in every bite—is it the quality of strawberries, the type of cream, or something else entirely?
History
While strawberry shortcake now conjures up images of sweet summer desserts, its origins are surprisingly modest and practical. Initially, this delightful treat began as a simple dish, composed chiefly of biscuits or crumbled bread mixed with strawberries, which would be scattered over with a dusting of sugar. This method was a resourceful way to use up stale bread, making it an economically savvy choice throughout various communities.
As the years passed, you’ll find that the evolution of strawberry shortcake mirrored changes in societal tastes and culinary techniques. By the 19th century, with the rise of baking soda and powder, the dessert had transformed. The once humble snack took on a more sophisticated flair, utilizing fresh, spongy cakes instead of old bread. Cream, once a luxury, became a staple topping as dairy farming flourished.
Delving into this transformation, it’s clear that your favorite summertime dessert holds a rich tapestry of history, evolving from a practical dish to an emblem of festive indulgence. Each layer of its development showcases a snapshot of culinary innovation, reflecting broader historical shifts and resource adaptability.
Such a background provides not only a tale of taste evolution but also a reflection of socio-economic changes over centuries.

One 16 oz. box of Duncan Hines Dolly Parton's Buttermilk Biscuit Mix

Knott's Berry Farm Premium Shortbread Cookies

No hydrogenated fats or high fructose corn syrup allowed in any food
Recipe
Strawberry shortcake is a classic dessert that perfectly combines the sweetness of fresh strawberries with the fluffiness of a light, tender biscuit. This delightful treat is often served during spring and summer when strawberries are at their peak, making it an excellent choice for picnics, barbecues, and other warm-weather gatherings.
The key to a perfect strawberry shortcake lies in using quality ingredients and guaranteeing your biscuits are baked to just the right texture – soft yet slightly crumbly, providing the perfect base for the juicy strawberries and whipped cream.
To get started, you’ll want to prepare your strawberries in advance to allow them to macerate, which brings out their natural juices and enhances the overall flavor of the dessert. Preparing the biscuits from scratch might sound intimidating, but it’s surprisingly simple and well worth the effort for that homemade taste.
Follow this straightforward recipe to create a delicious strawberry shortcake that will impress your guests and satisfy your sweet tooth.
Ingredients:
- 1 quart strawberries, hulled and sliced
- 1/4 cup sugar, plus 2 tablespoons for strawberries
- 2 cups all-purpose flour
- 1 tablespoon baking powder
- 1/2 teaspoon salt
- 4 tablespoons cold unsalted butter, cut into small pieces
- 3/4 cup whole milk, plus extra for brushing the tops
- 1 cup heavy cream, chilled
- 2 tablespoons powdered sugar
- 1 teaspoon vanilla extract
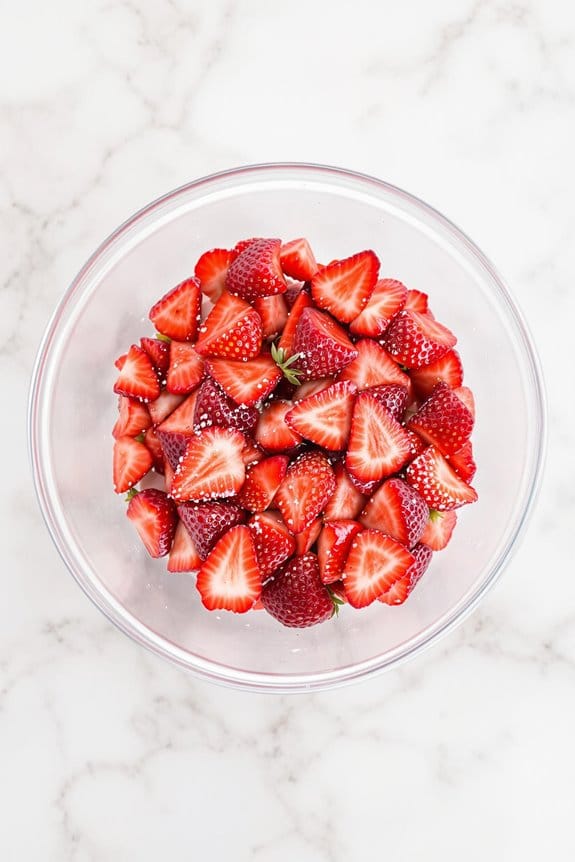
In a medium bowl, combine the sliced strawberries and 2 tablespoons of sugar; set aside to allow the strawberries to juice.
In a separate large bowl, whisk together the flour, baking powder, salt, and 1/4 cup sugar. Cut in the cold butter using a pastry cutter or two knives until the mixture resembles coarse crumbs. Gradually add the milk to the dry ingredients, stirring until the dough comes together but is still a bit shaggy.
Turn out the dough onto a floured surface, knead lightly a few times, then pat it into a 1-inch thick round. Cut into 6 rounds using a biscuit cutter and place on a baking sheet. Brush the tops with a bit of milk, and bake in a preheated 425°F oven for 15-18 minutes until golden brown.
When serving, whip the chilled heavy cream with powdered sugar and vanilla extract until soft peaks form. To assemble, split the biscuits in half horizontally. Spoon a portion of the macerated strawberries and their juice over the bottom half of each biscuit, add a dollop of whipped cream, and cover with the top half of the biscuit. Finish with a small dollop of whipped cream and a few more strawberries on top.
A few tips to guarantee your strawberry shortcake is as delightful as possible: First, make sure to chill your dough briefly before patting and cutting it, as this will help maintain the flakiness of the biscuit.
For the strawberries, you can adjust the sugar based on their natural sweetness; taste them first before adding the full amount of sugar. Finally, don’t over-mix the biscuit dough to avoid tough biscuits, and when whipping the cream, be careful not to over-beat it to keep the texture light and airy.
Enjoy your homemade strawberry shortcake as a revitalizing end to any meal!
Step 1. Mix Crushed Cookies and Butter
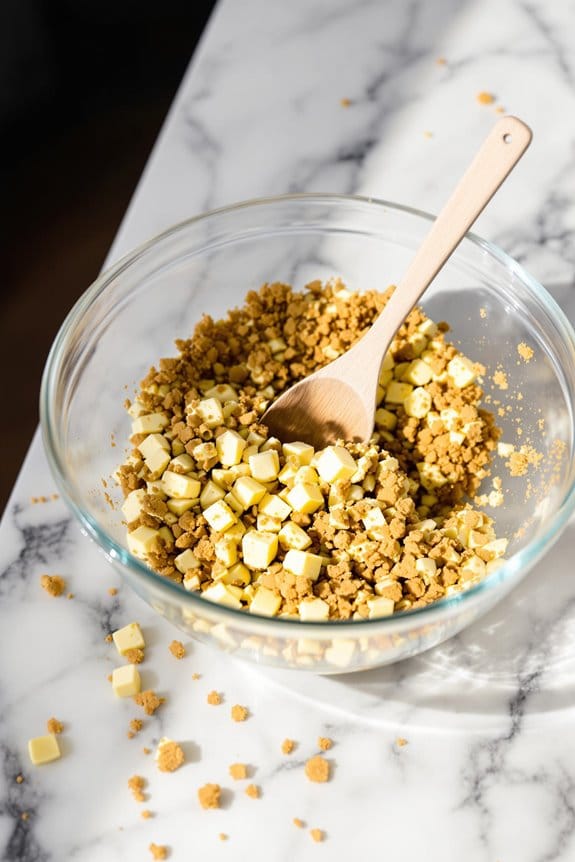
Begin by crushing your favorite cookies into fine crumbs using either a food processor or a sealed bag with a rolling pin.
Once you’ve got a fine, sandy texture, you’re ready for the next step. You’ll need about two cups of these crumbs to form the foundation of your dessert’s texture and flavor.
Now, take unsalted butter—make sure it’s melted and cooled slightly. You’ll want about half a cup.
Pour the butter over your cookie crumbs in a medium-sized bowl. Here’s where you’ll immerse yourself and get a bit messy—use your hands or a spatula to mix everything together until the crumbs are evenly coated with the butter.
This mixture should resemble wet sand. Your goal is to create a binding mixture that will hold together when pressed.
Check consistency by squeezing a small amount in your hand—it should clump together, not crumble apart. If it’s too dry, don’t hesitate to melt a little more butter and add it in.
You’re now set with a perfectly blended base ready for layering in your dessert pan.
Now, isn’t that simple and satisfying? You’ve just mastered an essential step towards creating a delectable Strawberry Shortcake Icebox Dessert.
Step 2. Layer Strawberry Slices
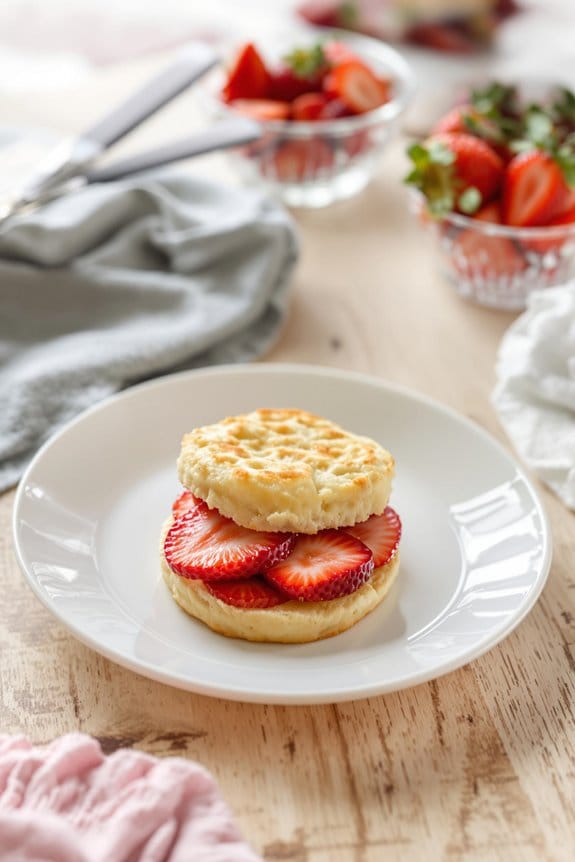
Next up, you’ll arrange a generous layer of fresh strawberry slices over the crumbly base. Start by washing and hulling your strawberries to guarantee they’re clean and free of any green bits.
You’ll want to slice them thinly and evenly to make certain each mouthful is infused with their juicy sweetness. Aim for about a quarter-inch thickness; this guarantees they’ll soften just right without becoming mushy.
Spread the slices over the base in an overlapping pattern, starting from the outer edge and spiraling inward. This not only makes for a stunning presentation but also assures that every bite includes a taste of strawberry.
Don’t skimp on the berries – it’s this layer that really brightens the dessert and gives it a burst of fresh, tangy flavor, contrasting beautifully with the sweet, buttery crust.
Make certain to cover the entire surface; any gaps might make your dessert less stable and mess with the perfect balance of texture and flavor.
Remember, the strawberries release some of their natural juices, which will seep into the crumbly layer below, further enhancing the overall flavor of your dish.
Once done, you’re ready for the next step of your scrumptious icebox dessert.
Step 3. Spread Whipped Cream Evenly
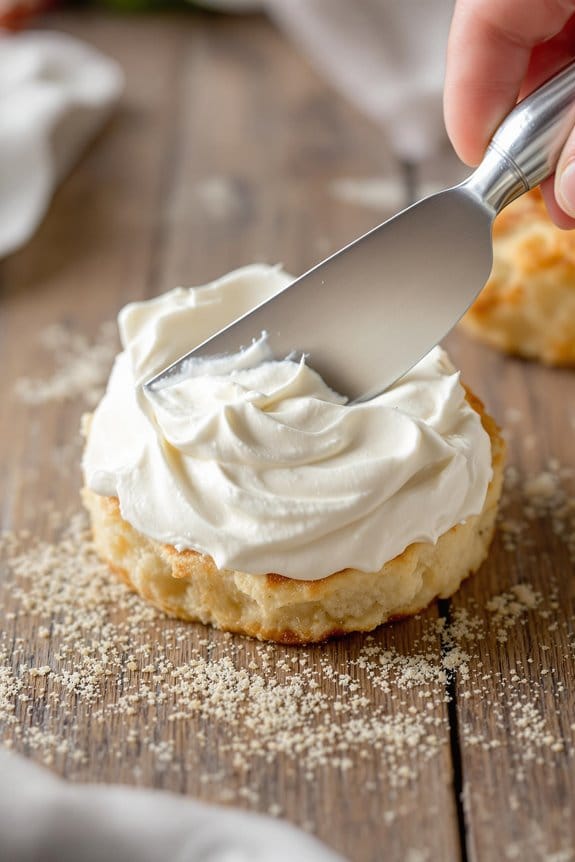
Once you’ve arranged the strawberry slices, it’s time to add a rich layer of whipped cream. To guarantee an even, silky layer, use a spatula or the back of a spoon. Start from the center and gently spread the cream towards the edges.
It’s important to cover the strawberries completely to create a uniform layer that melds beautifully with the flavors beneath.
Focus on maintaining an even thickness across the surface. If you find areas where the cream is too thin, add a bit more and carefully blend it into the surrounding area. This step isn’t just about aesthetics; it also affects how each bite combines the flavors of cream, strawberries, and cake.
As you’re spreading, try not to press too hard. If you do, you might displace the arranged strawberries or soak the underlying cake layer, which can make your dessert soggy.
With a light hand and smooth motions, you’ll keep the structural integrity of the cake intact, guaranteeing that every piece is as perfect as the next.
Step 4. Chill for Two Hours
After carefully spreading the whipped cream, place your strawberry shortcake in the refrigerator. This chilling process is essential for setting the dessert’s layers, ensuring each slice is perfectly firm and holds its shape when served.
Over the next two hours, the cold air will gently solidify the whipped cream, allowing the sweet strawberry juices to seep slowly into the soft, spongey cake beneath without making it soggy.
During this waiting period, resist the temptation to check on your creation too frequently. Opening the refrigerator door repeatedly can alter the internal temperature and humidity levels, potentially affecting the dessert’s texture.
Instead, use this time to clean up your workspace or prepare a garnish of fresh strawberries or mint to enhance the presentation of your dessert.
Don’t rush this step. Although two hours might seem like a long time, it’s the perfect duration to achieve the desired consistency throughout your strawberry shortcake.
When the time is up, your dessert won’t only look more appealing but will also have an improved texture and firmness, making cutting into it a smoother and more satisfying experience.
Step 5. Add Vanilla Custard Layer
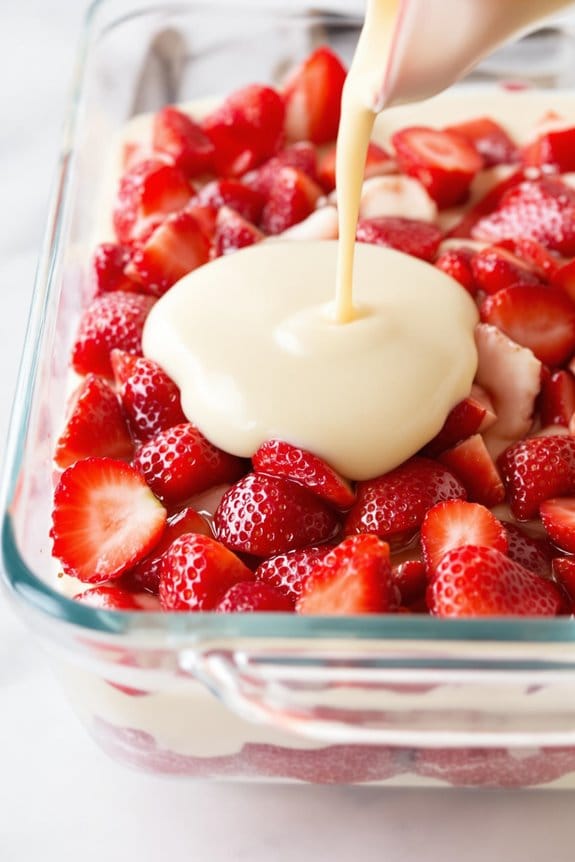
As you retrieve your chilled strawberry shortcake from the refrigerator, it’s time to add the decadent vanilla custard layer. This creamy addition will transform your dessert into an indulgent delight, balancing the vibrant tartness of the strawberries with its rich, smooth texture.
To begin, verify your vanilla custard is well-prepared and cool. Pour it gently over the chilled shortcake base, smoothing it with a spatula to create an even layer. This step not only enhances the flavor but also adds a visually appealing creaminess that makes your dessert irresistible.
Here are a few tips to elevate your custard layer:
- Use real vanilla beans: The tiny specks from the beans add a gourmet touch and intensify the vanilla flavor.
- Chill the custard beforehand: This prevents the layers from mixing and keeps everything firm.
- Spread evenly: Verify the custard covers the cake layer completely to avoid dry spots.
- Temperature control: Keep the dessert chilled until serving to maintain the perfect texture.
- Garnish wisely: A sprinkle of nutmeg or cinnamon can add a warm note, enhancing the overall taste.
Cooking Tips
To whip up the perfect strawberry shortcake, you’ll need a few expert tips that assure your dessert is as delightful as possible. First, verify your strawberries are ripe and sweet; taste a few before using them. Overly tart strawberries can throw off the overall sweetness. If they aren’t sweet enough, sprinkle a little sugar on them and let them sit for about 30 minutes to macerate.
When layering your dessert, aim for uniformity. The aesthetic appeal is just as important as the taste. Cut your strawberries into similar-size pieces to guarantee each bite is harmoniously balanced.
For the vanilla custard layer, always cook over low heat and stir continuously. This prevents it from burning or curdling, which could ruin the smooth texture you’re aiming for.
Cool each layer completely before assembling. Adding warm custard or fresh whipped cream to layers that haven’t fully cooled can lead to a soggy dessert. Patience here really pays off.
Lastly, when it comes to the whipped cream topping, beat it until just stiff peaks form. Overbeating will make it grainy and butter-like. Always use cream with a high-fat content for the best results—it’ll be richer and more stable.

One 13 ounce container of Original Ultra Pasteurized Dairy Whipped Topping

One 13 ounce container of Extra Creamy Ultra Pasteurized Dairy Whipped Topping

365 by Whole Foods Market products give you that dance-down-the-aisles feeling, virtual aisles too! Our huge range of choices with premium ingredients at prices you can get down with makes grocery shopping so much more than tossing the basics in your cart.
Final Thoughts
While crafting your strawberry shortcake, remember that even the smallest details can make a significant difference. This dessert isn’t just a treat; it’s a masterpiece that reflects your passion for delightful, intricate flavors that dance on the taste buds.
As you wrap up this culinary journey, keep these final thoughts in mind to guarantee your dessert isn’t only tempting but truly unforgettable.
- Select ripe strawberries: The quality of the strawberries can dramatically alter the flavor profile of your dessert.
- Chill before serving: Allowing your shortcake to chill thoroughly will enable the flavors to meld beautifully.
- Offer variations: Adapt the recipe to dietary needs by substituting gluten-free ingredients or a vegan whipped topping.
- Presentation counts: Take time to garnish with fresh mint or a drizzle of strawberry sauce for that extra wow factor.
- Practice makes perfect: Each attempt helps refine your technique, so don’t shy away from trying different approaches.
Creating a strawberry shortcake icebox dessert is more than following a recipe; it’s embracing an opportunity to give joy to those you serve.
Enjoy the smiles that come with every slice, and remember, every piece you create carries a part of your culinary expression.

Whole-Berry Crunch You Can Hear: Whole freeze dried strawberries stay crispy and crunchy for satisfying snacking, better bite than small strawberry pieces for everyday fruit snacks

Good Humor Strawberry Shortcake Frozen Dairy Dessert Bar is a delicious combination of a creamy vanilla frozen dairy dessert and a strawberry core with a signature cake coating