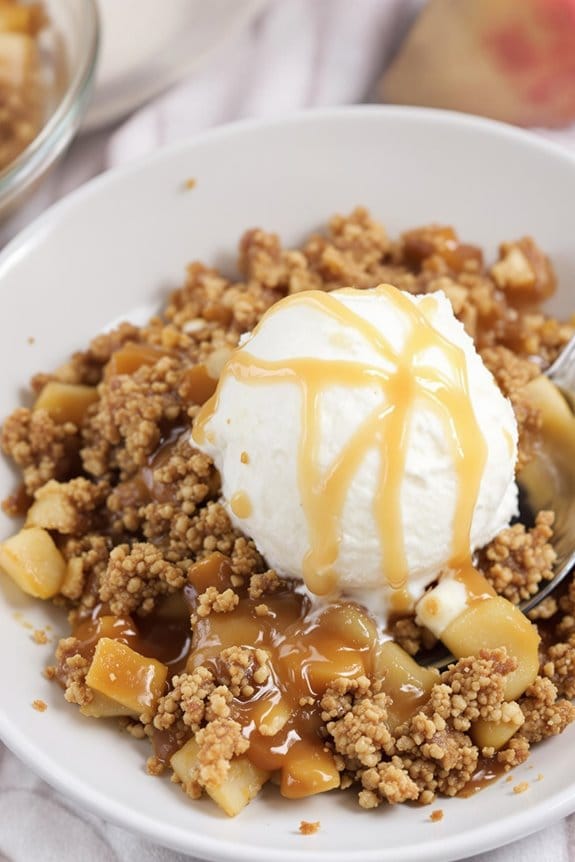
You’ve probably indulged in a classic apple crisp before, but have you ventured into the decadent domain of Salted Caramel Apple Crisp? This dish elevates the traditional with its luxurious swirl of salted caramel that intermingles perfectly with the tartness of the apples. As you imagine the crisp, golden topping breaking under your spoon, consider the subtle balance of flavors and textures at play. Why does this combination work so well, and how can you perfect it in your own kitchen? Let’s explore the ingredients and techniques that make this dessert a standout, ensuring your next autumnal gathering is unforgettable.
History
While the origins of apple crisp remain somewhat unclear, it definitely gained popularity in the United States during World War II. It likely surfaced as a simpler, more resource-friendly alternative to traditional apple pies. With rationing in effect, ingredients like sugar, butter, and flour were precious commodities. Apple crisp provided a delightful solution utilizing fewer of these scarce resources, and its simplicity allowed home cooks to adapt with whatever was on hand.
You’ll find that the heart of this dessert isn’t just its crumbly topping or tender apples, but its embodiment of ingenuity during tough times. Families across America embraced apple crisp, making it a staple dessert that filled homes with its comforting, cinnamon-spiced aroma. It wasn’t just about making do; it was about crafting something delicious and heartwarming from the limited supplies available. This spirit of innovation made apple crisp more than a mere dessert; it was a reflection of American resilience and creativity.
Over the decades, the popularity of apple crisp only grew. It became a celebratory dish during the autumn months, particularly around Thanksgiving, reflecting the harvest and the communal joy of sharing a simple, yet profoundly satisfying, dish with loved ones.
Recipe
Salted Caramel Apple Crisp is an irresistible autumn dessert that features a blend of sweet and salty flavors, enveloped in a blanket of crunchy oat topping. This cozy dish is perfect for using up the season’s abundance of apples and offers a wonderful twist on the classic apple crisp by incorporating salted caramel. The caramel not only accentuates the natural sweetness of the apples but adds a buttery richness that makes every bite truly sumptuous.
Pair it with a scoop of vanilla ice cream or a dollop of whipped cream for the ultimate comfort dessert that’s both easy to prepare and guaranteed to impress.
This recipe calls for common pantry ingredients and fresh apples. When choosing apples, opt for varieties that hold up well when baked, such as Granny Smith, Honeycrisp, or Golden Delicious. These types keep their texture and offer a nice balance of sweetness and tartness that complements the salted caramel beautifully.
Preparing the caramel from scratch adds a personal touch to the dish, but you can also use store-bought caramel sauce to simplify the process. The crisp topping is made from a simple mixture of oats, flour, butter, and sugar, which bakes up golden and crunchy, providing a delightful contrast to the soft baked apples underneath.
Ingredients:
- 4 large apples, peeled, cored, and thinly sliced
- 1 teaspoon ground cinnamon
- 1/2 teaspoon nutmeg
- 1 cup salted caramel sauce
- 1 cup all-purpose flour
- 3/4 cup old-fashioned oats
- 3/4 cup brown sugar, packed
- 1/2 cup unsalted butter, cold and cubed
- 1/2 teaspoon salt
- Ice cream or whipped cream, for serving (optional)
Instructions:
Preheat your oven to 350°F (175°C). In a large mixing bowl, toss the sliced apples with cinnamon and nutmeg, and spread them out in a greased 9-inch pie dish or baking pan. Drizzle the salted caramel sauce evenly over the apples.
In another bowl, combine the flour, oats, brown sugar, and salt. Add the cubed butter and use a pastry cutter or your fingers to mix until the mixture resembles coarse crumbs. Sprinkle this mixture over the caramel-covered apples.
Bake in the preheated oven for about 45 minutes or until the topping is golden brown and the apples are bubbling. Allow to cool slightly before serving.
Extra Tips:
When making the salted caramel from scratch, remember to watch the sugar carefully as it melts to prevent it from burning. Stir it constantly and keep a close eye on the color—it should reach a deep amber hue.
For those with a less sweet tooth, consider reducing the caramel sauce by a quarter cup or increasing the amount of salt slightly in the topping to enhance the savory contrast. Serve this dessert warm, and for an extra indulgent treat, pair it with vanilla ice cream which will beautifully complement the warm spices and salted caramel.
Step 1. Peel and Slice Apples
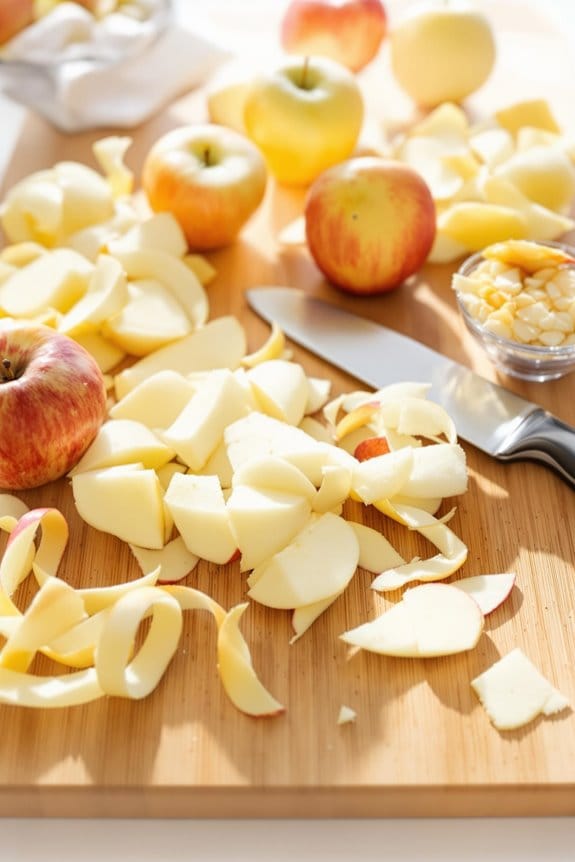
Begin by washing the apples thoroughly under cold water to remove any dirt or pesticides.
Next, you’ll need to peel them. Grab a comfortable peeler because here’s where you’ll invest some effort. Hold the apple firmly and peel off the skin in a downward motion, rotating the fruit until it’s completely bare.
Don’t worry if small bits of skin remain; they won’t affect your dish’s flavor.
Now, it’s time to slice the apples. You’ll want to remove the core first, which can be quickly done with an apple corer. If you don’t have one, slice the apple into quarters and cut out the cores manually with a knife.
Once the cores are out, lay the apple quarters flat and slice them into even pieces, about a quarter-inch thick. This consistency in size helps the apples cook uniformly, ensuring each bite is perfectly tender.
Laying the foundation with well-prepared apples is essential for your salted caramel apple crisp. It’s these details that will make your dessert a delightful treat, so take your time to do it just right.
Don’t rush—good prep is the secret to a great outcome.
Step 2. Mix in Spices and Sugar
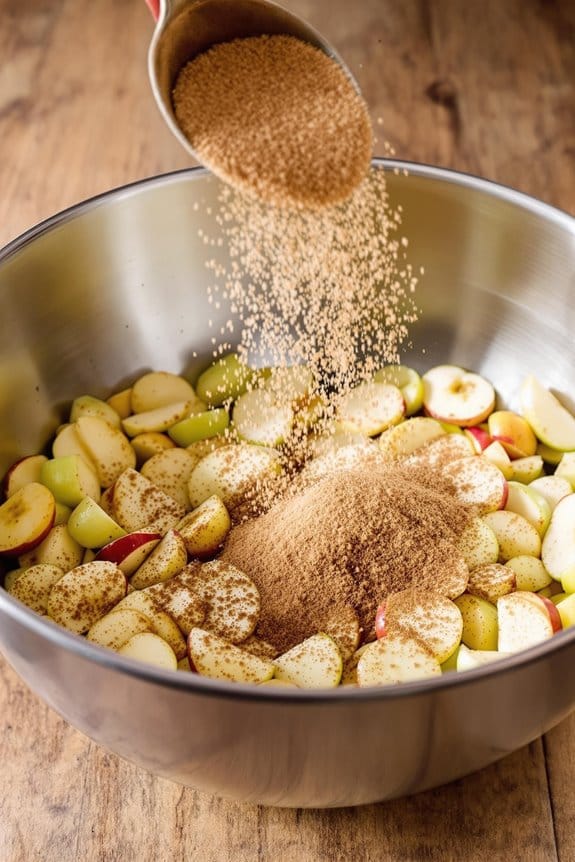
After your apples are peeled and sliced, it’s time to add the spices and sugar that will elevate the flavors in your salted caramel apple crisp.
Begin by sprinkling about half a cup of granulated sugar over your sliced apples. This isn’t just to sweeten them, but the sugar also helps to draw out the natural juices, creating a richer base for your dessert.
Next, introduce a teaspoon of cinnamon for that quintessential warmth, and a pinch of nutmeg for a subtle depth. Both spices not only enhance the taste but also fill your kitchen with an inviting aroma.
For an extra hint of autumn spice, consider a dash of allspice or ground cloves; just be mindful, these are potent, so a little goes a long way!
Mix these ingredients gently yet thoroughly, ensuring each apple slice is coated in this sweet and spicy mix. The sugar will dissolve slightly, and the spices will begin to meld with the juices, setting the stage for a truly flavorful apple crisp.
Step 3. Prepare Caramel Sauce Mixture
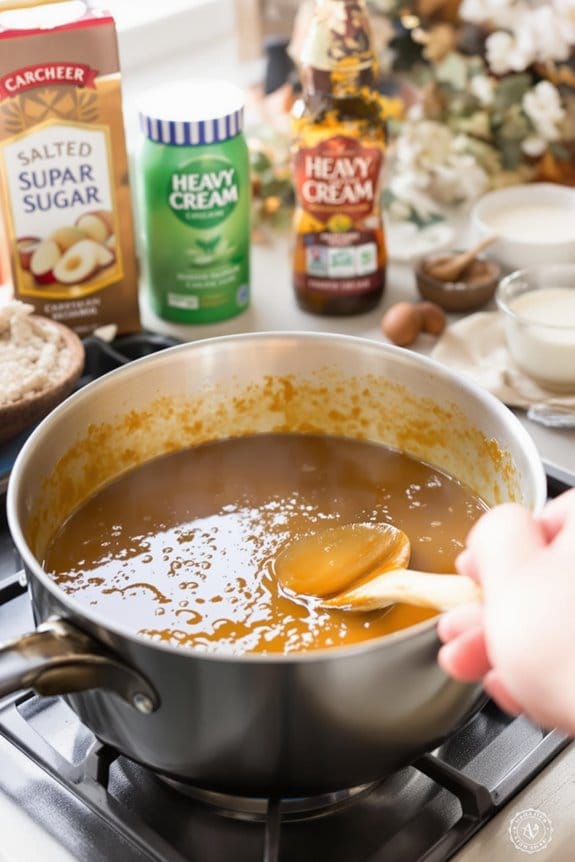
Now, you’ll prepare the rich caramel sauce that’s the heart of this dessert. First, you’ll need a medium saucepan.
Over low heat, melt one cup of unsalted butter, whisking it with two cups of packed brown sugar. The key here is patience—don’t rush the melting process, as a gentle heat allows the sugar to dissolve into the butter without burning.
Once the butter and sugar mixture is smooth and fully combined, increase the heat to medium. Carefully pour in one cup of heavy cream, stirring constantly. The mixture will bubble up, so keep stirring to prevent any splashes or burning.
Add a pinch of salt to enhance the flavors—it makes all the difference!
Continue to cook the mixture for about five minutes, or until it thickens slightly. You’re looking for a velvety, pourable consistency, rich in color and decadent in taste. Remember, the sauce will thicken as it cools, so don’t overcook.
Remove from heat and stir in a teaspoon of vanilla extract for an added layer of flavor.
Your caramel sauce is now ready. This luscious concoction will beautifully complement the spiced apples, creating a perfect harmony in your apple crisp.
Step 4. Layer Apple-Caramel Mixture
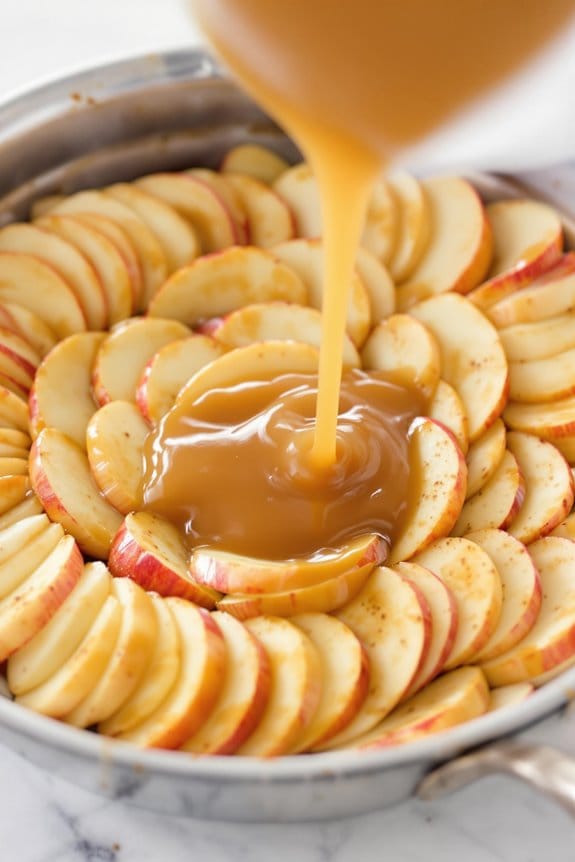
Once you’ve prepared the caramel sauce, it’s time to assemble the apple layers for your crisp.
Begin by peeling, coring, and slicing your apples—choose varieties like Granny Smith or Honeycrisp for that perfect balance of tartness and sweetness. You’ll want your apple slices to be fairly uniform, about a quarter-inch thick, to guarantee they cook evenly.
In a large mixing bowl, toss your apple slices with the freshly made caramel sauce. Make sure each slice is nicely coated with the sticky, sweet mixture. This guarantees every bite of your crisp will have a decadent caramel apple flavor that melds beautifully in the oven.
Now, take your prepared baking dish and layer the caramel-coated apple slices. Start from the outer edge of the dish, overlapping the apples slightly as you work your way towards the center. This method not only creates a pleasing pattern but also packs the apples tightly, which enhances the texture of your crisp.
Once all your apples are neatly arranged, any remaining caramel sauce from the bowl can be drizzled over the top. This extra layer will caramelize beautifully and add an irresistible depth to the final dish.
Step 5. Bake Until Golden
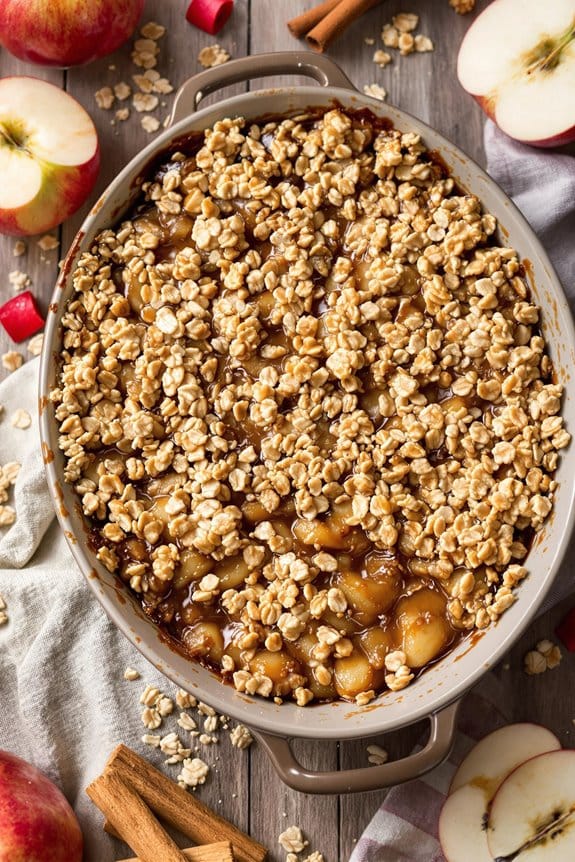
While your oven preheats to 375 degrees Fahrenheit, place your caramel-coated apple dish on the center rack.
Laser-focus on your timer; you’re aiming for the perfect golden hue which usually comes around 30 minutes, though it might need a few more to get there.
Peek through that oven window—if the top bubbles with a deep golden color, you’re on track.
Now, here’s what you should keep an eye on to guarantee a stellar apple crisp:
- Even baking: Make sure the heat circulates freely around the dish. Avoid overloading the oven with other items that can hinder the airflow.
- Texture check: You want that top layer crispy and browned, not burnt. Around the 25-minute mark, start checking every 5 minutes.
- Caramel bubbling: This sight of oozy caramel peeking out is a clue that your apples are cooking nicely underneath, melding flavors beautifully.
Once that timer dings, pull the dish out cautiously.
Let it rest for a good 10 minutes. Those bubbling sugars are scorching hot! This rest period lets the caramel thicken back up, giving you that delightful, chewy texture with every bite.
It’s not just food; it’s the crafting of fall’s comfort in a dish.
New Recipe
- Pepperoni and Hot Honey PizzaTry the tantalizing twist of pepperoni pizza with hot honey, where sweet meets heat—how will it transform your taste buds?
Cooking Tips
If you’re aiming to enhance the flavor and texture of your Salted Caramel Apple Crisp, paying attention to a few key techniques can really make a difference.
Start by selecting the right type of apples. Tart varieties, like Granny Smith or Honeycrisp, maintain their texture and offer a nice contrast to the sweet caramel. Make certain your apples are thinly and consistently sliced; this guarantees they cook evenly and integrate seamlessly with the caramel.
Don’t skimp on the caramel part, either. Opt for a high-quality sea salt caramel; it will provide a rich flavor and the perfect touch of saltiness to balance out the sweetness.
When mixing your topping, aim for a crumbly texture — not too wet, not too dry. This is achieved by properly cutting the butter into the flour and sugar mixture until it resembles coarse crumbs.
As you assemble your apple crisp, layer the apples and caramel carefully to guarantee each bite is as flavorful as the last.
Before placing it in the oven, sprinkle a little extra sea salt over the top for an additional flavor boost that enhances the overall taste of the dessert.
With these tips, your crisp will be irresistibly delicious!
Final Thoughts
As you put the final touches on your Salted Caramel Apple Crisp, remember that each element from choice of apples to the crust’s texture plays a crucial role in creating a harmonious dessert. Your selection of sweet or tart apples can profoundly affect the flavor balance, and achieving that perfect crumbly yet crisp topping might just make your dessert a family favorite for years to come.
In the spirit of perfecting your baking craft, consider these key tips:
- Apple Variety: Opt for a mix of tart and sweet apples to provide a complex flavor profile. Granny Smith and Honeycrisp make a great combination.
- Caramel Quality: Use high-quality caramel for a rich, decadent drizzle. It should be smooth and pourable.
- Oven Watchfulness: Keep an eye on your crisp as it bakes. Each oven is different, and the perfect golden-brown crust can quickly turn if not monitored.
Mastering this dish requires patience and passion, but isn’t that the beauty of baking?
Sharing your creations brings joy and pride, and each bite reflects your dedication. So, serve it warm, possibly with a scoop of vanilla ice cream, and savor the sweet rewards of your culinary efforts.

