Have you ever tried making Raspberry Swirl Mini Cheesecakes at home? These treats are not just visually striking but also pack a delightful punch of creamy and tangy flavors. The process of swirling the raspberry through the cheesecake mixture isn’t just for aesthetics; it infuses bursts of fruitiness with each bite. However, achieving the perfect swirl and ensuring the cheesecake remains delightfully creamy without being overpowered by the raspberry requires a few tricks. You might find that a slight tweak in technique can dramatically elevate the outcome. Curious about how to master this?
Items You Will Need
History
Although cheesecake recipes can be traced back to ancient Greece, the addition of raspberry sauce injects a modern twist into this classic dessert. Originally, these early versions were simple mixes of flour, wheat, honey, and cheese. It wasn’t until the Romans conquered Greece that eggs were introduced, enhancing the cake’s texture and richness.
Over centuries, as the recipe spread across Europe, each region put its distinct spin on it, incorporating local cheeses and techniques. By the time cheesecake reached America with the waves of European immigrants, it had evolved considerably. In the U.S., cream cheese became the base ingredient, thanks especially to its availability and unique texture.
It’s here in the bustling streets of New York that the famous New York-style cheesecake was born, loved for its rich, dense consistency. The incorporation of raspberries is a relatively recent innovation, reflecting modern culinary trends towards pairing sweetness with a hint of tartness.
This combination not only adds a splash of vibrant color but also a fresh, fruity counterpoint that enhances the overall flavor profile, making for a delightful contrast against the creamy, subtle backdrop of cheese. This addition shows how traditional dishes continually adapt, embracing new influences while honoring their origins.
Recipe
Raspberry swirl mini cheesecakes offer a delightful combination of creamy cheesecake and the tangy zest of fresh raspberries. Perfect as an elegant dessert for parties or a sweet treat for family gatherings, these individual cheesecakes are as visually appealing as they’re delicious.
Making them in a mini format not only guarantees that they’re easy to serve and eat but also helps manage portion sizes for those who are conscious of their sweets intake.
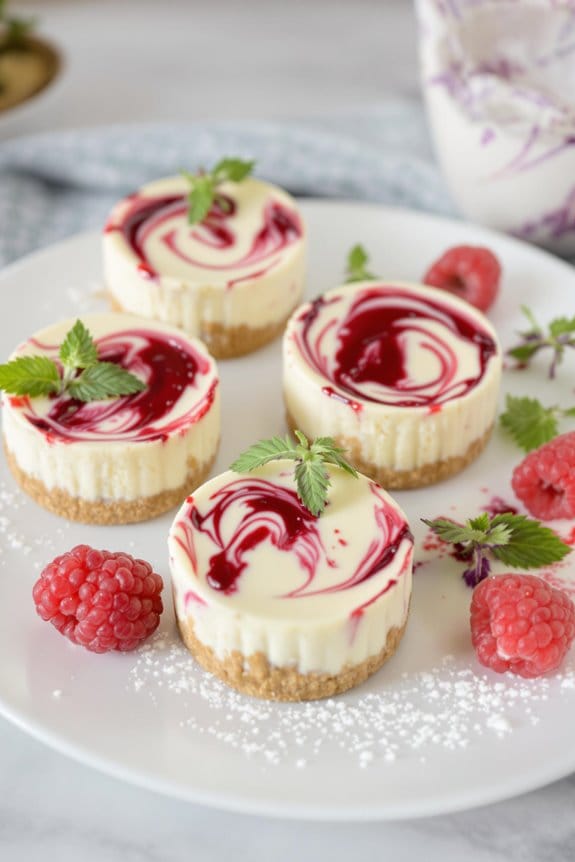
These mini cheesecakes mix classic cheesecake smoothness with the sharp contrast of raspberry, creating a stunning marbled effect that looks sophisticated on any dessert table. Each bite delivers a burst of raspberry flavor, making it a revitalizing addition to any meal or tea party.
Below is a list of ingredients you’ll need to create this delightful dessert, followed by straightforward cooking instructions.
Ingredients:
- 1 cup graham cracker crumbs
- 4 tablespoons unsalted butter, melted
- 2 tablespoons Sugar
- 16 ounces cream cheese, softened
- 1/2 cup granulated sugar
- 2 large eggs
- 1 teaspoon vanilla extract
- 1/2 cup sour cream
- 1/2 cup raspberry sauce (store-bought or homemade)
Cooking Instructions:
Start by preheating your oven to 350°F (175°C) and lining a cupcake pan with paper liners.
Mix the graham cracker crumbs, melted butter, and 2 tablespoons sugar together and firmly press about a tablespoon of the mixture into the bottom of each liner. Bake the crusts for 5 minutes, then remove from the oven.
In a large bowl, blend the softened cream cheese with 1/2 cup sugar until smooth. Beat in the eggs one at a time, then mix in vanilla extract and sour cream.
Pour the cream cheese mixture over the crusts, filling each one about three-quarters full. Add a few drops of raspberry sauce to the tops of the cheesecakes and use a toothpick to swirl it into the cream cheese mixture.
Bake for 20-22 minutes or until set. Let them cool in the pan for a while before transferring to a wire rack to cool completely.
Extra Tips:
Verify that all your ingredients are at room temperature before you begin to make the cheesecake mixture, which guarantees a smoother texture.
Cooling the cheesecakes in the fridge for at least a few hours before serving will help them set properly and enhances their flavor and texture.
If you’re making your own raspberry sauce, simply blend fresh or frozen raspberries with a little sugar and strain to remove the seeds.
Always add the raspberry swirl gently; too much stirring can mix the sauce into the batter, losing the swirl effect.
Toggle the sweetness of the raspberry sauce according to your taste, especially if you prefer a more pronounced tartness to counterbalance the sweetness of the cheesecake.
Step 1. Preheat Oven to 350°F
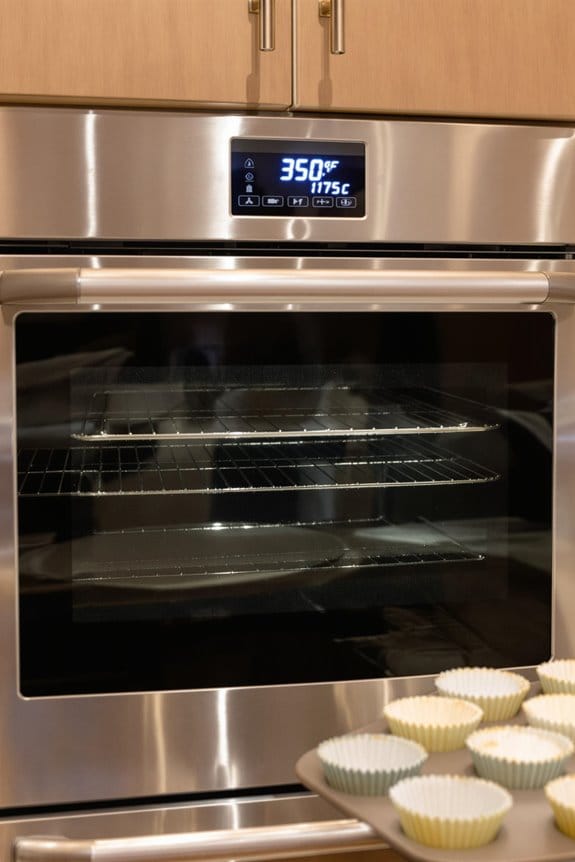
Before you begin mixing ingredients for your Raspberry Swirl Mini Cheesecakes, it’s essential to preheat your oven to 350°F. This initial step isn’t just about getting the temperature right; it’s vital for ensuring that your cheesecakes bake evenly and develop that delightful texture you’re aiming for.
The correct heat activates the leavening agents in your batter, helping each mini cheesecake to rise properly and avoid any dense or soggy patches. What’s more, an already hot oven helps your cheesecakes to set quickly, sealing in those gorgeous, creamy flavors.
It also plays a significant role in achieving that slightly golden top, a characteristic sign of well-made cheesecakes. Remember, fluctuating oven temperatures can lead to under or overcooked desserts, which is why it’s wise to let your oven reach the desired temperature before you start baking.
Step 2. Mix Crust Ingredients
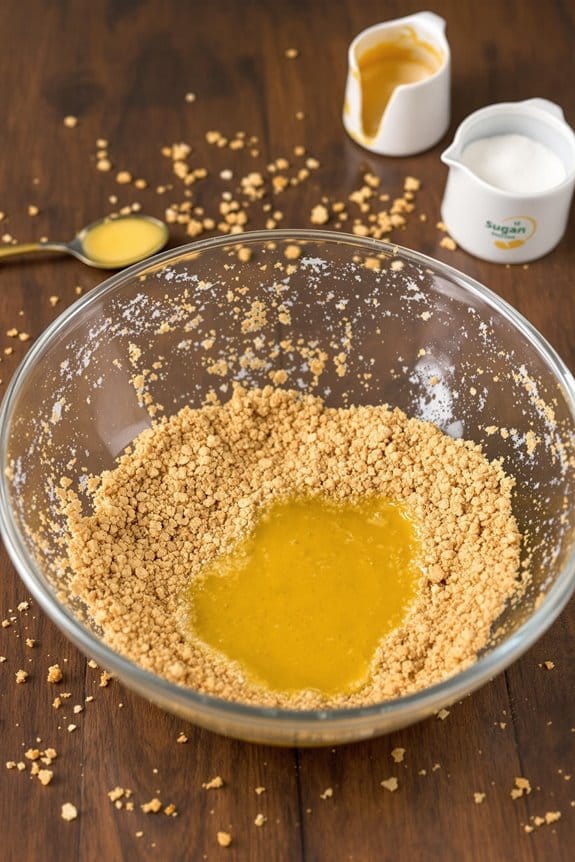
Now that your oven is heating up, let’s start on the crust for your Raspberry Swirl Mini Cheesecakes.
You’ll need to gather a few simple ingredients: graham crackers, melted butter, and sugar.
First, take about one and a half cups of graham cracker crumbs. If you don’t have pre-crumbled crackers, it’s no problem at all; just put the crackers in a plastic bag and give them a good whack with a rolling pin or even the bottom of a sturdy cup.
Once you’ve got your crumbs, mix them well with a quarter cup of sugar. This adds just the right touch of sweetness to your crust.
Next, pour in six tablespoons of melted butter. The butter acts as the perfect binder, ensuring your crust will hold beautifully together and won’t crumble when it’s time to enjoy these delightful cheesecakes.
Use a spoon to blend everything thoroughly. You’re looking for a mixture that slightly sticks together if you press it between your fingers. This is your crust base.
After mixing, take a moment to appreciate the buttery, sweet aroma—it’s the first layer of flavor for your mini cheesecakes, and you’ve nailed it.
Step 3. Pour Filling Into Crust
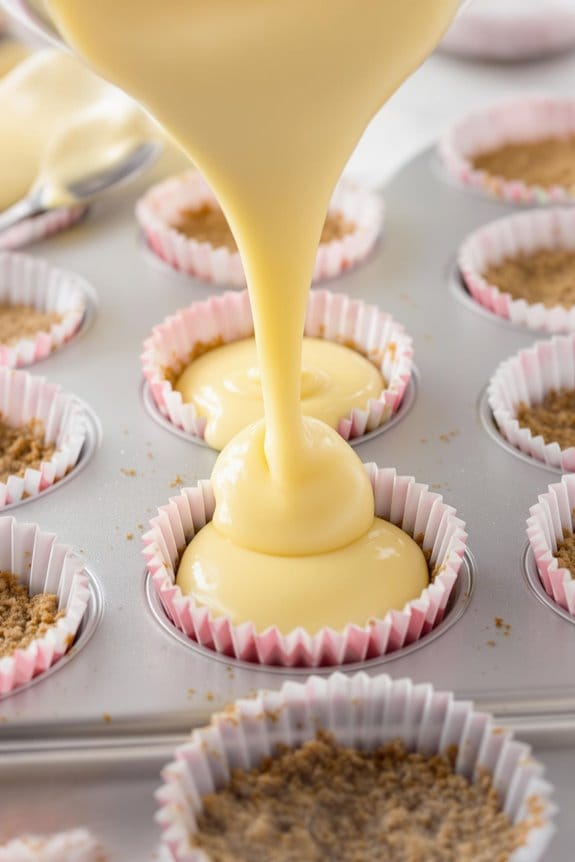
Scoop the creamy cheesecake filling gently on top of your prepared crust in each mini pan depression, guaranteeing an even and smooth layer. You’ve got to feel like a pro as you fill each cup, marveling at the ease with which the rich, silky filling settles into the crumbly base you meticulously prepared earlier.
Next, carefully distribute the filling to avoid any air pockets which might affect the aesthetics and texture of your mini cheesecakes. It’s all about precision here; the goal is to achieve a consistent level across all your cups for uniform cooking.
Don’t fill them to the brim, though – leave a little space to allow the filling to expand slightly as it bakes, guaranteeing it doesn’t spill over and create a mess in your oven.
Use a spoon or a small ladle for best results, as these tools provide better control and reduce the risk of overfilling. This step isn’t just about functionality; it’s where your cheesecakes start to take on their individual character.
Each one, a perfect canvas set for those delightful raspberry swirls you’ll soon create. But first, guarantee these bases are flawlessly executed – the foundation of every great mini cheesecake.
Step 4. Add Raspberry Sauce Swirls
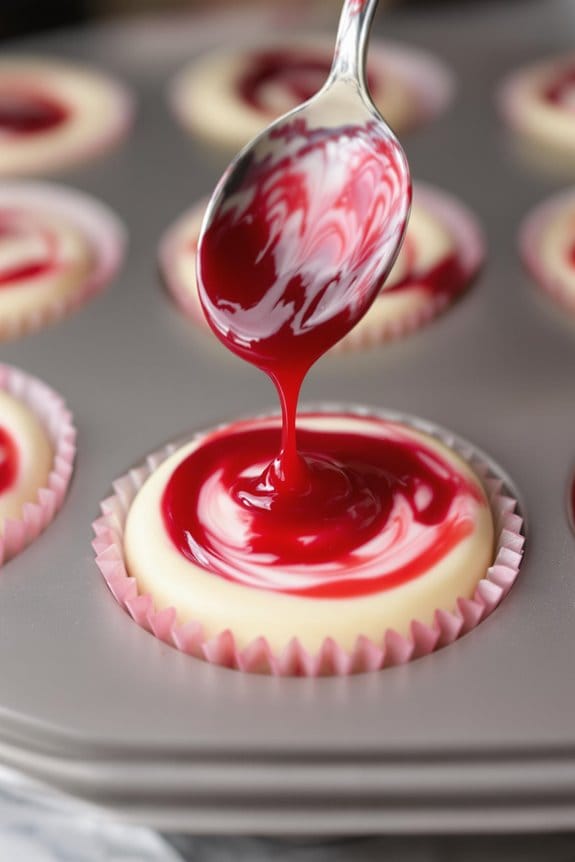
To add an artistic touch to your mini cheesecakes, gently drizzle the raspberry sauce in a spiraling pattern over each cheesecake base. Use a teaspoon or a small squeeze bottle for better control and precision. This step isn’t just about flavor; it’s also about creating a visually stunning dessert that’ll catch every eye.
Once you’ve applied the sauce, take a toothpick or the narrow end of a chopstick and gently drag it through the sauce and cheesecake mixture. Start from the center and work your way outward, creating a marbled or web-like effect. Alternatively, you can start from the edges and swirl inward for a different design.
Don’t be afraid to experiment with various patterns. The goal is to incorporate the sauce sufficiently so it doesn’t just sit on top but intertwines with the filling, ensuring every bite is infused with that delightful raspberry zing.
Make sure you don’t overdo the swirling. While it’s tempting to keep mixing, too much can muddy the colors and flavors. A few thoughtful strokes are enough to achieve the perfect blend.
This deftly added layer of raspberry not only enhances the aesthetic appeal but also deepens the flavor profile of your cheesecakes, making each mouthful a pleasant surprise.
New Recipe
- Pepperoni and Hot Honey PizzaTry the tantalizing twist of pepperoni pizza with hot honey, where sweet meets heat—how will it transform your taste buds?
Step 5. Bake 20 Minutes
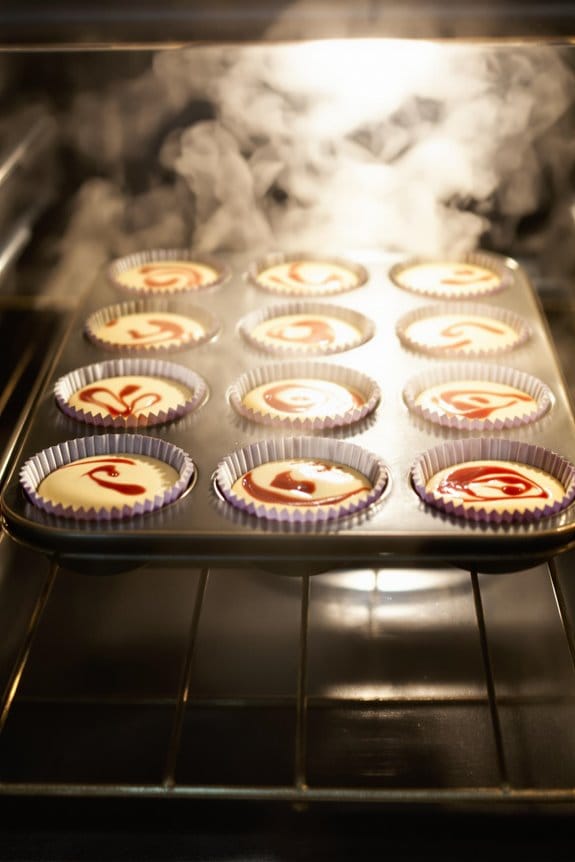
Once you’ve finished swirling the raspberry sauce through the cheesecake mixture, it’s time to bake your mini cheesecakes.
Carefully place your muffin tin, filled with vibrant dollops of batter, into a preheated oven set at 325 degrees Fahrenheit. The lower temperature is essential as it allows the cheesecakes to bake gently, ensuring they remain creamy and don’t crack.
Set your timer for 20 minutes and resist the temptation to open the oven door too often; each peek can lower the temperature and affect the baking process.
While waiting, you can start cleaning up your kitchen or perhaps prepare a simple garnish, like fresh raspberries or a light dusting of powdered sugar for serving later.
Once the time is up, check on your cheesecakes. They should appear set around the edges yet slightly wobbly in the center—a sign they’re cooked perfectly. If they need more time, just give them a couple more minutes, but keep a close eye on them.
After removing them from the oven, let them cool in the tin for about an hour before transferring them to a cooling rack.
This gradual cooling helps prevent shocking the cheesecakes, which can lead to cracks or sinking middles. Your patience will be rewarded with beautifully smooth, indulgently creamy mini cheesecakes. Enjoy the delight of your culinary creation!
Cooking Tips
Although making Raspberry Swirl Mini Cheesecakes might seem challenging at first, by following a few simple cooking tips, you can enhance both their flavor and appearance.
First, verify your cream cheese is fully at room temperature before you start. This prevents lumps in your batter, giving you a smoother, creamier texture. When mixing, don’t overdo it; excessive beating can incorporate too much air, leading to cheesecakes that rise and fall, and possibly crack.
Pouring the batter into the cupcake liners, fill them just three-quarters full to allow space for the raspberry swirl. To create the perfect swirl, use a toothpick or a thin knife. Gently swirl the raspberry sauce through the batter, making sure not to overmix, as you want distinct swirls rather than a pink hue throughout.
Lastly, the water bath method isn’t just for large cheesecakes. Placing your muffin tin in a larger pan filled with hot water helps cook them gently, preventing cracks and verifying an even texture.
Bake as directed, then cool in the oven with the door slightly open to prevent sudden temperature changes that can cause sinking. These tips will surely impress anyone with their professional look and delightful taste!
Final Thoughts
After embracing these cooking tips, you’re well-equipped to tackle Raspberry Swirl Mini Cheesecakes with confidence.
Remember, achieving the perfect swirl isn’t just about aesthetics; it’s about integrating the bright, tangy raspberry through the creamy, sweet cheesecake for a balanced flavor. Don’t rush the process. Patience is your ally, especially when it comes to setting your cheesecakes in the refrigerator. Rushing this step might yield a less than perfect texture.
You’ve learned how important it’s to use quality ingredients. The difference in using fresh raspberries compared to alternatives is noticeable, not only in the vibrant burst of flavor but also in the nutrition it offers. Stick with the best whenever possible; it really does show in your final dish.
Lastly, don’t forget that making these cheesecakes can be more than just preparing a delicious treat; it’s a chance to share joy with friends and family. Each mini cheesecake can be a personal touch of your culinary artistry at gatherings.
Embrace these moments of making and sharing, and let each bite be a reminder of why you enjoy baking. Immerse yourself, create, and most importantly, enjoy every step of your baking journey.

