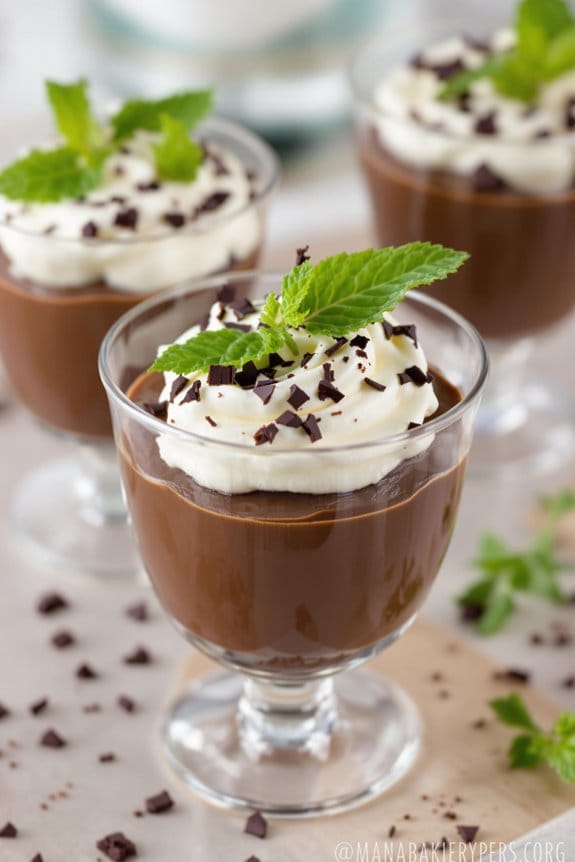
You’ve likely tried various desserts, but have you ever experienced the truly unique combination found in Mint Chocolate Mousse Cups? This dessert, with its invigorating hint of mint and deeply satisfying chocolate, strikes a rare balance that might just redefine your dessert preferences. However, its real charm goes beyond taste. The intriguing part about these mousse cups is their versatility in preparation and presentation, which might surprise you and certainly raises a question: how can such a simple dessert adapt so well to different palates and occasions? To discover the secrets behind its adaptability, one must consider both its components and culinary techniques.
History
Although the precise origins of mint chocolate as a flavor pairing are hard to pinpoint, culinary historians generally agree that it became popular in Europe during the late 19th century.
As you explore the history, you’d find that the rise of mint chocolate is intertwined with the evolution of confectionery practices during the industrial revolution.
By the time you hit the early 20th century, advancements in how chocolate was processed and marketed allowed for innovative combinations with various flavors, including mint.
It’s likely that the appeal of mint chocolate stemmed from its invigorating contrast to the rich, often heavy, textures of pure chocolate products. This newly found coupling thrived in various forms, from luxurious European chocolate bars to simpler, more accessible treats.
You might be surprised to learn that one of the first commercial products to celebrate this blend was a mint chocolate ice cream, introduced in the United States.
Its popularity quickly spread back across the Atlantic, influencing sweet makers in the UK and France.
Consequently, the love for mint chocolate became global, entrenched in the fabric of sweet indulgence, enduring through centuries and evolving to fit contemporary tastes and culinary trends.
Recipe
Mint Chocolate Mousse Cups offer a delightful blend of invigorating mint and rich chocolate, making them a perfect treat for any dessert table. This recipe creates an elegant dessert that’s surprisingly simple to assemble, using a combination of dark chocolate for depth and mint for a burst of freshness. The silky smooth texture of the mousse paired with a crunchy cookie base provides a contrast that can excite any palate. Ideal for dinner parties or a cozy night in, these mousse cups will impress guests and satisfy those chocolate cravings.
Preparing Mint Chocolate Mousse Cups involves a few key components: the chocolate cookie crust, the mint chocolate mousse filling, and the garnish. The crust, made from crushed chocolate cookies mixed with butter, forms a solid base that complements the soft mousse. The mousse itself is infused with mint extract and whipped to perfection, creating a luxurious texture that’s light yet indulgent. Top these off with a sprig of fresh mint or some chocolate shavings for an extra touch of elegance.
Ingredients:
- 24 chocolate sandwich cookies, crushed
- 5 tablespoons unsalted butter, melted
- 1 1/2 cups heavy cream
- 1 teaspoon vanilla extract
- 3/4 teaspoon mint extract
- 200g dark chocolate, finely chopped
- 2 tablespoons sugar
- Optional for garnish: fresh mint leaves, chocolate shavings
Start by mixing the crushed chocolate cookies with melted butter until the mixture resembles coarse sand. Press this mixture into the bottoms of individual cup molds or a muffin tin, forming a compact base, and chill in the fridge to set.
For the mousse, heat half of the heavy cream in a saucepan until it just begins to simmer, then pour it over the chopped dark chocolate in a bowl, letting it sit for a few minutes before stirring until smooth. Cool to room temperature.
In another bowl, whip the remaining cream with sugar, vanilla, and mint extract until it forms soft peaks. Fold the whipped cream into the cooled chocolate mixture gently to keep the mousse light and fluffy. Spoon the mousse over the chilled cookie bases and refrigerate until set, about 2 hours.
When preparing Mint Chocolate Mousse Cups, it’s important to verify that the chocolate doesn’t come into contact with water during melting, as this can cause the chocolate to seize. Additionally, be careful not to over-whip the cream; it should be just firm enough to hold its shape.
If using mint extract, start with a small amount and adjust according to taste preference; mint flavors can vary in intensity. Serve the mousse cups chilled, and for an extra decorative touch, garnish with fresh mint leaves or chocolate shavings just before serving to maintain their crispness and vibrant color.
Step 1. Gather Ingredients and Equipment
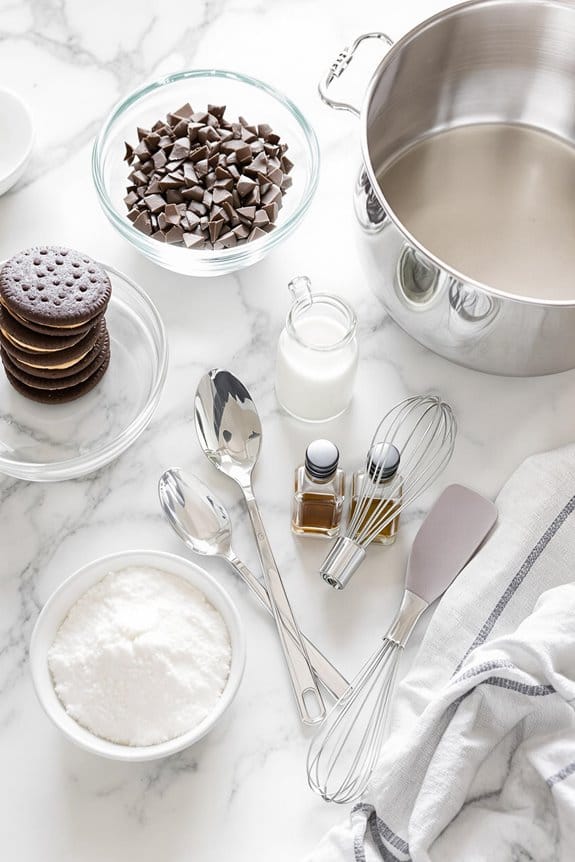
Before you start crafting your mint chocolate mousse cups, you’ll need to gather some essential ingredients and equipment. You’re heading into a delightful culinary process, and having everything on hand will make it smoother and more enjoyable.
First off, focus on the ingredients. You’ll need high-quality dark chocolate, as it’s the star of your mousse. Opt for chocolate with at least 60% cocoa content for that rich, deep flavor.
Next, fresh mint leaves will be vital—they provide the invigorating zest that pairs beautifully with the chocolate. Don’t forget heavy cream, which will give your mousse that luscious, creamy texture.
As for equipment, certain items are indispensable:
- *Electric mixer*: This is essential for whipping the cream to the right consistency.
- *Double boiler*: Important for melting chocolate smoothly without burning it.
- *Fine mesh sieve*: Helps in straining the mint-infused cream to guarantee a smooth texture without leafy bits.
Make sure all your tools are clean and ready to go. Pacing yourself and prepping in advance will keep you from scrambling last minute, making certain your mint chocolate mousse cups turn out perfectly.
Step 2. Combine Chocolate and Cream
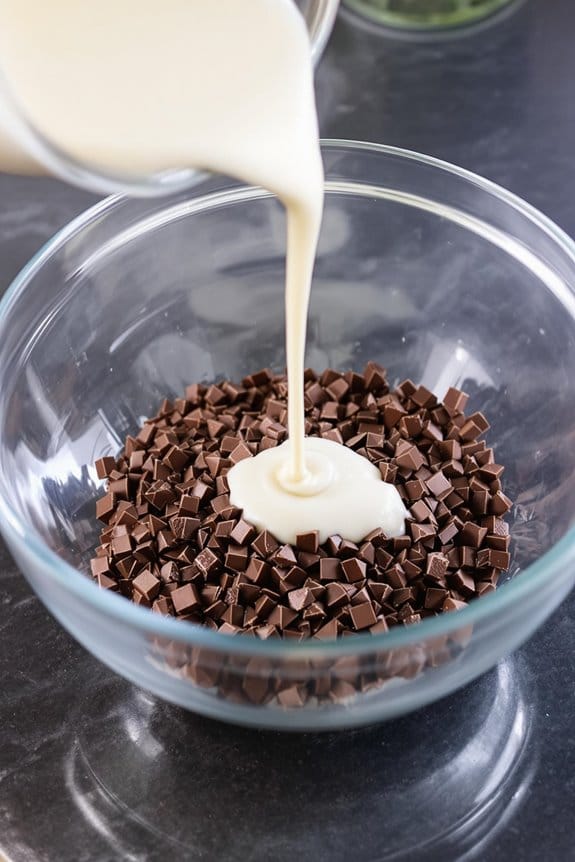
Now that you’ve gathered all the necessary ingredients and tools, let’s begin by combining the chocolate and cream. Start by chopping the chocolate into small, consistent pieces to guarantee even melting. Choose a heat-proof bowl for this step, as you’ll be using a double boiler method to melt the chocolate together with the cream.
Set up your double boiler by simmering a few inches of water in a saucepan over medium heat. Place the bowl containing the chocolate and cream on top of the saucepan, making sure the bottom doesn’t touch the water. Stir the mixture gently with a spatula until the chocolate has completely melted and the cream is fully incorporated. This process should give you a smooth, glossy mixture.
It’s important to manage the heat carefully—too much heat can cause the chocolate to seize or burn, while too little mightn’t allow it to melt properly. If the mixture seems too thick, add a little more cream, a tablespoon at a time, until you reach the desired consistency.
This step is vital as it forms the base of your mousse, guaranteeing a silky texture and rich chocolate flavor that perfectly complements the invigorating hint of mint you’ll be adding later.
Step 3. Whip to Soft Peaks
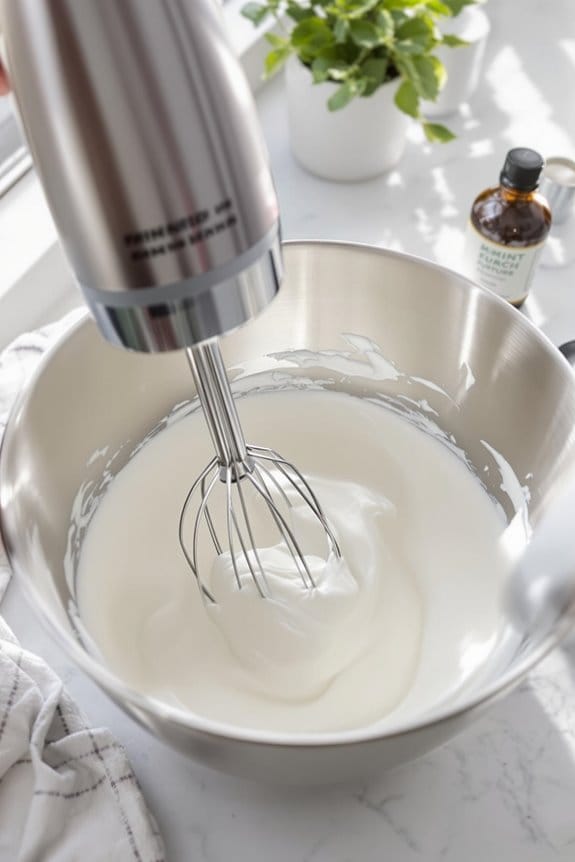
Start whipping the chilled heavy cream in a clean, dry bowl until you reach soft peaks. This vital step in your mint chocolate mousse recipe involves a careful process to guarantee that your dessert is light and airy.
You’ll want your mixer’s setting on medium high, initially, to incorporate enough air without splattering. As you watch the cream thicken, you’ll begin to see trails forming behind the whisk. These trails are your cue to frequently check the consistency.
Lift the whisk out of the cream briefly; if the peaks that form droop softly while still holding a shape, you’ve achieved soft peaks.
Here are a few tips to perfect your technique:
- Guarantee the heavy cream is very cold; the colder, the better as it whips faster.
- Use a whisk attachment for even air distribution, which is essential for smooth peaks.
- Don’t rush the process. Patience guarantees that you won’t turn your cream into butter.
Step 4. Chill in Refrigerator
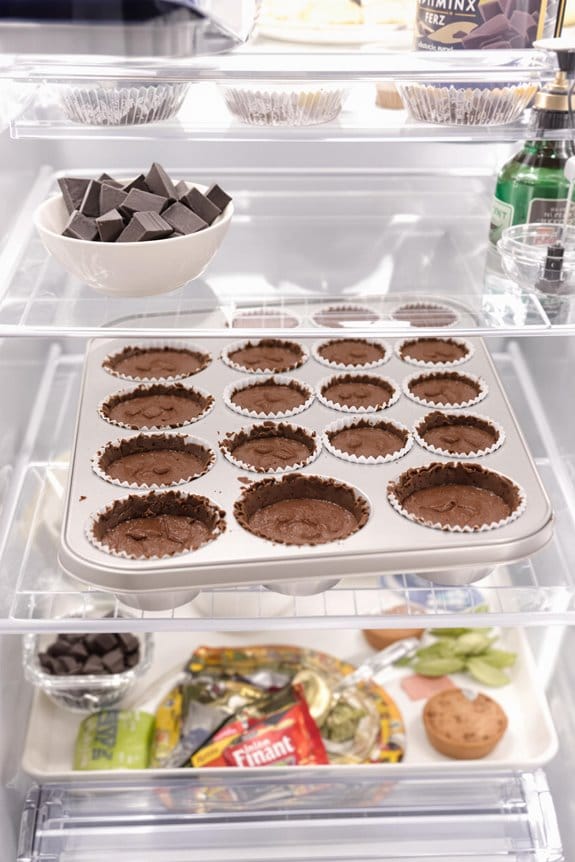
Having achieved soft peaks, your next step is to chill the cream mixture in the refrigerator. This cooling phase is vital; it allows the flavors to meld beautifully while setting the mousse into a firmer, more luscious texture.
So, gently fold in your crisp mint extract and ripples of melted chocolate into the peaked cream. With each fold, you’re ensuring that minty zest fully marries the creamy, chocolaty goodness.
Now, here’s what you’ll do: spoon the mixture into your chosen dishes, be it elegant glasses or simple ramekins.
Then, very meticulously, place them onto a flat surface of your refrigerator. This careful placement prevents any unfortunate spills or misshaping of your mousse as it sets.
It’s essential to give your mousse a good few hours in the chill – ideally, let them sit overnight. During this time, don’t be tempted to disturb their chilling process.
The patience will pay off! The slow, undisturbed setting won’t only enhance the textures but also intensify the mint’s fresh, vibrant flavors against the rich backdrop of chocolate.
Step 5. Serve in Individual Portions
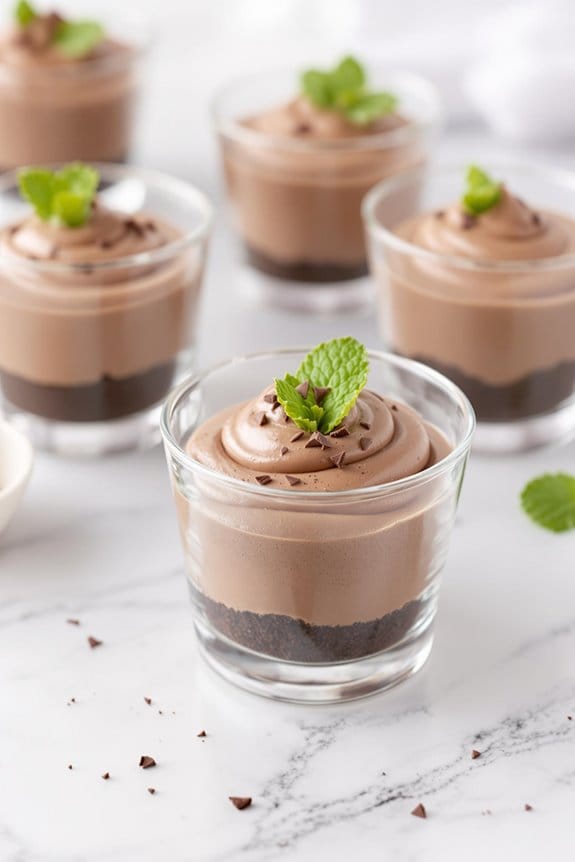
Once your mint chocolate mousse has fully set, you’re ready to serve it up. At this point, the presentation is key, so it’s important to carefully transfer the mousse into individual serving dishes.
Using clear glass cups or mini trifle bowls can really showcase the layers of your decadent mousse. Here’s how you can beautifully present your dessert to impress your guests or just treat yourself:
- Select the Right Vessels: Choose small, clear cups to clearly display the lush layers of your mousse. Glasses with a stem or fancy dessert bowls add an extra touch of elegance.
- Add Garnishes: Mint leaves, a sprinkle of cocoa powder, or even a few crushed mint candies can enhance both the visual appeal and the flavor. Consider a thin biscuit or cookie placed on the side for added texture.
- Serve Chilled: Make sure each portion is served chilled. This not only keeps the mousse firm but also intensifies the minty freshness.
New Recipe
- Pepperoni and Hot Honey PizzaTry the tantalizing twist of pepperoni pizza with hot honey, where sweet meets heat—how will it transform your taste buds?
Cooking Tips
To guarantee your mint chocolate mousse holds its delightful texture, focus on the quality of your chocolate and the precision in whipping the cream. Always choose high-quality chocolate which melts smoothly and incorporates well with other ingredients. If the chocolate is too stiff or grainy, it can affect the final smoothness of your mousse.
Whipping the cream requires attention too: aim for stiff peaks that hold their shape but watch closely as overbeating can turn it grainy. When folding the whipped cream into your chocolate mixture, use a gentle hand. A spatula is best for this, allowing you to delicately blend without deflating the air that makes your mousse so lusciously light.
Temperature is another critical factor. Make sure all components are at similar temperatures before combining. This alignment prevents the chocolate from seizing when mixed with colder elements.
In addition, once mixed, chill the mousse promptly. This not only sets it but intensifies the flavors, especially the freshness of the mint.
Lastly, consider mint quality. Fresh mint will give you a vibrant, natural flavor compared to artificial essences. Rinse and dry the mint leaves before mincing to avoid any wateriness impacting the texture.
Final Thoughts
While creating mint chocolate mousse cups may seem challenging, rest assured that with these tips, you’re well-equipped to master this elegant dessert. The key lies in embracing the process and enjoying the art of dessert making.
Here’s a concise breakdown of what you’ve learned and some additional reminders to guarantee your culinary success:
- Ingredient Quality: Always opt for fresh mint and high-quality chocolate. These core ingredients define the flavor and texture of your mousse cups.
- Consistency Is Key: Remember to whisk the mixture to the right consistency. Too runny or too stiff can both spoil the desired silky smooth texture.
- Chilling Time: Never rush the chilling process. Patience during this phase allows the flavors to meld beautifully and the mousse to set perfectly in the cups.
Now that you’ve got a handle on these essentials, it’s time to put your skills to the test.
Don’t be afraid to experiment with garnishes like a mint leaf or a sprinkle of cocoa powder for that extra flair. Every batch you make will boost your confidence and refine your technique.
Jump in, enjoy the process, and relish the delightful outcome of your homemade mint chocolate mousse cups.

