Have you ever tried a Loaded Tater Tot Skillet Bake? This dish isn’t just a delightful mix of crispy tater tots, oozy cheese, and savory bacon; it also offers a canvas for your culinary creativity. You can stick to the classic toppings or perhaps you’d like to explore some unconventional additions—think pulled pork, jalapeños, or even a drizzle of barbecue sauce. The simplicity of its preparation belies the depth of flavor you can achieve. And if you’re wondering whether this could be your next dinner party centerpiece or a new favorite family meal, consider the endless possibilities that come with such a versatile dish.
History
Tracing back to mid-20th century America, the tater tot was born from the need to efficiently use leftover potato scraps in Oregon potato processing factories. The inventors, brothers Nephi and Golden Grigg, founders of Ore-Ida, concocted this crispy delight as a solution to minimize waste.
By chopping up the scraps, seasoning them, and forming them into small cylinders, then frying them, they turned what could’ve been discarded into a culinary trendsetter.
Swiftly, these bite-sized pops of joy captured the nation’s heart, sprawling from freezer sections to dinner tables everywhere. Schools, diners, and home kitchens embraced tater tots for their convenience, versatility, and the satisfying crunch that epitomizes comfort food.
Consequently, from humble beginnings, the tater tot ascended as an iconic American snack, now synonymous with quick, delicious meals.
Recipe
Nothing spells comfort food quite like a bubbling skillet loaded with tater tots, cheese, and delicious toppings. This Loaded Tater Tot Skillet Bake brings all your favorite flavors together in one pan, making it the perfect dish for a family dinner or a cozy gathering with friends.
With crispy tater tots, melted cheese, crispy bacon, and a touch of green onions for freshness, this recipe is both easy to prepare and delightful to eat. Here’s how you can bring this crowd-pleaser to your table and make everyone asking for seconds.
The beauty of this recipe lies in its versatility and ease. You can customize it with various toppings like sour cream, jalapenos, or even different types of cheeses to match your taste preferences or whatever you have on hand in your kitchen.
The process involves minimal prep time, freeing you up to enjoy the company of your loved ones or take care of other tasks while your oven does most of the work.
Ingredients:
- 4 cups frozen tater tots
- 1 1/2 cups shredded cheddar cheese
- 1/2 cup sour cream (for serving)
- 6 slices bacon, cooked and crumbled
- 1/4 cup green onions, chopped
- 1 teaspoon garlic powder
- 1 teaspoon onion powder
- Salt and pepper to taste
Cooking Instructions:
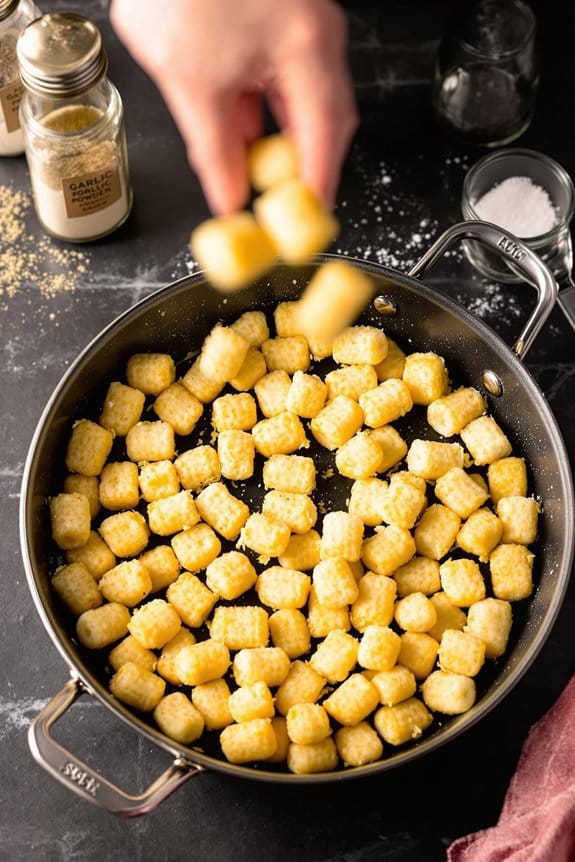
Preheat your oven to 425°F (220°C). In a large oven-safe skillet, spread the frozen tater tots in an even layer. Sprinkle with garlic powder, onion powder, salt, and pepper.
Bake the tots in the preheated oven for 15 minutes. After 15 minutes, take the skillet out and sprinkle the cooked, crumbled bacon and half of the green onions over the tots, followed by the shredded cheddar cheese.
Return the skillet to the oven and bake for another 10-15 minutes or until the cheese is bubbly and the tots are crispy. Remove from the oven and let it cool slightly before topping with the remaining green onions and dollops of sour cream.
Additional Tips:
For a healthier version, you can substitute regular tater tots with sweet potato tots and use turkey bacon instead of regular bacon.
Additionally, verify your skillet is oven-safe before beginning the recipe. If you don’t have an oven-safe skillet, you can transfer the baked tots to a baking dish before adding the toppings.
For extra flavor, consider adding a sprinkle of paprika or cayenne pepper along with the garlic and onion powders. Serve immediately for the best experience, and enjoy your loaded tater tot skillet with a side salad to balance the richness.
Step 1. Preheat Oven and Assemble Ingredients

Before kicking off the Loaded Tater Tot Skillet Bake, make sure your oven is preheated to 375°F (190°C).
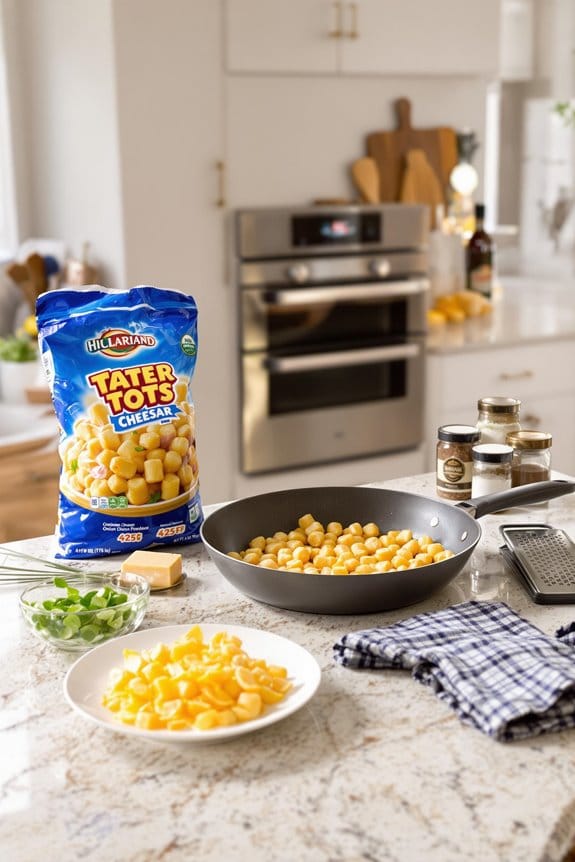
Next, gather all the necessary ingredients. You’ll need a bag of frozen tater tots, shredded cheddar cheese, cooked bacon pieces, chopped green onions, and sour cream for garnishing.
It’s also vital to have a large skillet that’s oven-safe, as you’ll be using it both on the stovetop and in the oven.
If you’re feeling adventurous, consider adding some diced onions or bell peppers for extra flavor.
Make certain your ingredients are prepared before starting: cheese shredded, bacon crisply cooked and crumbled, and green onions finely chopped.
This prep work will streamline your cooking process and help you seamlessly shift to the next steps.
Step 2. Arrange Tots in Skillet

Now that your skillet’s ready, let’s begin by arranging the frozen tater tots in a single layer.
Spread them evenly in your skillet to guarantee they all get a good chance to crisp up beautifully. By doing this, you’ll create the perfect foundation for your loaded skillet bake, assembling each piece snuggly next to the other.
There shouldn’t be any overlapping or stacking; you want every tot to be exposed to the heat directly. This simple step not only maximizes surface area for cooking but also aids in achieving that desirable golden-brown finish.
Step 3. Add Cheese and Bacon Toppings

Once your tater tots are evenly distributed and starting to crisp, it’s time to layer on the delicious flavors.
Sprinkle a generous amount of grated cheddar cheese over the tots, ensuring it’s evenly spread so every bite will have a gooey, cheesy goodness.
Next, scatter crispy bacon bits across the top. These add a savory crunch that complements the soft tater tots perfectly.
Don’t hold back—both ingredients will meld together under heat, forming a delightful crust that’s both tasty and visually appealing.
If you’re feeling adventurous, throw in some diced green onions or chopped peppers for an extra pop of color and flavor.
This step isn’t just about taste; it’s about crafting a skillet bake that looks as good as it eats.
Step 4. Bake Until Golden Brown

Pop your skillet into a preheated oven at 375°F (190°C) and bake for about 20 minutes, or until the cheese is bubbling and the tots turn a golden brown.
As you wait, the aroma of melting cheese and sizzling bacon begins to fill the air, hinting at the delicious meal ahead.
This critical baking step guarantees that the tater tots aren’t just heated through; they’re transformed into a crispy, golden layer of perfection, juxtaposed against the gooey, rich cheese and the savory bite of bacon.
Keep an eye on the oven, as the exact time might vary slightly based on your oven’s characteristics.
You’re looking for that perfect color—too light, and they won’t be crispy; too dark, and you might lose some of the nuanced flavors.
Step 5. Serve With Sour Cream

After pulling the golden, crispy tater tot skillet from the oven, it’s time to add a creamy twist with some homemade sour cream. A dollop on top not only enhances the flavors but also brings a delightful contrast to the hot and spicy elements in your bake.
- Balance: Sour cream cuts through the spiciness, balancing the robust flavors.
- Creaminess: Adds a smooth texture that complements the crispiness of the tots.
- Cooling: Provides a cooling effect, perfect against the skillet’s heat.
- Visual Appeal: Gives a touch of elegance with its white cream against the golden brown.
- Customizable: Easy to flavor with herbs or spices, tailoring it to your taste.
Now, plunge in and enjoy the burst of flavors in each bite!
New Recipe
- Pepperoni and Hot Honey PizzaTry the tantalizing twist of pepperoni pizza with hot honey, where sweet meets heat—how will it transform your taste buds?
Cooking Tips
To guarantee your Loaded Tater Tot Skillet Bake turns out perfectly crispy and flavorful, preheat your oven to the right temperature before you begin.
Always arrange your tater tots in a single layer in the skillet; this guarantees they cook evenly and get that desired golden-brown crust.
Don’t skimp on greasing your skillet, as this helps prevent sticking and contributes to the overall texture.
As you layer your ingredients, season each layer for depth of flavor.
Don’t rush the baking time; give your skillet bake enough time in the oven to let the cheese melt thoroughly and the edges to crisp up.
Finally, keep an eye on the oven during the last few minutes to avoid overcooking.
Final Thoughts
When you pull your Loaded Tater Tot Skillet Bake from the oven, the golden-brown crust and tantalizing smell signal a job well done.
Now, as you set your masterpiece on the counter, ready to plunge into its layers of cheesy, crispy goodness, here are a few additional tips to keep in mind:
- Serve immediately for best texture.
- Pair with a simple salad to balance the richness.
- Experiment with different cheeses for new flavors.
- Consider adding a dollop of sour cream or salsa on top.
- Store leftovers in an airtight container for best results.
Following these suggestions will guarantee that your Loaded Tater Tot Skillet Bake remains a favorite dish for gatherings, offering both comfort and a touch of culinary flair.
Enjoy your delicious creation!


