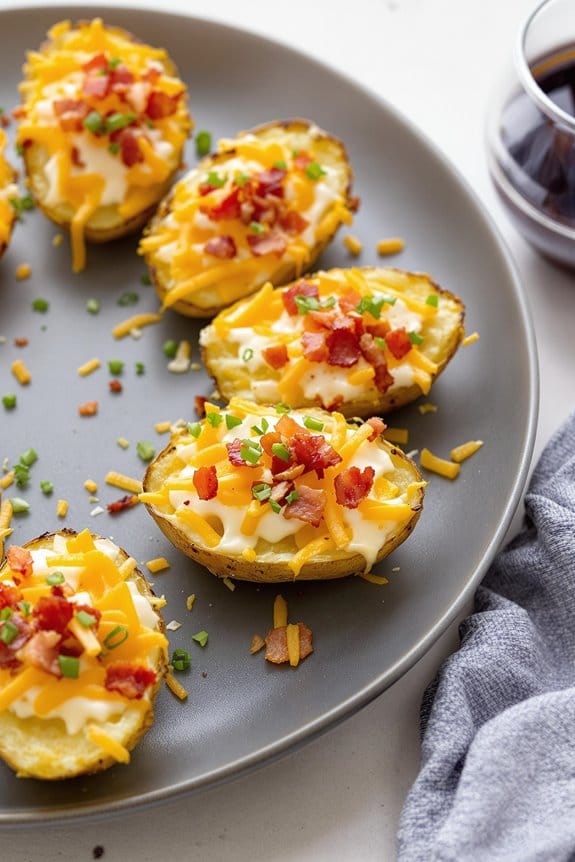
Imagine settling down with a plate of loaded baked potato skins, the crispy shells generously filled with melted sharp cheddar and sprinkled with savory bits of crispy bacon. You’ve experienced the classic, but have you ever considered the endless variations that could elevate this dish further? Think about incorporating some unexpected ingredients that might just turn this familiar favorite into something extraordinary. What could these potential ingredient twists be? Just consider the possibilities that await in transforming this simple comfort food into a gourmet delight. Curious? Let’s explore how a few simple changes could make a world of difference.
History
Potato skins gained popularity as a bar snack in the United States during the 1970s. You’ve probably seen them at your favorite local sports bar, often served during big games.
Originally, chefs sought to minimize waste by using leftover potato skins, once considered scraps. Soon, they recognized their potential for flavor and began experimenting with various toppings.
This resourcefulness turned what was once thrown away into a culinary delight, reflecting not just a shift in food culture but also an economical pivot during a time when resource management was key.
As popularity soared, so did the variations, transforming simple potato skins into hearty, customizable appetizers that captured the hearts and taste buds of many across the nation.
Recipe
Loaded baked potato skins are a classic appetizer that combines the comforting flavors of crispy potato, melted cheese, and savory bacon. This dish is perfect for gatherings, game nights, or even as a fun family meal component. The key to perfect potato skins is baking the potatoes until they’re just right – crispy on the outside with a fluffy interior – before scooping out the middle, leaving a small amount of potato in the skin to provide structure and flavor.
Before you begin, choose potatoes that are roughly the same size to guarantee even cooking. Russets are generally the preferred choice due to their sturdy skin and starchy interior, which makes them ideal for achieving that desired crispy texture. Preparing the toppings while the potatoes cook is a great way to streamline the process, making sure everything is ready to assemble once the skins are pre-baked.
Ingredients:
- 4 large russet potatoes
- Olive oil
- Salt and pepper, to taste
- 1 cup cheddar cheese, shredded
- 4 strips of bacon, cooked and crumbled
- 1/4 cup green onions, chopped
- 1/2 cup sour cream
- 1 tablespoon butter, melted
Cooking Instructions:
Preheat your oven to 400°F (200°C). Thoroughly wash and dry the potatoes, then prick them several times with a fork to allow steam to escape during baking. Rub the skins with olive oil and season with salt and pepper.
Place the potatoes on a baking tray and bake for about 50 minutes, or until tender. Allow them to cool slightly before slicing each potato in half lengthwise. Carefully scoop out most of the potato flesh, saving it for another use, and leaving about a 1/4 inch of potato inside the skin.
Brush the inside and outside of the skins with melted butter, then return them to the oven for 10-15 minutes until the edges are crisp. Remove from the oven, sprinkle cheese and bacon into each skin, and bake for an additional 5-7 minutes until the cheese is melted. Serve hot, topped with sour cream and green onions.
Extra Tips:
When scooping out the potato flesh, be gentle to avoid tearing the skins; a melon baller or a small spoon works well for this task. For an extra crispy skin, consider a second round of baking before adding the toppings.
Additionally, you can vary the toppings according to your preferences, such as using different types of cheese or adding diced jalapeños for a spicy kick. Remember to pre-cook any raw ingredients that won’t cook completely in the short final baking, such as onions or bell peppers.
Finally, potato skins are best served immediately but can be prepared in advance up to the point of the final baking with toppings.
Step 1. Prepare Potatoes for Baking
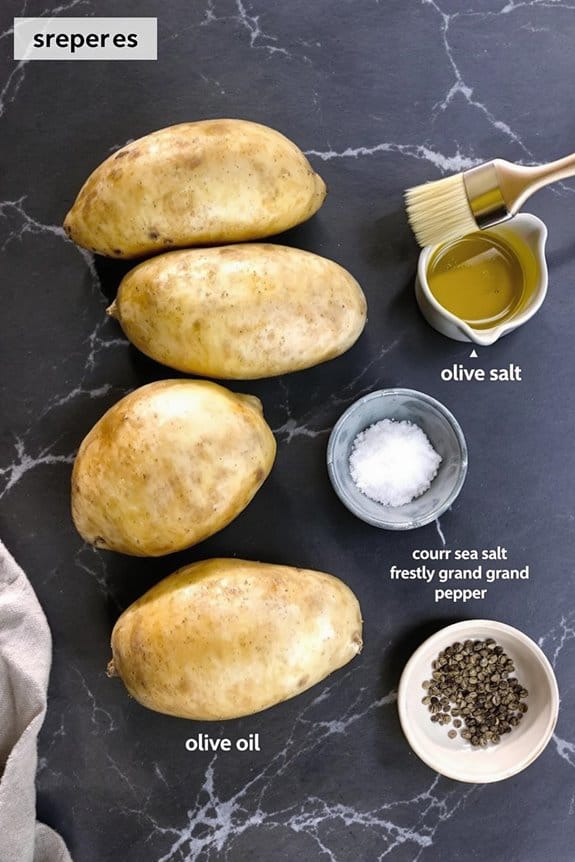
Begin by preheating your oven to 400 degrees Fahrenheit to guarantee it’s hot enough to bake the potatoes thoroughly.
Choose medium-sized Russet potatoes for their sturdy skins and fluffy interiors, ideal for potato skins. Scrub the potatoes well under cold water to remove any dirt, ensuring they’re clean since you’ll be eating the skins later.
Dry the potatoes completely with a towel. Then, with a fork, prick each potato several times on all sides. These little holes will allow steam to escape and prevent the potatoes from bursting in the oven.
Rub the skins with a bit of olive oil and sprinkle some salt over them. This will enhance the flavor and help crisp up the skins while they bake.
Finally, arrange the potatoes on a baking tray ready for the oven.
Step 2. Hollow Out Baked Potatoes
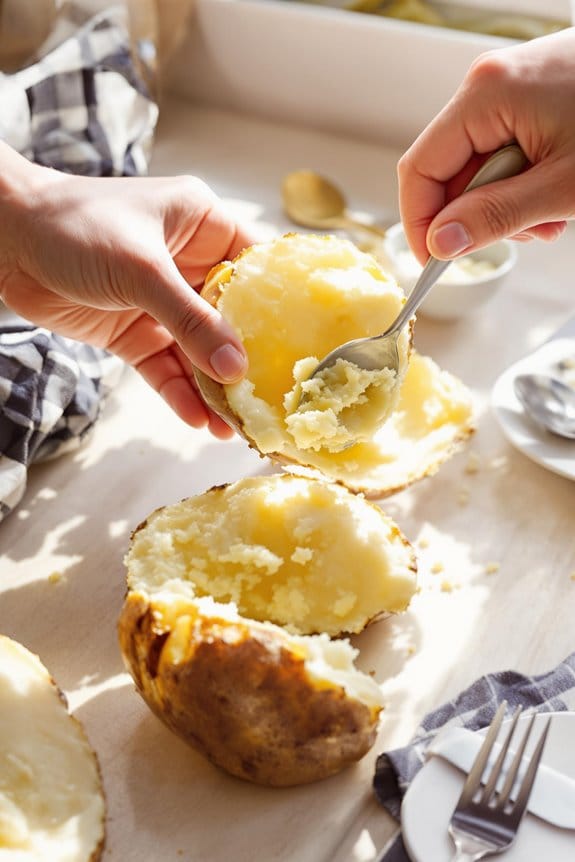
Once your potatoes are perfectly baked and cool enough to handle, you’ll want to prepare them for the filling.
Here’s how to hollow out your potatoes:
- Slice carefully: Cut each potato in half lengthwise. Use a steady hand to guarantee even halves that will sit flat and hold more toppings.
- Scoop gently: With a small spoon, carefully scoop out the insides, leaving about a quarter inch of potato on the skin. This creates a sturdy shell for your fillings.
- Reserve the insides: Don’t discard the scooped potato! These can be used for another dish, such as mashed potatoes or potato cakes, guaranteeing nothing goes to waste and maximizing your kitchen’s efficiency.
Step 3. Add Cheese and Bacon

Now, sprinkle a generous amount of shredded cheese into each potato skin, making certain to cover the base evenly. Choose a good melting cheese, like cheddar, which adds a rich, creamy texture and a sharp, tangy flavor.
After you’ve covered the bottom with cheese, it’s time to layer on the crispy bacon. You’ll want to break the cooked bacon into small pieces, distributing them generously over the cheese in each skin.
This combo not only packs a punch flavor-wise but also adds a delightful crunch and a smoky depth. Make certain the bacon pieces are small enough to guarantee every bite is evenly delightful.
This stage sets the stage for a truly indulgent experience, just waiting to be broiled to melted perfection.
Step 4. Broil Until Cheese Melts
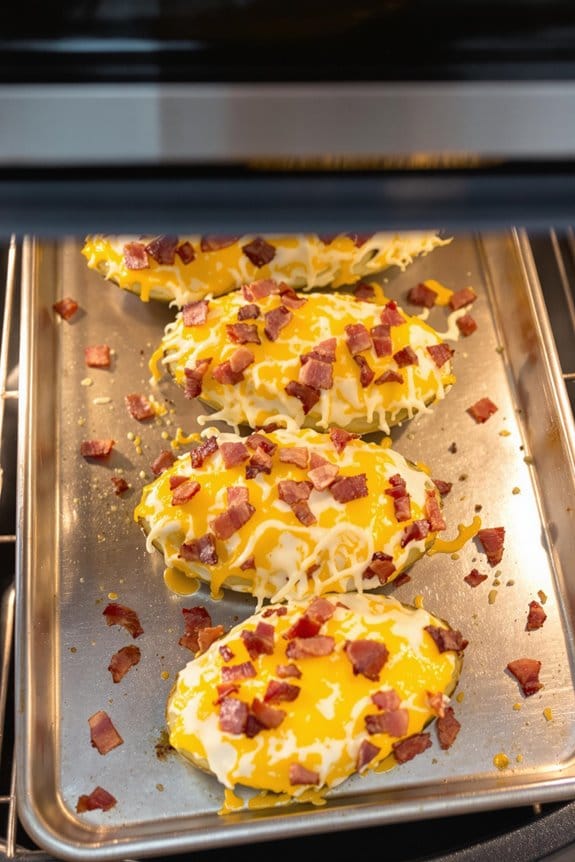
With your potato skins loaded with cheese and bacon, move them to the oven’s broiler for the final touch.
Position them about 6 inches from the heat source to guarantee even melting without burning the toppings. Broiling doesn’t take long, so you’ll need to keep a close eye on them.
Here’s what to watch for:
- Bubbling Cheese: Look for the cheese to start bubbling. This is a telltale sign that it’s melting nicely.
- Slightly Browned Edges: The edges of the bacon and cheese should start to turn a golden brown; this adds a delightful crunch and flavor.
- Irresistible Aroma: Once the savory, smoky aroma fills your kitchen, it’s usually a cue that your potato skins are ready to come out.
Be ready to pull them out the moment they’re perfectly broiled!
Step 5. Serve With Sour Cream

After pulling your potato skins from the broiler, it’s time to add a cool, creamy contrast with some homemade sour cream. Dollop each skin generously, letting the sour cream meld into the hot, melted cheddar and crispy bacon.
This isn’t just about taste; the sour cream tempers the spiciness and enriches the overall flavor profile, complementing the sharpness of the cheese and the smoky notes of bacon. Plus, it adds a delightful creaminess that balances the crunch.
Don’t hesitate to personalize it—perhaps with a sprinkle of chives or a dash of paprika on top for a bit of color and an extra kick. This simple addition transforms your dish into a gourmet experience, keeping every bite interesting and indulgent.
New Recipe
- Pepperoni and Hot Honey PizzaTry the tantalizing twist of pepperoni pizza with hot honey, where sweet meets heat—how will it transform your taste buds?
Cooking Tips
To master the art of making perfect baked potato skins, it’s vital to focus on a few key techniques. Here are three important tips:
- Choose the Right Potatoes: Opt for russet potatoes for their starchy content and thick skin, which crisps up beautifully in the oven.
- Bake, Don’t Boil: Always bake your potatoes instead of boiling. This method dehydrates the skins, making them crispier. Aim for 425°F and a solid baking time to guarantee they’re cooked through and crispy.
- Prep Properly: After baking, let them cool slightly. Then, scoop out most, but not all, of the flesh to create a sturdy base for your toppings. This balance guarantees they won’t collapse when loaded.
Final Thoughts
Mastering the making of loaded baked potato skins can elevate your culinary skills to a new level. Once you’ve perfected this dish, you’ll find it’s not just about the delicious combination of crispy skins, melted cheddar, and smoky bacon—it’s about bringing joy and comfort to your table.
You’ll see that the versatility of these potato skins makes them perfect for nearly any occasion, whether it’s a casual family dinner or a festive gathering.
Don’t be afraid to experiment with toppings. From a dollop of sour cream and fresh chives to a sprinkling of paprika, customize to your liking.
Most importantly, always serve them warm and crisp to capture that perfect blend of textures and flavors. Happy cooking!

