
You’ve likely encountered numerous desserts in your culinary adventures, but lemon cheesecake bars stand out with their delightful interplay of tart and sweet flavors. These bars elevate the humble cheesecake with the brightness of lemon, which cuts through the richness with its citrusy zest. As you consider these treats for your next gathering, imagine not only the invigorating bite but also the satisfied smiles of your guests who are treated to this elegant twist on a classic dessert. Let’s contemplate how this dessert could be adapted to fit various dietary preferences, ensuring everyone can indulge in its creamy delight. What adaptations would work best, you wonder?
History
While the modern lemon cheesecake bar might seem like a recent innovation, its origins can be traced back to ancient Greece, where a simple form of cheesecake was a popular dish. The Greeks mixed cheese with honey and flour, offering it during the Olympic games as a source of energy for athletes.
As time ticked on, this basic recipe journeyed across Europe, progressing with each culture’s unique twist. By the time it reached the shores of America with the early settlers, the transformation of these simple cheesecake recipes intensified. They incorporated ingredients like lemon to cater to local palates, transforming into the exquisite variations you know today.
You’d be surprised to find how global influences amalgamated over centuries to shape the lemon cheesecake bars into a blend of zesty freshness encased in a creamy texture. Every bite you savor is a reflection of a culinary journey that spans continents and epochs, innovating through each era.


It’s not just a dessert; it’s a piece of history that’s as rich as its flavor, drawing connoisseurs and curious taste buds alike into its delicious sweep across time.
Recipe
Lemon cheesecake bars offer a delightful blend of tangy lemon and creamy cheesecake cradled on a crumbly, buttery base that makes for a perfect dessert anytime. The bright, citrusy layers harmoniously blend in each bite, making these bars an excellent treat for picnics, parties, or as a comforting snack.
The process of making lemon cheesecake bars is fairly straightforward, involving a simple crust, a rich cheesecake filling, and a vibrant lemon topping, each layer setting the stage for the next. The key to perfecting this dessert lies in achieving the right balance between the zesty lemon and the sweet, luxurious cheesecake filling.
Preparing the crust and baking it before adding the filling helps to maintain its crispness, guaranteeing that every layer remains distinct in both texture and flavor. The use of fresh lemon juice and zest not only infuses a burst of freshness but also enhances the overall aroma and appeal of the dessert.
Ingredients:
- 1 1/2 cups graham cracker crumbs
- 1/4 cup granulated sugar for crust
- 6 tablespoons unsalted butter, melted
- 3 (8 ounce) packages cream cheese, softened
- 1 cup granulated sugar for filling
- 3 large eggs
- 1/4 cup fresh lemon juice
- 1 tablespoon lemon zest
- 1 teaspoon vanilla extract
Cooking Instructions:
Begin by preheating your oven to 350 degrees Fahrenheit. Mix the graham cracker crumbs, 1/4 cup of sugar, and melted butter in a bowl until well combined. Press this mixture into a lined and lightly greased 9×13 inch baking pan, making sure it’s compact and even.
Bake the crust for about 10 minutes or until just set. Meanwhile, beat the cream cheese with 1 cup of sugar until smooth. Add eggs one at a time, fully incorporating each before adding the next. Stir in the lemon juice, lemon zest, and vanilla extract until the mixture is smooth.
Pour the cheesecake filling over the baked crust and return to the oven, baking for about 25 minutes or until the filling is set. Let it cool completely before refrigerating for at least three hours.
Additional Tips:
For the best results, make sure all your ingredients are at room temperature before you begin to make the filling. This aids in achieving a smooth, lump-free cheesecake texture.
When pressing the crust into your baking pan, use the bottom of a measuring cup to help press it evenly across the pan and slightly up the sides to create a lip that will contain the cheesecake filling. After baking, let the bars chill thoroughly in the refrigerator; this makes cutting them into clean slices much easier.
Lemon cheesecake bars also freeze well, so don’t hesitate to make a double batch and save some for later enjoyment.
Step 1. Crust Preparation Phase
To begin crafting your lemon cheesecake bars, start with the crust—a foundational layer that sets the tone for this delightful treat. You’ll need simple ingredients: graham crackers, unsalted butter, and sugar.
First, crush the graham crackers until they’re fine crumbs. You can use a food processor or place them in a zip-top bag and roll with a rolling pin. Aim for uniformity to guarantee your crust cooks evenly.
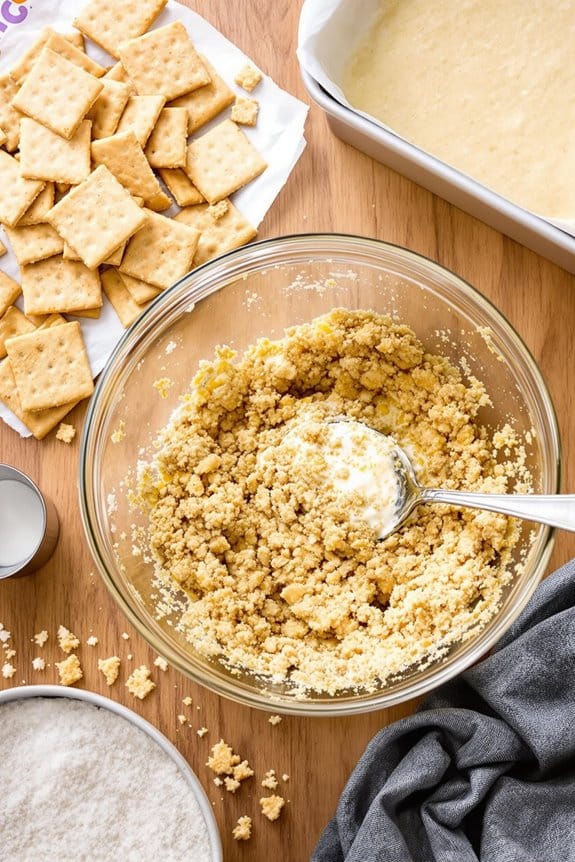
Next, melt the butter in a microwave-safe bowl or on the stovetop. Combine the melted butter with your graham cracker crumbs and sugar in a medium mixing bowl. Mix them thoroughly until the crumbs are well-coated and the mixture starts to clump slightly, resembling wet sand.
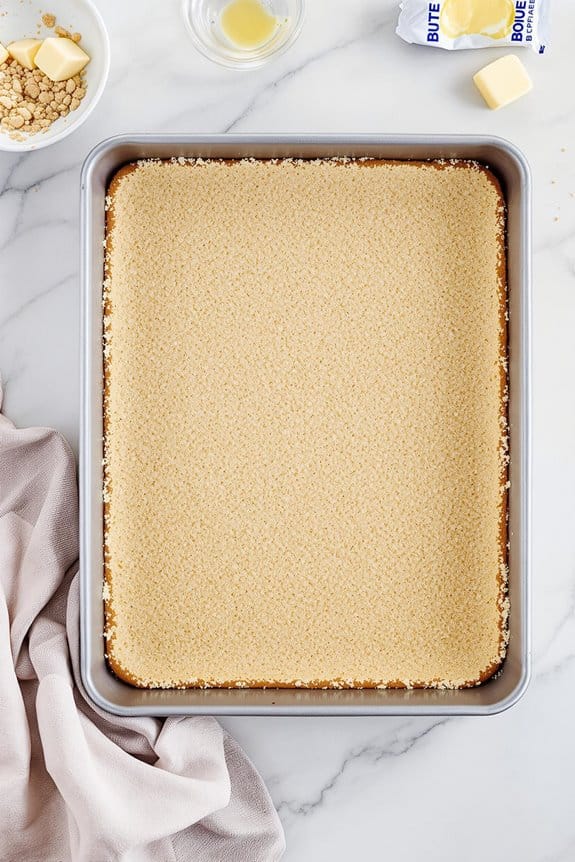
Now, it’s time to press this mixture into the bottom of your prepared pan. Use the flat bottom of a cup or your fingers to press down firmly and evenly across the pan. This will help your crust to hold together and not crumble when you add your filling and bake.
Baking the crust slightly before adding the filling, about 8-10 minutes in a preheated 325°F oven, will give it a chance to firm up and enhance its flavor and texture, setting the perfect stage for the creamy filling to come.

Step 2. Filling Preparation Stage
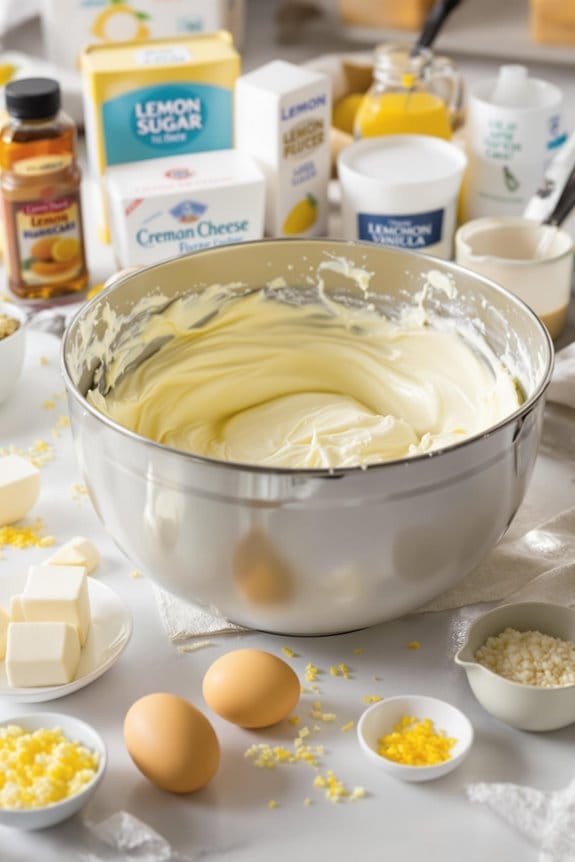
After your crust has been par-baked and it’s beginning to cool, you’ll prepare the creamy lemon filling. Start by blending room temperature cream cheese in a large mixing bowl until it’s smooth. You don’t want any lumps, so take your time with this step.
Next, you’ll add granulated sugar, mixing well to guarantee it’s completely incorporated and the texture remains silky.
Now, for the lemony essence, zest two large lemons. The zest will add a vibrant flavor that’s key to the zesty kick you’re looking for. After zesting, squeeze fresh lemon juice from these lemons, straining to avoid any seeds slipping into your bowl.
Whisk the lemon zest and juice into your cream cheese mixture, along with a dash of vanilla extract for that subtle depth of flavor.
Your next additions are the eggs. Add them one at a time, thoroughly combining after each to maintain the mixture’s creamy consistency. This method guarantees each component melds perfectly, avoiding any separation during the baking process.
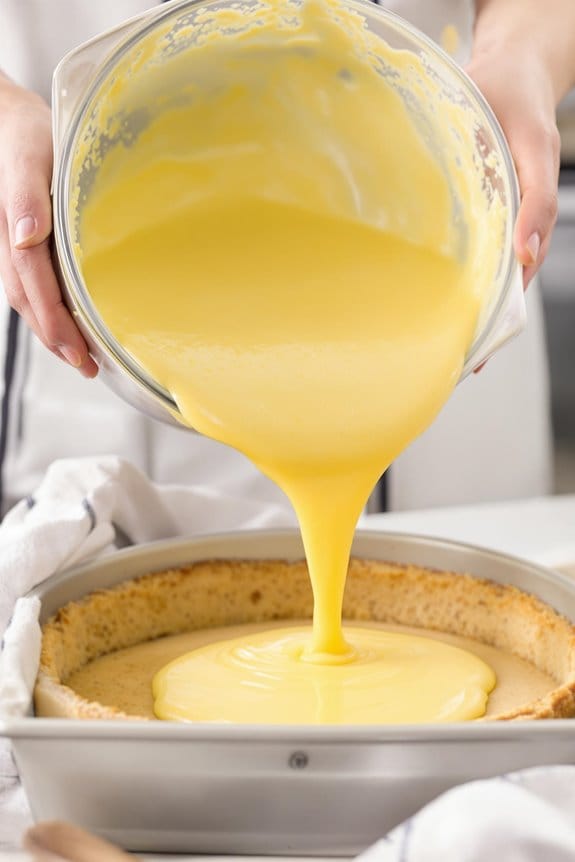
Pour this luscious lemon filling over your slightly cooled crust, spreading evenly. The smooth, tangy filling should nestle into the crust nicely, setting the stage for a beautifully balanced lemon cheesecake bar once baked.
Step 3. Chill Crust Before Filling
Before you pour the lemon filling, make certain your crust has had ample time to chill. This essential step allows your base to set properly, ensuring that it can support the weight and moisture of the filling without becoming soggy.
Place your crust in the refrigerator for at least 30 minutes—this downtime isn’t just a pause; it’s a key part of achieving the perfect texture in your lemon cheesecake bars.
While waiting, resist the temptation to rush. A well-chilled crust not only holds up better but also enhances the overall flavor. The cold helps solidify the fats in the crust, which contributes to a crisper, firmer base once baked.
If time allows, extending the chilling to an hour could further stabilize your crust, providing an ideal firmness that contrasts delightfully with the creamy filling above.

Step 4. Pour Lemon Filling
Now that your crust has chilled adequately, let’s get started on the lemon filling. First, in a large bowl, whisk together the required cream cheese until it’s smooth and creamy. Make sure there are no lumps—this guarantees your filling is perfectly silky.
Next, gradually add granulated sugar, mixing well between each addition to maintain that smooth texture.
Now, it’s time to bring the zesty magic. Add the freshly squeezed lemon juice and zest, blending them thoroughly into the cream cheese mixture. The zest not only infuses the filling with a vibrant lemony tang but also adds a lovely speckled appearance to your bars.
For an extra touch of richness, stir in heavy cream along with a dash of vanilla extract, blending until everything is well combined and beautifully uniform.
Lastly, crack in the eggs, one at a time, stirring well after each to guarantee they’re fully incorporated without overmixing. Overmixing might introduce too much air into the filling, preventing it from setting perfectly.
Once your filling looks smooth and lusciously lemony, gently pour it over the prepared crust, spreading it evenly to cover all corners. You’re now ready for the next step!
Step 5. Bake Until Set

Once you’ve evenly spread the lemon filling over the crust, place the baking dish in a preheated oven set to 350 degrees Fahrenheit.
It’s essential that you set your timer; 22 to 25 minutes should be just right. You’re looking for the center to become set, but a slight jiggle still remains. The edges will likely appear lightly golden, a hint that your bars are nearing perfection.
Here’s a tip: don’t be tempted to overbake. Cheesecake tends to firm up as it cools, so if it’s slightly underdone at this stage, that’s actually just right. Overbaking could lead to a less creamy texture when it cools.
Once the timer dings, don’t hasten to pull it out. Turn off the oven and crack the door slightly, allowing the bars to cool gradually for about 1 hour. This gradual cooling helps prevent the top from cracking and guarantees a smooth, creamy finish.
Afterward, chill the bars in the refrigerator for at least 4 hours before slicing. This chilling process solidifies the texture and enhances the flavors, giving you the perfect lemony tang balanced with creamy sweetness that you’re craving.
Patience here really pays off.
New Recipe
- Pepperoni and Hot Honey Pizza
 Try the tantalizing twist of pepperoni pizza with hot honey, where sweet meets heat—how will it transform your taste buds?

Cooking Tips
When making lemon cheesecake bars, it’s essential to confirm your ingredients are at room temperature to facilitate smoother mixing and more uniform texture in the final dish. This step helps prevent lumps in your cheesecake mixture and guarantees that the ingredients blend seamlessly.
You’ll also want to mix your batter just enough to incorporate everything well—overmixing can introduce too much air, leading to cracks as your bars bake. Aim for a silky consistency without whipping the mixture excessively.
Lining your baking pan with parchment paper is a game changer. It not only prevents sticking but also allows you to lift out the entire cheesecake smoothly for effortless slicing. Make sure to leave an overhang of paper on the sides for easy removal.
Another pro tip involves the baking process itself. Use a water bath to keep the oven’s moisture high; this technique helps in cooking your lemon cheesecake bars gently, avoiding surface cracks and creating a perfectly creamy texture.
Lastly, keep a close eye on your bars as they bake. You’re aiming for a set but slightly wobbly center. Pulling them out at just the right moment prevents overbaking, which can dry out your dessert.
Final Thoughts
If you’ve followed the tips above, your lemon cheesecake bars should turn out creamy, tangy, and irresistibly smooth. As you indulge in the fruits of your labor, take a moment to appreciate the fusion of bright lemon zest with the rich creaminess of the cheesecake—a delightful contrast that’s sure to please any palate.
Remember, the key to perfect cheesecake bars lies not only in the quality of ingredients but also in the precision of your technique. Making certain to mix your batter just right and baking it at the proper temperature can make all the difference in achieving that desired velvety texture without cracking.
Also, chilling your bars sufficiently before cutting guarantees clean, beautiful slices.
This recipe offers more than just a delicious treat; it’s a chance to showcase your culinary skills and perhaps even start a new tradition in your kitchen. Don’t hesitate to experiment with variations—maybe a sprinkle of toasted coconut or a drizzle of raspberry sauce—to personalize the bars to your taste.
Finally, sharing your creation with friends and family can turn a simple dessert into a memorable occasion. Enjoy the smiles and compliments as they savor each bite, and take pride in knowing you’ve mastered a classic dessert that’s sure to be requested time and again.