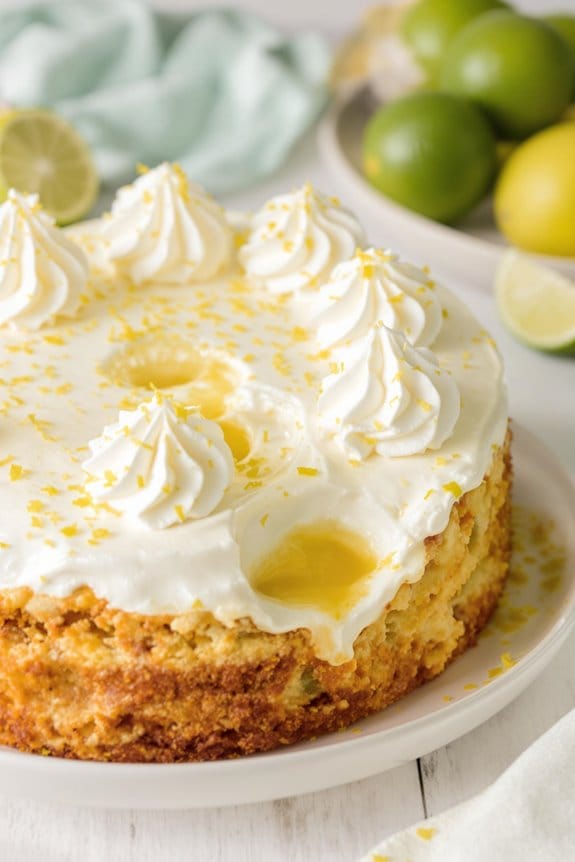
Have you ever tried your hand at making a Key Lime Poke Cake? This dessert cleverly combines the zesty brightness of key lime pie with the spongy texture of a poke cake. By simply adding freshly squeezed key lime juice to a white cake mix and incorporating a luscious filling of sweetened condensed milk, you transform an ordinary cake into a revitalizing treat. But here’s the twist: the real magic happens with the layering of flavors that might just make you reconsider your favorite summer dessert. Curious to see how? Perhaps it’s time to discover the unique twist this cake offers.
History
The history of Key Lime Poke Cake intertwines with the legacy of Key lime pie, a beloved dessert originating from the Florida Keys in the late 19th century. As you explore the roots of this sweet creation, you’ll discover it’s a modern twist on the traditional pie, adapted to suit contemporary tastes and culinary trends.
The original pie, crafted from key lime juice, egg yolks, and sweetened condensed milk, became an iconic American dessert, celebrated for its unique, tangy flavor encased in a graham cracker crust.
You might wonder how this transformed into the poke cake craze. The adaptation began as an inventive experiment in the kitchens of home bakers seeking a moist, flavor-infused version of the traditional cake.
By incorporating the poke technique—poking holes in a baked cake and filling them with a luscious key lime sauce—bakers allowed the citrusy zest to permeate every bite, enhancing the cake’s moisture and flavor.
This culinary evolution reflects a broader trend of reimagining classic dishes to align with modern dining preferences. As you investigate further, you appreciate how this dish isn’t just a cake but a celebration of innovation in American baking, merging history with modern creativity.
Recipe
Key lime poke cake is a revitalizing and tangy dessert that’s perfect for summer gatherings or any time you want a taste of the tropics. The cake is infused with the fresh, zesty flavor of key lime, then soaked with a sweet lime syrup, guaranteeing every bite is moist and flavorful. Topped with a light, creamy frosting and a sprinkle of lime zest or graham cracker crumbs, this cake isn’t only delicious but also visually appealing.
This dessert is surprisingly easy to make, despite its impressive appearance and taste. It starts with a basic white cake base, which is then enhanced with the key lime elements. The ‘poke’ part of the recipe comes from poking holes in the warm cake and pouring over a lime-flavored syrup, which allows the flavor to permeate throughout. The result is a wonderfully moist cake with bursts of lime in every forkful.
Ingredients:
- 1 box white cake mix (plus ingredients required to make the cake: typically water, oil, and eggs)
- 3/4 cup key lime juice, divided
- 1 can (14 oz) sweetened condensed milk
- 1/2 cup sugar
- 2 teaspoons lime zest
- 8 oz cream cheese, softened
- 1/2 cup unsalted butter, softened
- 3 cups powdered sugar
- 1 teaspoon vanilla extract
- Graham cracker crumbs or additional lime zest, for garnish
Instructions:
Begin by baking the white cake according to package instructions in a 9×13 inch baking dish, but substitute half of the water called for with key lime juice for added flavor.
While the cake is baking, mix half of the remaining key lime juice with sweetened condensed milk and sugar in a small saucepan, and warm over low heat until the sugar dissolves.
Once the cake is done and still warm, poke holes all over it using the handle of a wooden spoon. Pour the lime-milk mixture over the cake, allowing it to soak into the holes.
In a mixing bowl, whip together the cream cheese, butter, powdered sugar, vanilla extract, and the remaining key lime juice until smooth and fluffy. Spread this frosting over the cooled cake and sprinkle with graham cracker crumbs or lime zest for decoration.
Extra Tips:
For the best results, verify your cake has plenty of holes and they go almost to the bottom of the cake – this helps the lime syrup soak through more evenly.
Allow the cake to cool completely before frosting; this prevents the frosting from melting into the warm cake.
If you prefer a less sweet cake, you can reduce the amount of condensed milk and sugar in the lime syrup.
Refrigerate the cake for at least an hour before serving; this helps set the frosting and makes the cake easier to cut.
For an extra touch of elegance, serve each slice with a thin slice of fresh lime or a dollop of whipped cream.
Step 1. Prepare Cake Batter Base
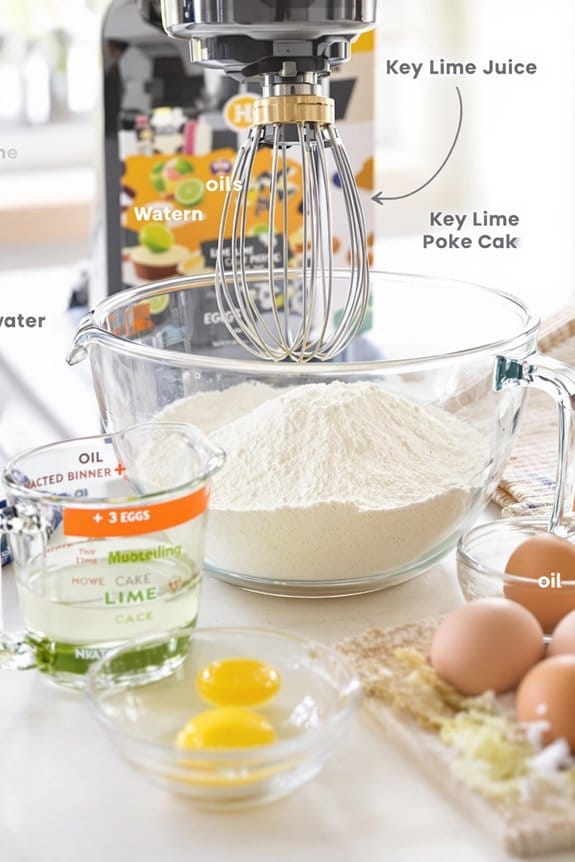
Begin your culinary adventure by preparing the cake batter base, an important first step to creating the delightful Key Lime Poke Cake. First, you’ll need to gather all your ingredients: flour, sugar, baking powder, salt, eggs, milk, and butter. It’s vital to measure these out accurately to guarantee your cake has the perfect texture and taste.
Start by sifting the flour, baking powder, and salt together in a medium bowl. This helps to aerate the ingredients, making your cake lighter and fluffier.
In a separate large bowl, cream the butter and sugar together until the mixture is pale and fluffy. This process incorporates air into the butter, setting the foundation for a well-risen cake.
Next, beat in the eggs one at a time, making sure each is fully incorporated before adding the next. Then, alternate adding your dry ingredients and milk to the butter mixture, starting and ending with the dry. Mix just until everything is combined—overmixing can lead to a dense cake.
Once your batter is smooth, it’s ready for the next step. You’re now set to pour this mixture into your prepared baking pan, primed to create a luscious, lime-infused dessert.
Step 2. Bake Cake Base
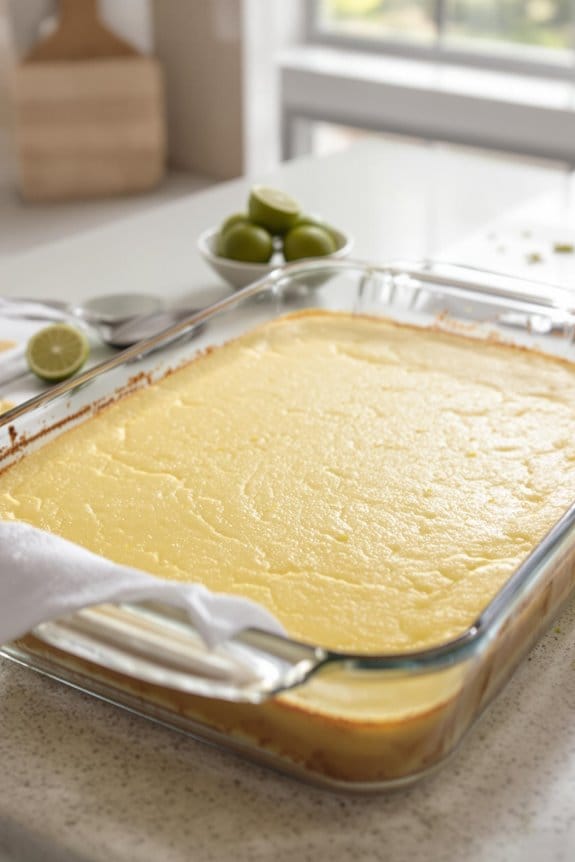
Now that your batter’s ready, pour it into the greased 9×13 inch baking pan. Smooth the surface with a spatula to guarantee an even layer, essential for uniform baking and ideal texture.
Preheat your oven to 350 degrees Fahrenheit beforehand, as this guarantees that the cake starts baking in the best conditions for rising properly.
Once your oven’s preheated, place the pan on the middle rack. This position is vital as it allows for even heat distribution, preventing the edges from baking too quickly.
You’ll need to bake the cake for about 25-30 minutes. Keep an eye on the clock; however, don’t rely solely on time. Ovens can vary, so it’s best to check for doneness around the 25-minute mark.
To test if the cake is baked through, insert a toothpick into the center. If it comes out clean, the cake is ready. If not, give it a few more minutes, but watch closely—you don’t want to overbake it. An overbaked cake can turn dry and crumbly, losing the tender texture that makes this dessert so delightful.
When it’s done, remove the cake from the oven and set it on a cooling rack. Allow it to cool completely in the pan. This step helps it settle and firm up, making the next steps easier and more effective.
Step 3. Puncture With Fork Evenly
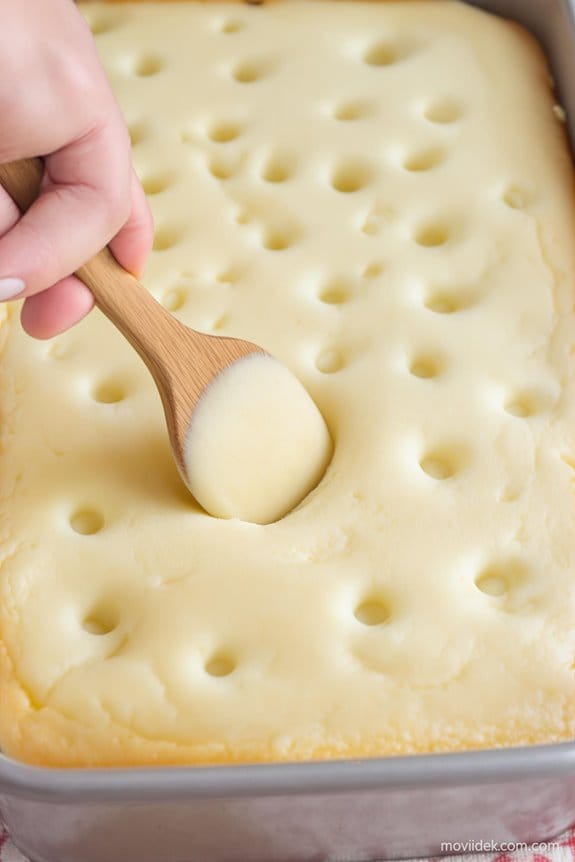
Once your cake has cooled completely, it’s time to add some extra texture and flavor by puncturing it evenly with a fork. This step is essential as it prepares the cake to absorb additional ingredients that enhance its moistness and infuse it with rich flavors. Grab a standard dining fork; there’s no need for specialized equipment here.
Start at one corner of the cake and work your way down in rows, spacing your punctures about an inch apart. This technique guarantees every bite will be equally delightful. It’s not just about making holes; it’s about creating tiny gateways for flavors to seep into the cake, making the overall experience more enjoyable.
Make certain you puncture all the way down to the bottom of the cake. This depth is necessary to allow for maximum absorption of the upcoming ingredients. Be gentle yet firm with each press to avoid breaking the cake’s surface unnecessarily.
This process isn’t just functional; it’s a way to personalize your cake, making the end result uniquely yours. Once you’ve covered the entire surface, your cake is prepped and ready for the next exciting phase: the infusion of flavors. Take care that each puncture is done with care and consistency for the best results.
Step 4. Pour Lime Gelatin Mixture
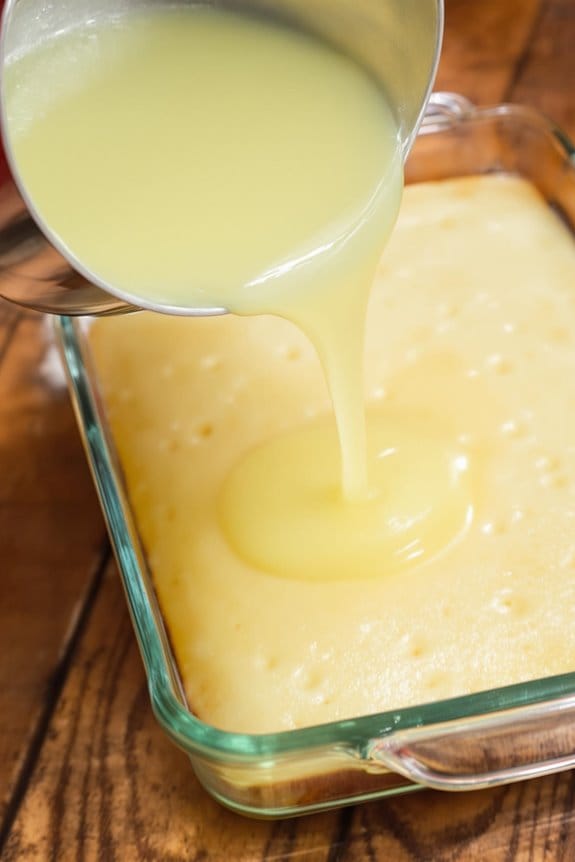
With your cake meticulously punctured, it’s time to drizzle the lime gelatin mixture over the entire surface. First, verify that your gelatin is still liquid but not hot; a warm, pourable consistency is what you’re aiming for.
Begin at one end of the cake, pouring gently to allow the mixture to seep into those fork-made crannies. You’ll want to cover all areas thoroughly so that each bite has that zesty lime flavor infused throughout.
For even distribution, use a spoon or a small pitcher for better control and aim to cover every square inch. It’s essential not to rush this step. The liquid needs time to sneak into the holes you’ve made.
Carefully guide the flow across the grid of punctures until no part of the cake’s surface is left untouched. Should you notice any pooling on top, lightly tap the pan on your workspace; this helps the gelatin slide deeper into the cake, reaching every potential dry spot.
Step 5. Chill to Set Gelatin
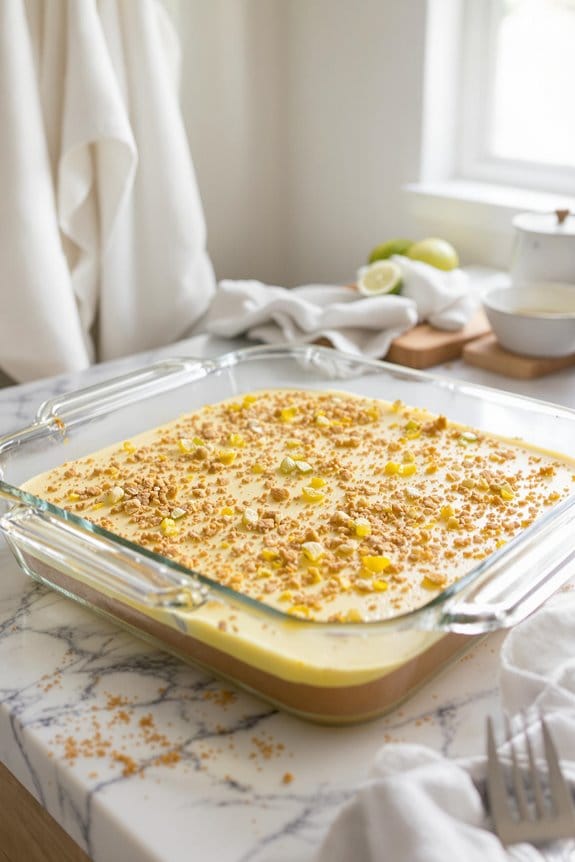
After you’ve thoroughly covered the cake with the lime gelatin mixture, place it in the refrigerator to set. This chilling step is vital as it allows the gelatin to firm up, integrating beautifully with the moist layers of the cake.
Ideally, you should chill the cake for at least four hours, though overnight is best if you’ve got the time. This patience pays off by confirming the gelatin is perfectly set and the flavors are well blended.
During this cooling period, the gelatin seeps into the poked holes of the cake, creating delightful surprises of tangy lime flavor in every bite. Remember, the goal is for the gelatin to solidify enough so it doesn’t ooze when sliced but remains jiggly and soft to the touch, enhancing the overall eating experience.
Here are three essential tips to confirm perfect gelatin setting:
- Ensure even coverage: When pouring the gelatin, distribute it evenly to avoid lumpy areas within the cake.
- Maintain steady temperature: Avoid frequent opening of the refrigerator, as this can affect the setting process.
- Check firmness before removing: Gently press the surface. If the cake feels firm under a slight pressure, it’s ready.
Patience during this step will guarantee your Key Lime Poke Cake turns out impeccably.
New Recipe
- Pepperoni and Hot Honey PizzaTry the tantalizing twist of pepperoni pizza with hot honey, where sweet meets heat—how will it transform your taste buds?
Cooking Tips
If you’re making a key lime poke cake, paying attention to a few expert tips can elevate your dessert from good to unforgettable. Start by selecting the highest quality key limes. Fresh, aromatic limes will impart a vibrant, tangy flavor that’s essential for the authentic taste of your cake.
When it comes to the actual baking, don’t skimp on poking; those holes are what allow the key lime glaze to seep into the cake, providing moisture and flavor throughout every bite. Use the handle of a wooden spoon to make evenly spaced and sized holes for optimum soaking.
Another tip is to let the cake cool completely before adding the lime glaze. Pouring glaze over a warm cake might seem like a time-saver, but it actually causes much of your glaze to pool at the bottom rather than being absorbed.
Finally, for the topping, go beyond the traditional whipped cream. Consider adding a sprinkle of toasted coconut or zest of lime on top for an extra pop of flavor and texture that complements the rich tartness of the lime.
Each element, from crust to topping, plays a significant role in crafting a memorable key lime poke cake.
Final Thoughts
As you step back to admire your culinary creation, consider how these expert tips have turned a simple dessert into a sublime treat. Crafting this key lime poke cake not only fills your kitchen with zesty aromas but also infuses your baking repertoire with a rejuvenating twist.
Your dedication to following the nuanced advice has surely paid off, culminating in a dessert that’s as visually appealing as it’s deliciously satisfying.
The real magic lies not just in the ingredients you’ve chosen, but in the techniques you’ve applied. To highlight this, consider:
- Zesting Techniques: Employing fine zesting adds an intense lime flavor without the bitterness that larger zest pieces can impart.
- Even Pouring: The even distribution of lime syrup guarantees every bite is imbued with that delightful key lime tang.
- Chill Time: Patience during the chilling process allows the flavors to meld perfectly, creating a harmonious balance between sweet and tart.
Each step has built upon the last, proving that great baking isn’t just about following a recipe—it’s about understanding how small touches can make a big impact.
Enjoy your delicious success and the smiles it brings!

