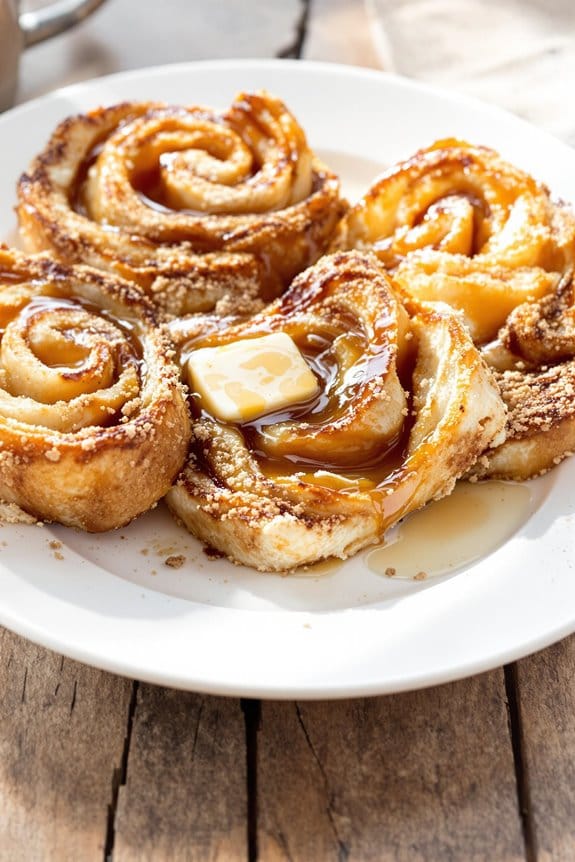
Have you ever experimented with adding a splash of color to your brunch table with Funfetti Crepe Roll-Ups? This delightful dish merges the buttery delicacy of crepes with the whimsical charm of funfetti, creating an experience that’s as visually appealing as it is delicious. While the basic preparation is straightforward, the choice of filling and the precise sprinkle-to-batter ratio can greatly affect both the taste and texture. If you’re curious about how varying these elements can elevate your crepe game, you might find that a few simple tweaks could open up a whole new level of dessert innovation.
History
While funfetti, those delightful, colorful sprinkles, captivates the senses in modern desserts, it actually originated from a simpler concept in the late 20th century. The origins of funfetti are embedded in the American baking traditions of the 1980s. Back then, you would’ve seen it first appearing not as a default cake ingredient, but as a novel way to add a burst of joy and color to what were otherwise standard vanilla cakes.
Pillsbury is credited with the commercial introduction of funfetti in 1989 after realizing the public’s craving for whimsy in everyday foods. The company’s original product was a boxed cake mix, speckled with vibrant rainbow particles that baked into soft explosions of color—making even the simplest of cakes feel like a celebration.
It wasn’t long before the sprinkle-inspired innovation captured nationwide attention. The trend grew, sparking a funfetti frenzy where everyone wanted to add that festive twist to their desserts.
Today, funfetti isn’t just for cakes. It’s a popular choice for everything from pancakes to ice creams.
Reflection on funfetti’s history reveals how a dash of creativity can redefine everyday culinary experiences and bring a touch of magic to the dining table.
Recipe
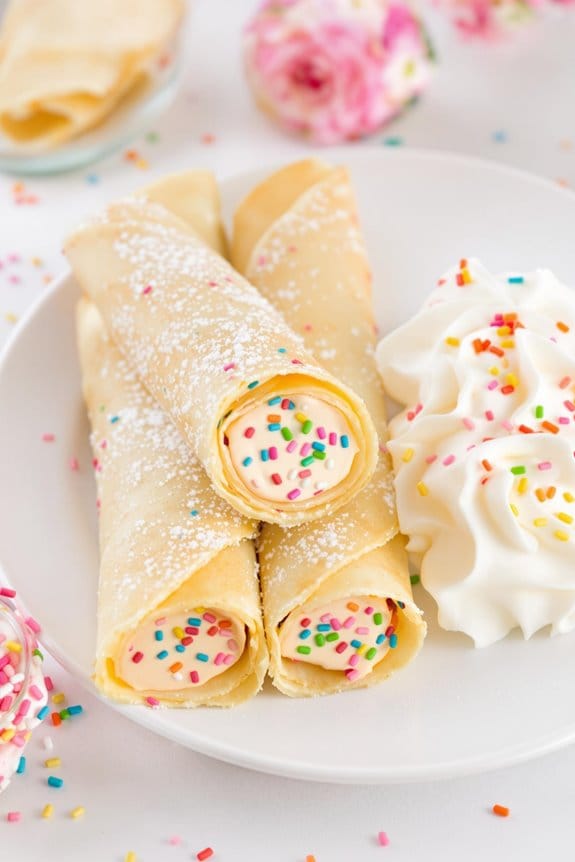
Funfetti Crepe Roll-Ups blend the delight of sprinkles with the elegance of crepes, creating a joyful twist on a traditional French dessert. Perfect for celebrations or brightening up a weekend brunch, these vibrant, sprinkled crepe roll-ups aren’t only eye-catching but also irresistibly tasty. The crepes are made light and tender, enveloping a sweet, whipped cream filling that’s speckled with colorful funfetti. When rolled and sliced, each piece reveals a swirl of color that’s bound to excite both kids and adults alike.
Getting started with Funfetti Crepe Roll-Ups is simpler than you might think, with everyday kitchen equipment and basic ingredients. The key to perfect crepes is ensuring your batter is smooth and allowing it to rest, producing crepes that are wonderfully soft and easy to roll. The funfetti can be mixed into the filling, adding a playful pop of color and a slight crunch that contrasts beautifully with the velvety cream.
Ingredients:
- 1 cup all-purpose flour
- 2 eggs
- 1 1/2 cups milk
- 1 tablespoon sugar
- 1/4 teaspoon salt
- 2 tablespoons melted butter, plus extra for cooking
- 1 teaspoon vanilla extract
- 1 cup heavy whipping cream
- 1/4 cup powdered sugar
- 1/2 cup funfetti sprinkles, plus extra for garnish
- Fresh fruits for serving (optional)
In a large mixing bowl, whisk together flour, eggs, milk, sugar, salt, melted butter, and vanilla extract until the batter is smooth. Allow the batter to rest for 30 minutes at room temperature.
Meanwhile, using a mixer, whip the heavy cream with powdered sugar until stiff peaks form, then gently fold in the funfetti sprinkles.
Heat a non-stick skillet over medium heat, lightly butter it, then pour in about 1/4 cup of batter, swirling to spread evenly. Cook for about 1-2 minutes until the edges lift easily, then flip to cook the other side briefly. Repeat with the remaining batter.
Once all crepes are cooked, spread a thin layer of the funfetti cream on each crepe, roll them up tightly, and slice into rounds.
These Funfetti Crepe Roll-Ups are best served immediately after preparation to enjoy the crispness of the crepes and the airy texture of the whipped cream. For an extra touch of sweetness and texture, sprinkle some additional funfetti over the plated roll-ups.
If you’re preparing these for a party or event, they can be made a few hours in advance and stored in the refrigerator; just be sure to cover them lightly with plastic wrap to avoid them drying out. Serving them with fresh fruits like berries or slices of kiwi can add a revitalizing contrast to the sweet, creamy filling. Enjoy the burst of colors and flavors in each bite!
Step 1. Mix Batter Ingredients Thoroughly
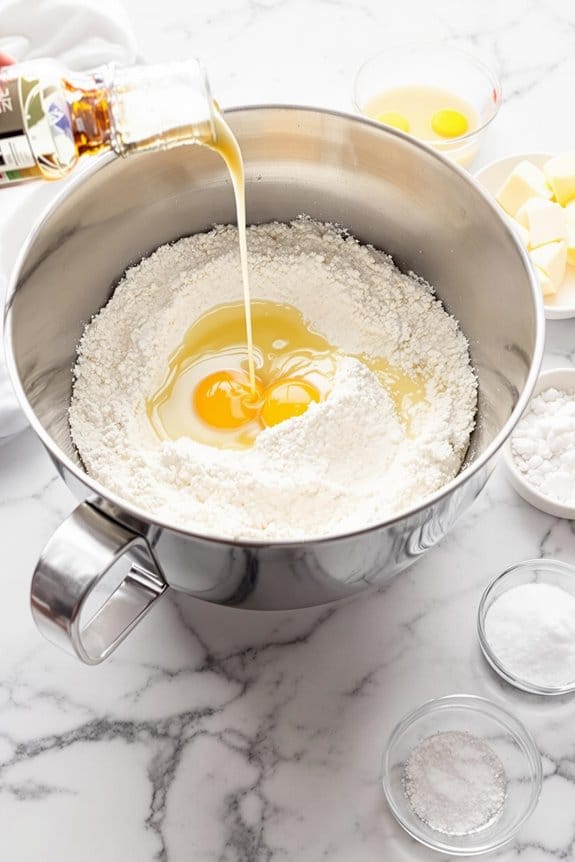
To create the perfect Funfetti crepe roll-ups, begin by thoroughly mixing the batter ingredients. This initial step guarantees that your crepes will have the right consistency and flavor, vital for that delightful end result you’re aiming for.
Start with your all-purpose flour in a large mixing bowl. You’ll want to sift it to avoid any lumps that could mar the texture of your crepes.
Next, add granulated sugar and a pinch of salt, blending these dry components well. In another bowl, whisk together your wet ingredients: milk, slightly beaten eggs, and melted butter. This combination should be smooth and homogeneous before you proceed.
Now, pour your wet mixture into the dry ingredients. Using a whisk, mix everything gently but thoroughly. You’re not just combining ingredients; you’re incorporating air, which is key to getting light, tender crepes.
Take care not to overmix as this can lead to tough textures.
Finally, fold in your signature Funfetti sprinkles with a spatula. Mix these in lightly to distribute them evenly throughout the batter, without bleeding color.
Your batter should now appear festive and colorful, perfectly prepped for the next step of cooking.
Step 2. Pour Batter Into Hot Pan
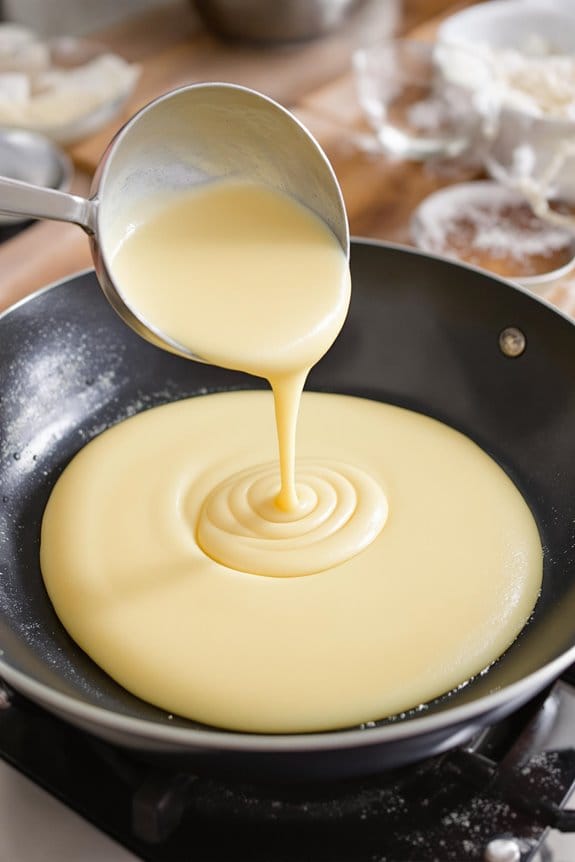
Now that your Funfetti batter is evenly mixed and vibrant with sprinkles, it’s time to cook these colorful crepes. First, heat a non-stick pan over medium heat until it’s hot enough that a few drops of water sizzle and evaporate on contact.
You’ll want to make certain the pan isn’t too hot, or your crepes might burn before they cook through.
Next, lightly grease the pan with a small dab of butter or a spray of non-stick cooking oil. This guarantees that your crepes don’t stick and turn evenly golden without too much fuss. It’s all about finding that balance to achieve the perfect texture.
Now, take about 1/4 cup of your Funfetti batter and pour it into the center of the hot pan. Immediately, tilt the pan in a circular motion to spread the batter thinly and evenly across the surface.
The goal here is to cover the bottom of the pan with a thin layer of batter, trimming the excess to guarantee it cooks evenly and stays delightfully light and tender.
As the batter spreads, you’ll notice the edges starting to lift slightly from the pan, and small bubbles may form on the surface. This is perfectly normal and a sign that your crepes are starting to cook.
Don’t rush this part; give it a gentle touch and the right amount of time to create that wonderfully soft texture that makes crepes so delightful.
Step 3. Flip to Cook Other Side
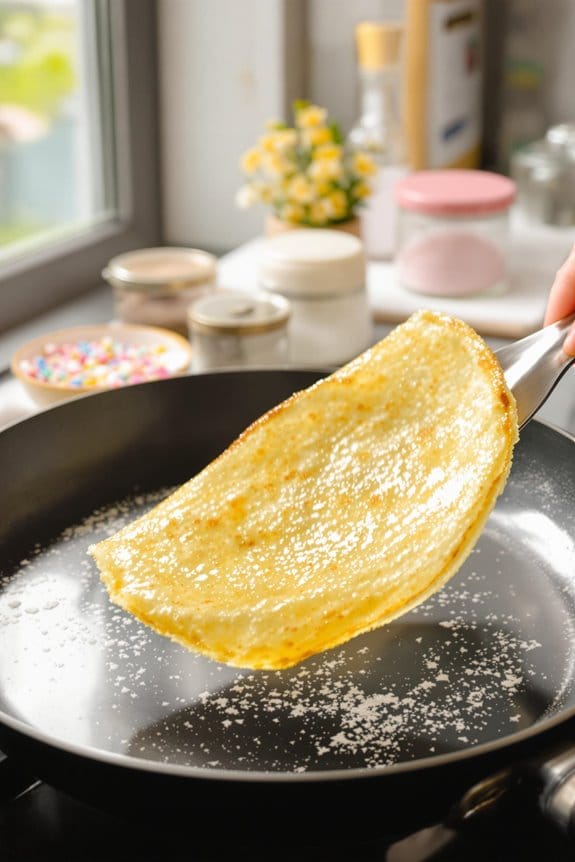
Gently slide your spatula under the edges of the crepe, making certain it’s free from the pan. Once you’re confident it’s loose, get ready for the flip.
You’ll want your wrist firm but flexible—think of it as a gentle but quick motion. It’s vital not to hesitate; a swift flip guarantees the crepe won’t fold on itself or tear. If you’ve loosened the crepe well, it should flip beautifully, floating momentarily before landing back in the pan to cook on the other side.
Now, let it cook for just about a minute more—this side cooks faster since the pan is already very hot. What you’re looking for is a delicate golden tint, a sign that it’s done just right. The texture should be slightly crisp around the edges but still tender and pliable.
Keep a close eye; it can move from perfect to overdone quite quickly at this stage.
Once cooked, transfer the crepe to a plate. It’s best to lay them flat and avoid stacking as they cool slightly—this prevents them from becoming too steamy and soft.
Step 4. Add Colorful Funfetti Sprinkles
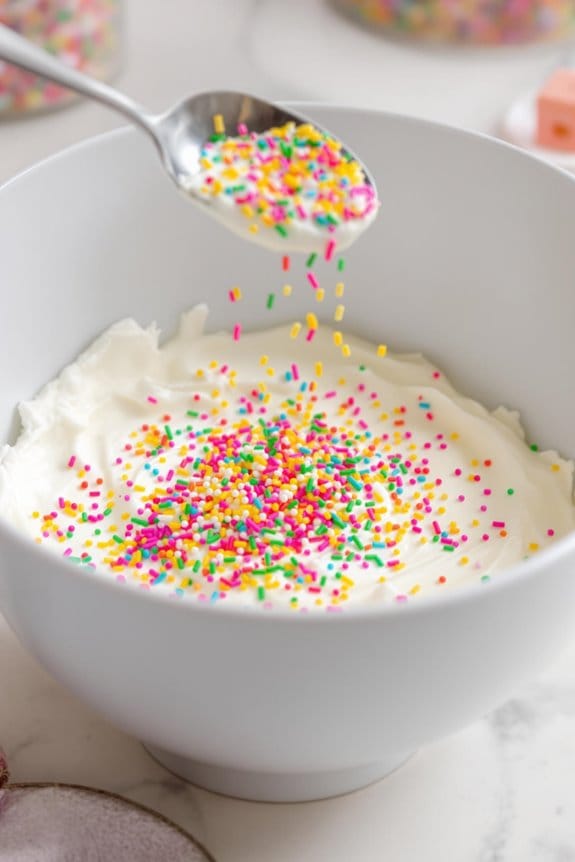
Once your crepe is golden and resting on the plate, it’s time to sprinkle on the funfetti. This step isn’t just about making your crepe look vibrant; it’s also about adding a burst of sugary taste that complements the sweetness of your mix-ins.
Funfetti sprinkles, with their bright colors, bring a playful look and a slightly crunchy texture that contrasts wonderfully with the softness of the crepe.
You might wonder how much funfetti to use. Don’t hold back! A generous handful guarantees that each bite is as joyful as the last. Spread them evenly across the surface, focusing on the center where they can be encapsulated once you roll up the crepe.
This technique guarantees that every slice you cut later reveals a colorful cross-section, sure to delight anyone who sees it.
While you’re at it, consider the range of funfetti colors available. Mixing traditional rainbow sprinkles with pastel shades can create a visually appealing dish that stands out.
Whether you’re preparing a snack for yourself, a festive brunch, or a special dessert, these crepes promise a burst of beauty and flavor in every bite.
Step 5. Roll Tightly With Fillings Inside
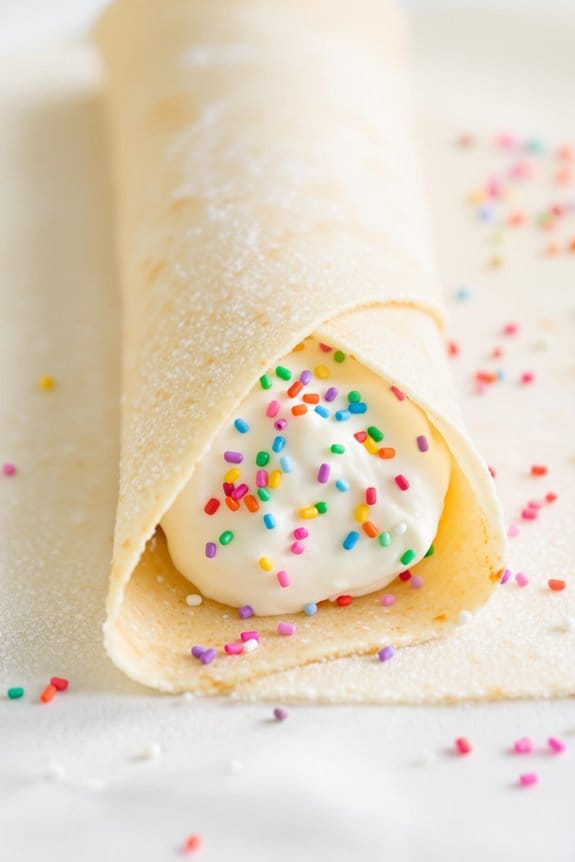
Begin rolling the crepe by carefully folding one edge over the fillings inside, pressing lightly as you continue wrapping to guarantee a tight roll. Confirm that the fold encompasses all the colorful funfetti and any additional fillings evenly, avoiding any spillage or uneven distribution. The key is to maintain even pressure and not rush this step; patience will result in a beautifully rolled crepe.
As you roll, hold the folded part firmly, while gently pulling back the opposite edge to create tension. This technique helps in keeping the roll compact, which is essential for the perfect crepe ensemble.
Once you’ve reached the end, give the crepe a final gentle press along the seam to seal all the goodness inside securely.
For an impeccable finish, rest the crepe seam-side down for a couple of minutes before serving. This not only prevents it from unrolling but also confirms the fillings meld together, enhancing the overall flavor profile.
New Recipe
- Pepperoni and Hot Honey PizzaTry the tantalizing twist of pepperoni pizza with hot honey, where sweet meets heat—how will it transform your taste buds?
Cooking Tips
While preparing Funfetti Crepe Roll-Ups, ensuring that your batter is smooth and free of lumps will make your crepes lighter and more tender.
You’ll want to whisk your batter thoroughly or even consider using a blender to achieve that silken texture. Letting the batter rest for about half an hour before cooking can also help; this step allows the flour to absorb the liquid, resulting in more cohesive and less brittle crepes.
When you’re ready to cook, it’s essential to get the temperature just right. A moderately hot, non-stick skillet works best. If the pan is too cool, your crepes may turn out too thick.
Too hot, and they might brown unevenly or burn quickly. It’s often helpful to cook a test crepe first to adjust your technique without wasting too much batter.
A uniform, thin pour is key to the perfect crepe. Tilt the skillet in a circular motion to spread the batter evenly, achieving that ideally thin, delicate layer.
You’re aiming for a balance—thick enough to hold the fillings and endure rolling, yet thin enough to promise a delightful, subtle crunch. With practice, your wrist will find the rhythm, and you’ll be flipping crepes like a pro.
Final Thoughts
After mastering the techniques for the perfect crepe, you’re ready to roll up your sleeves and start experimenting with these Funfetti Crepe Roll-Ups. You’ve learned how crucial the right batter consistency is, and the importance of evenly heating your crepe pan.
Now, let’s push the boundaries of creativity with colors, flavors, and fillings that pop and sparkle. You’ll find that once you’ve got the hang of the basics, the possibilities become almost endless.
Imagine whipping up a batch of these eye-catching roll-ups for your next brunch, birthday party, or just as a special treat for yourself. The playful bursts of funfetti add a delightful surprise to the light, airy texture of the crepes, making each bite a whimsical delight.
When you serve these creations, expect smiles all around. Everyone loves the colorful speckles hidden within the tender embrace of these delicate crepes.
Don’t hesitate to play around with different color schemes for various occasions—think pastels for spring gatherings or vibrant tones for a summer fiesta.
As you continue to refine your technique, remember that practice makes perfect. Each crepe is a canvas waiting for your artistic touch. Immerse yourself, have fun, and enjoy the process as much as the results.

