You’ve probably heard about the classic marshmallow treats made with crispy rice cereal, but have you ever tried swapping in Fruity Pebbles to add a burst of color and flavor to this age-old snack? Fruity Pebbles Crispy Rice Bars are a simple twist on the traditional recipe and a delightful way to bring a little more joy into your kitchen. What’s more, the preparation is a breeze, and you might already have everything you need in your pantry. Imagine biting into the perfect balance of gooey and crunchy textures, bursting with fruity flavors. Yet there’s one pivotal element to getting them just right that might surprise you.
History
While Fruity Pebbles themselves have been brightening breakfast tables since 1971, Fruity Pebbles Crispy Rice Bars entered the snack scene much later. It wasn’t until the early 2000s that the iconic cereal was transformed into a convenient snack bar, combining the beloved fruity flavor with the ease of on-the-go consumption. You mightn’t remember the exact launch year, but these bars quickly found their place in lunch boxes and snack drawers across the country.
The creation of the Fruity Pebbles Crispy Rice Bars was a strategic move by Post Consumer Brands to capitalize on the lasting popularity of the cereal. Recognizing the shift towards portable eating options, they designed these bars to offer both convenience and taste.
With their colorful appearance and sweet, tangy flavor, they resonated particularly well with kids, as well as adults who cherished the nostalgic feel of the original breakfast cereal.
Over the years, these bars haven’t only sustained their appeal but also adapted to changing consumer preferences with minor adjustments in recipe and packaging. Their journey from a new product to a staple in American snack culture reflects a successful blend of innovation and tradition in the food industry.
Recipe
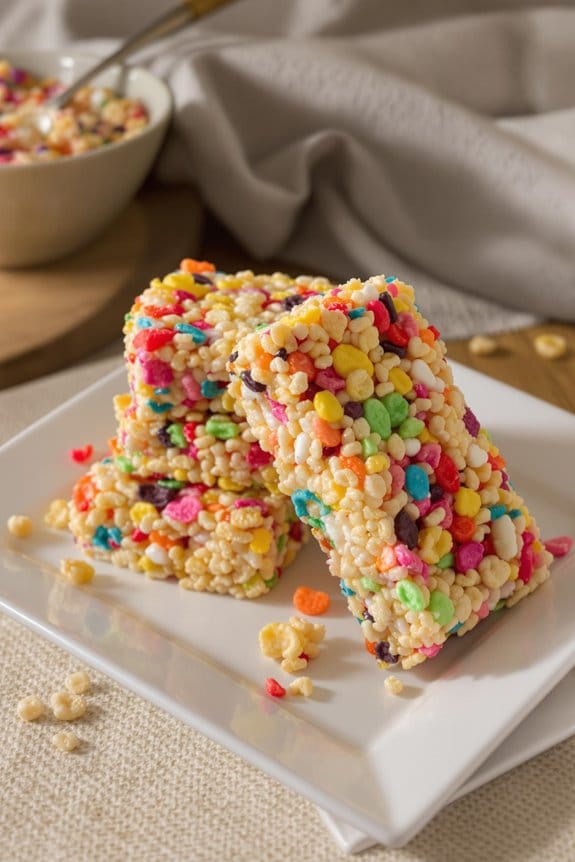
Fruity Pebbles Crispy Rice Bars are a vibrant and cheerful treat that combines the nostalgic flavors of sweet crispy rice with colorful, fruity cereal. This no-bake recipe is incredibly easy to make, requiring just a few ingredients and minimal prep time. It’s perfect for parties, classroom treats, or just as a fun snack to brighten up your day. The crisp texture of the rice cereal mixed with the gooey marshmallow creates a delightful contrast, while the Fruity Pebbles add a burst of flavor and color.
To make these delightful treats, you’ll need only a handful of ingredients, most of which you may already have in your pantry. This recipe is also fantastic for getting kids involved in the kitchen, as they can help measure and mix ingredients. Remember to supervise closely when melting marshmallows and handling the hot mixture, but aside from that, it’s a great recipe for young aspiring chefs to try their hands at cooking.
Ingredients:
- 6 cups Fruity Pebbles cereal
- 10 oz marshmallows (approximately one standard-size bag)
- 3 tablespoons unsalted butter
- 1/2 teaspoon vanilla extract (optional)
To begin making your Fruity Pebbles Crispy Rice Bars, start by greasing a 9×13-inch baking pan with butter or spraying it with non-stick cooking spray. In a large pot, melt the butter over low heat. Add the marshmallows to the pot and stir continuously until they’re completely melted and the mixture is smooth. If you’re using vanilla extract, stir it in now.
Remove the pot from heat and immediately add the Fruity Pebbles cereal. Stir the mixture quickly to ascertain that all the cereal is evenly coated with the marshmallow mixture. Transfer the cereal mixture to your prepared baking pan, and using a spatula or greased hands, press it down into an even layer. Allow the mixture to cool and set at room temperature for about 1 hour, then cut into bars and serve.
A few additional tips to make certain your Fruity Pebbles Crispy Rice Bars are perfect: first, don’t overheat the marshmallows, as this can make the mixture too hard once it sets. Low and slow is the key here.
In the second place, pressing the mixture into the pan firmly helps the bars hold together better when cut, but be careful not to compress them too much, or they may turn out hard. Finally, if you prefer a more gooey texture, you can use more marshmallows or less cereal. Feel free to experiment with the balance to find your perfect texture.
Enjoy crafting this colorful, sweet treat that’s sure to be a hit!
Step 1. Gather Ingredients
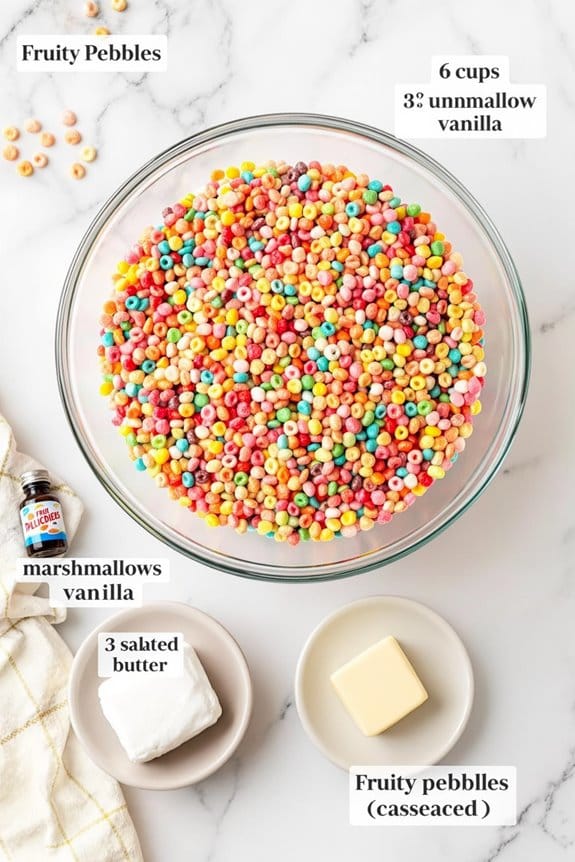
Before you start creating your delicious Fruity Pebbles crispy rice bars, you’ll need to gather a few key ingredients. First and foremost, grab a large box of Fruity Pebbles cereal. You’ll need about six cups of this colorful, crunchy base to give your bars that signature vibrant look and sweet flavor.
Next, make certain you have plenty of butter on hand; about three tablespoons will do. This will help bind your mixture together once melted and mixed with the other components.
Additionally, fetch a ten-ounce bag of mini marshmallows. These will act as the sticky glue that holds your crispy rice bars together, creating a smooth and chewy texture once melted. It’s also a good idea to prepare a teaspoon of vanilla extract for an extra layer of flavor to enhance the sweetness of the bars.
Make sure you have a suitable pan—something like an 8-inch square pan works perfectly for pressing and setting your mixture.
Finally, don’t forget a spatula or a spoon for stirring and a piece of wax paper or non-stick spray to line your pan and prevent sticking. Now, with all these items ready, you’re set to start mixing and making your treat.
Step 2. Mix With Melted Marshmallows
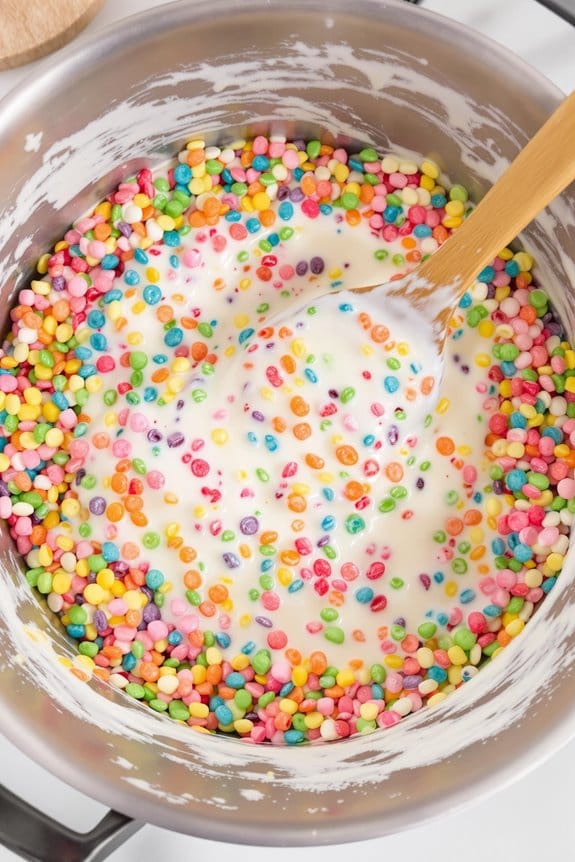
First, melt three tablespoons of butter over low heat in a large saucepan. Once it’s melted, add one 10-ounce bag of mini marshmallows. Stir them continuously until they’re completely melted and the mixture is smooth. This process requires patience, but keep at it to prevent any burning.
Next, it’s time to bring the color and fun! Pour in six cups of Fruity Pebbles cereal. Quickly mix everything together, ensuring that the melted marshmallow mixture evenly coats each pebble. You’ll notice the vibrant colors start to stand out as you stir—this is your sign that you’re doing it right!
Make sure to scoop from the bottom and fold over, so no dry spots remain. This step must be done swiftly, as the marshmallow mixture starts to set once removed from heat.
Don’t worry about getting a bit sticky during the process; it’s all part of the fun in making these delightful treats. Just keep your movements quick and deliberate to achieve that perfect gooey, crispy texture.
Once everything is thoroughly mixed, you’ll be ready for the next step to shape and set your bars.
Step 3. Press Into Greased Pan
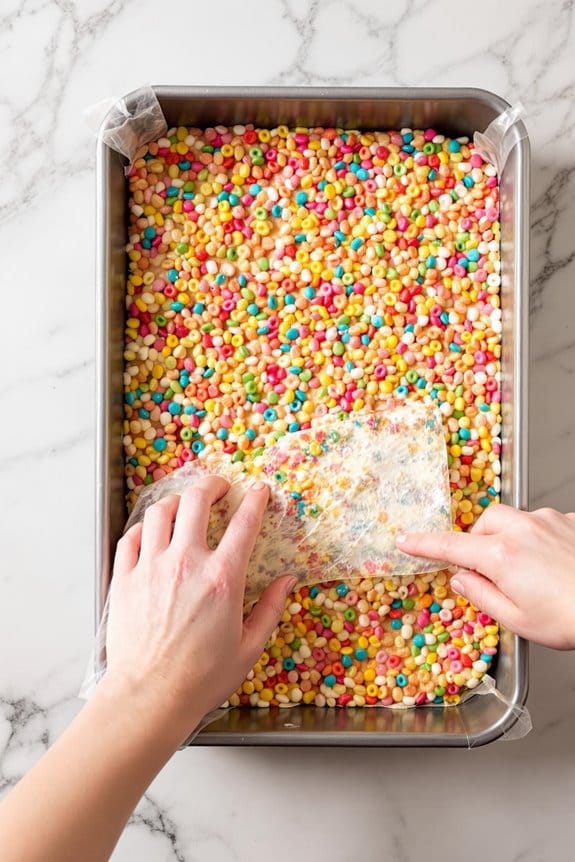
Grease a 9×13 inch baking pan with butter or non-stick spray to guarantee your Fruity Pebbles rice bars won’t stick.
Once you’ve mixed your vibrant, marshmallow-coated Fruity Pebbles, you’re ready for the essential part: pressing the mixture into the pan. This step isn’t just about shaping; it’s about ensuring the right density and texture for your bars.
When pressing the mixture into the pan, aim for an even layer to avoid bars that are too thick in some parts and too thin in others. You want each bite to be perfectly crispy and chewy!
Here are a few tips to make the process easier and mess-free:
- Use a Spatula: A spatula or the back of a spoon helps spread the mixture evenly across the pan.
- Wet Your Hands: If you prefer using your hands, wet them slightly to prevent sticking and facilitate smoothing.
- Parchment Paper Trick: Lay a sheet of parchment paper over the top and press down. This can help achieve an even surface without any stickiness.
- Don’t Over-Press: Press firmly but gently—over-compressing can make the bars too hard once they set.
Step 4. Cool in Refrigerator
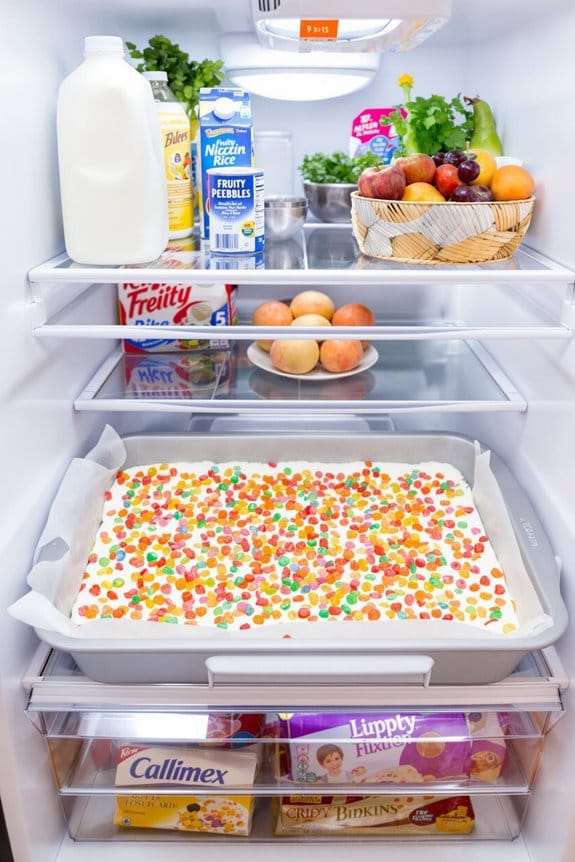
Once you’ve pressed the mixture evenly into your pan, place it in the refrigerator to cool. This chilling process isn’t just a waiting game; it’s a vital step to ensuring your bars set properly and maintain their shape. Typically, you’ll want to leave them in the fridge for at least an hour, but if you’re not in a rush, giving them a bit more time can only help.
The cold temperature slows down the movements of molecules inside the bars, allowing the marshmallow and butter mixture to firm up and bind the Fruity Pebbles together. This results not only in a bar that holds together better but also in a delightful snap when you bite into it.
While it’s tempting to check on your creation every few minutes, it’s best to just let them be. Opening the fridge repeatedly can lead to fluctuations in temperature that might affect the setting process.
Instead, use this time to clean up your workspace or prepare for the next step in your recipe. Patience here really pays off, leading you to a perfect batch of Fruity Pebbles crispy rice bars that are as fun to look at as they’re to eat.
Step 5. Cut Into Desired Shapes
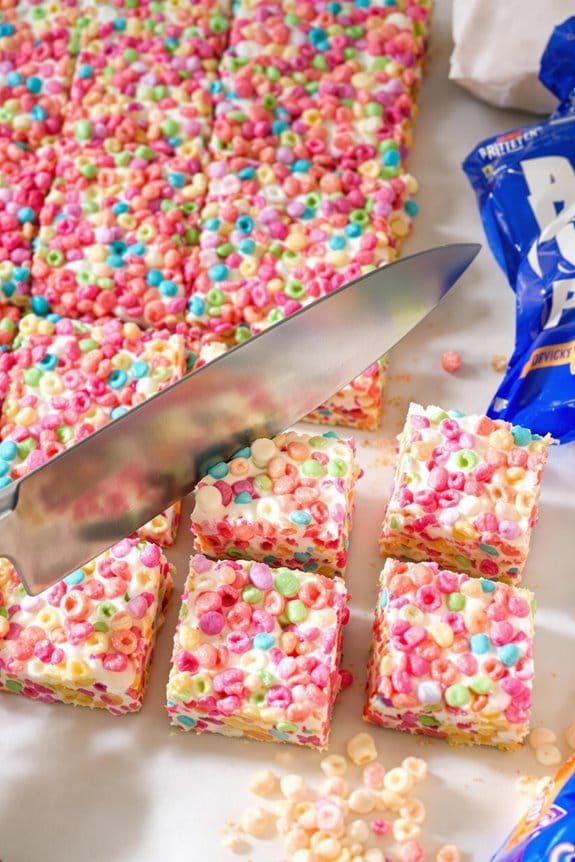
After allowing sufficient time for your Fruity Pebbles crispy rice bars to cool and set in the refrigerator, you’re ready to shape them into perfect, snackable pieces.
Grab your sharpest knife or a cookie cutter for some creative cuts. Here’s how to make certain each piece comes out just as you’d like it:
- Choose Your Tool: A sharp knife will get through the bars cleanly. Lightly oiling the blade can help prevent sticking. For fun shapes, use cookie cutters.
- Make Even Cuts: Measure and mark lines with a knife tip to guarantee uniform pieces. Aim for squares or rectangles that are easy to handle.
- Consider Thickness: Cut bars according to your preference. Thicker bars stay chewy longer, while thinner ones might provide more crunch.
- Use a Steady Hand: Press down firmly and evenly; don’t saw. A single downward motion yields smoother cuts.
Once you’ve cut the bars, you can store them in an airtight container to keep them fresh.
Serve them at room temperature to guarantee they maintain their delightful texture. Enjoy the pop of color and the playful crunch that makes these treats a hit at any gathering!
New Recipe
- Pepperoni and Hot Honey PizzaTry the tantalizing twist of pepperoni pizza with hot honey, where sweet meets heat—how will it transform your taste buds?
Cooking Tips
To guarantee your Fruity Pebbles Crispy Rice Bars turn out perfectly, it’s essential to carefully measure all ingredients. Precise proportions are the key to achieving the delightful balance between marshmallow gooeyness and the crisp texture of the cereal.
Don’t guess the amounts—use standard measuring cups and a kitchen scale if you’ve got one. It’s worth the extra minute to ascertain accuracy.
You’ll also want to prepare your pan properly to avoid sticky situations. Try lightly greasing the pan or using parchment paper for easier removal and clean-up. This step will help the bars maintain their shape and make them easier to cut once cooled.
Melting your butter and marshmallows over low heat is vital. High heat can cause the mixture to burn, leading to an unpleasant taste. Stir consistently to get a smooth, even melt.
Once melted, work quickly to fold in your Fruity Pebbles before the marshmallow mixture begins to set. This timing ascertains every morsel of cereal is well-coated and the bars are uniformly colorful.
Final Thoughts
Creating Fruity Pebbles Crispy Rice Bars is a delightful way to bring a bit of color and nostalgia into your kitchen. You’ve followed the steps carefully, mixed the vibrant cereals with marshmallow and butter, and now you’re ready to share your creation with friends and family or savor them yourself.
Remember, these treats aren’t just tasty; they’re a trip down memory lane with every bite.
As you reflect on your cooking journey, consider these points to guarantee perfection every time:
- Experiment with Shapes: Don’t just stick to the traditional bar form; use cookie cutters to make fun shapes.
- Control the Sweetness: Balance the sugary cereal with unsalted butter or less marshmallow if you prefer a subtler taste.
- Storage is Key: Keep them in an airtight container to maintain freshness.
- Mix it Up: Add different ingredients like nuts or chocolate chips to create a customized treat that still holds the essence of the original bars.
Making these crispy rice bars is more than just preparing a snack; it’s about enjoying the process and the final product.
Immerse yourself in the possibilities, and don’t forget to have fun each step of the way!

