You’ve likely savored the warm, comforting flavors of chicken pot pie at some point, but have you considered the convenience of a freezer version? Imagine coming home after a long day, popping a pre-prepared pot pie into the oven, and soon sitting down to a hearty, homemade meal. It’s a blend of tender chicken, vibrant vegetables, and creamy sauce, all encased in a flaky crust. It’s not just the ease that’s appealing, but the versatility too. You’ll find there’s more to this freezer-friendly dish than meets the eye. So, are you curious to discover its potential?
History
Though it’s unclear exactly when the first chicken pot pie was baked, this hearty dish has a rich and interesting history. Originating in Greece, it was the Romans who took the idea and ran with it, creating a variety of recipes which were then passed around Europe. Over time, the pot pie evolved, with different regions adding their own unique twists.
In America, the dish was popularized by the Pennsylvania Dutch in the 19th century. Their version, often featuring chicken, became a staple of American comfort food. You might have relished a store-bought version or one made from scratch by loved ones. The simplicity of the ingredients combined with the warmth and heartiness of the dish make it a beloved choice for many.
Recipe Cooking Steps
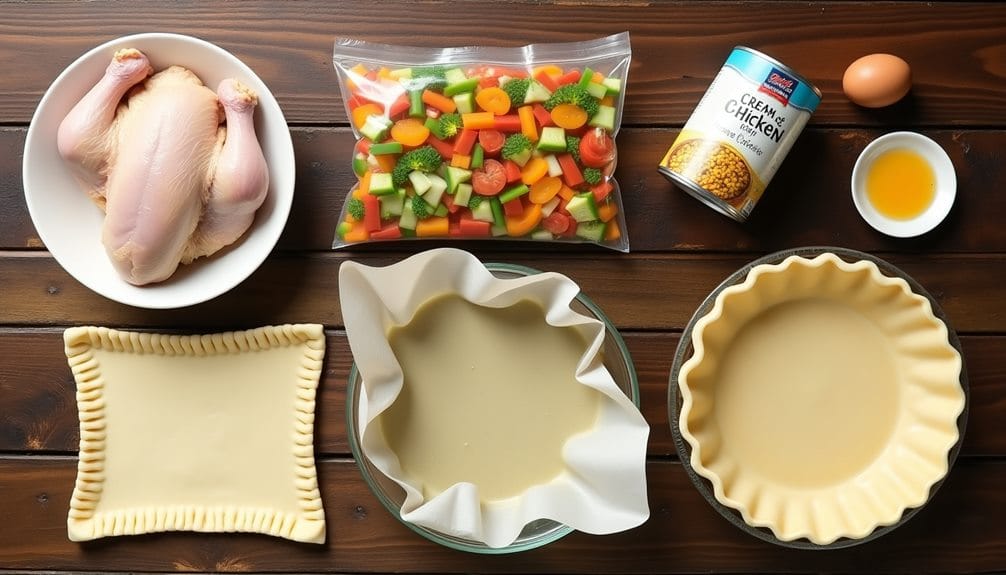
Chicken pot pie is a beloved classic that offers comfort and satisfaction in every bite. This recipe simplifies the process by using pre-cooked rotisserie chicken and frozen vegetables, combined with a creamy soup base and enveloped in a flaky pie crust. The result is a hearty, flavorful dish that’s perfect for a cozy family dinner, yet easy enough to whip up on a busy evening. An added bonus is that this dish can be prepared in advance and frozen, so you’ll always have a delicious meal ready to go.
The secret to this quick and easy chicken pot pie is in its simplicity. The rotisserie chicken adds a depth of flavor that usually requires hours of slow cooking, while the frozen vegetables save on prep time without skimping on nutrition. A can of cream of chicken soup creates a creamy, savory sauce that ties everything together, and the pre-made pie crust guarantees a perfectly flaky finish every time. With just five ingredients and a few simple steps, you can create a chicken pot pie that rivals any homemade version.
Ingredients:
- 1 rotisserie chicken, shredded
- 1 bag of mixed frozen vegetables
- 1 can of cream of chicken soup
- 2 refrigerated pie crusts
- 1 egg
Preheat your oven to 375°F. In a large bowl, combine the shredded chicken, frozen vegetables, and cream of chicken soup until well mixed. Place one pie crust in a pie dish and pour in the chicken mixture. Cover with the second pie crust, crimping the edges to seal. Beat the egg and brush it over the top crust to create a golden finish. Bake for 30-35 minutes, or until the crust is golden brown. Let the pot pie cool slightly before serving.
A few additional tips can help perfect your chicken pot pie. Letting the pie cool for a few minutes after baking will allow the filling to set, making it easier to cut and serve. If you’re planning to freeze the pot pie, let it cool completely before wrapping in plastic wrap and then aluminum foil. You can bake it directly from frozen, but remember to increase the baking time to about 50-60 minutes. Feel free to customize this recipe with your favorite seasonings or herbs for a personalized touch. Enjoy the process and the delicious result – a heartwarming chicken pot pie made easy.
Step 1. Preheating Oven and Mixing Ingredients

First off, kick off your cooking process by cranking up your oven to a toasty 375°F. While it’s heating, grab a sizable mixing bowl. You’re going to need it to combine all your ingredients. In goes the shredded rotisserie chicken. Add the mixed frozen vegetables. Don’t worry about thawing them; they’ll cook perfectly in the oven. Now, pour in that can of cream of chicken soup.
Give everything a good stir. You want each component to integrate fully for maximum flavor. If you’re feeling adventurous, feel free to sprinkle in some extra seasonings. A dash of garlic or onion powder could add a nice kick. The mixture should be nice and creamy, with chunks of chicken and veggies peeking through.
While you’re mixing, don’t forget about your pie crusts. They should be at room temperature, so take them out of the fridge if you haven’t already. Unroll them and get them ready for the next step: filling.
Step 2. Filling Pie Crust

Now that your ingredients are mixed and your pie crusts are ready, it’s time to assemble your chicken pot pie. You’ve prepped your pie dish, so place one of the pie crusts into it. Press it gently into the dish, guaranteeing it takes the shape of your dish. It’s essential not to stretch the dough; instead, let it naturally fall into place.
Next, pour your hearty chicken mixture into the pie crust. You’ll want to spread it evenly to confirm each slice has a good mix of chicken and vegetables. Remember, you’re looking for a nice, thick filling that will give your pot pie that classic, comforting feel. Don’t skimp on the filling!
Once you’ve filled your pie crust, it’s time to set it aside and move on to the top crust. But before you do, take a moment to appreciate your work. You’re one step closer to enjoying a delicious homemade chicken pot pie!
Don’t forget, once you’ve assembled your pie, let it cool properly before freezing. This will help maintain the pie’s texture and flavor when you’re ready to enjoy it.
Step 3. Adding Top Crust and Egg

Let’s get that top crust on! Once you’ve filled your pie crust with the delectable mixture of chicken, veggies, and cream of chicken soup, it’s time to add that top layer. Unroll your second refrigerated pie crust and gently place it over the top of your filling. Carefully tuck the edges together with the bottom crust, pinching them to create a seal. This will prevent any of that delicious filling from escaping during the baking process.
Remember to cut a few slits into the top crust. This allows steam to escape, preventing the crust from getting soggy or bursting open. Now, for the finishing touch:
- Crack an egg into a bowl and give it a good whisk.
- Using a pastry brush, lightly coat the entire top crust with the beaten egg.
- This egg wash will create a beautiful golden color as the pie bakes.
- Don’t forget to cover the edges of the pie crust with foil to prevent them from burning.
- Finally, admire your handiwork before it goes into the oven. The sight of your prepared pot pie, glistening with egg wash, is a sight to behold!
Step 4. Baking the Pot Pie

With your chicken pot pie assembled and looking fabulous, it’s time to get it baking! Begin by preheating your oven to a cozy 375 degrees Fahrenheit. While your oven is heating up, take a moment to admire your handiwork. The crimped edges of the crust, the golden egg wash on top, the promise of savory goodness inside—it’s almost too beautiful to eat. Almost.
Once your oven has reached the desired temperature, place your pot pie on the center rack. You’ll want to bake it for about 30 to 35 minutes, but keep an eye on it. Your goal is a pot pie with a crust that’s a gorgeous golden-brown color and a filling that’s bubbling with deliciousness.
Now, here’s the tough part—waiting. The aroma of baking pie will fill your kitchen, tempting you to take it out early. But resist the urge! Remember, patience is a virtue, especially when it comes to baking. After the longest half hour of your life, remove your pot pie from the oven. But don’t plunge in just yet! You’ll need to let it cool slightly before serving. Trust us, it’s worth the wait.
Step 5. Cooling and Freezing Instructions

Often, the most challenging part of enjoying a piping hot chicken pot pie is waiting for it to cool down. But don’t be tempted to dig in immediately; it’s worth the wait.
After taking your golden creation from the oven, let it rest for about 15 minutes. This allows the filling to set, making your pie slice-able and its tasty contents less likely to spill out.
If you’re freezing your pie for future enjoyment, let it cool completely to room temperature before moving to the freezing process. This helps prevent the formation of ice crystals that can negatively affect texture and flavor.
Here’s your go-to guide for cooling and freezing:
- Remove the pie from the oven and let it rest for 15 minutes.
- If freezing, let it cool completely to room temperature.
- Wrap the cooled pie tightly in plastic wrap.
- Add an extra layer of protection with aluminum foil.
- Freeze for up to three months.
When you’re ready to enjoy, bake your pot pie straight from the freezer. Just remember to add a bit more baking time—about 50-60 minutes should do. Now, you’re all set to savor your homemade chicken pot pie anytime!
New Recipe
- Pepperoni and Hot Honey PizzaTry the tantalizing twist of pepperoni pizza with hot honey, where sweet meets heat—how will it transform your taste buds?
Final Thoughts
In conclusion, this freezer chicken pot pie is a real game-changer. It’s not just a time-saver, but also an incredibly delicious meal that you can whip up with minimal effort. You’ll love how the flavors of the rotisserie chicken, mixed vegetables, and creamy soup blend together under the golden, flaky crust. It’s the epitome of comfort food.
Remember, the secret to its convenience lies in its freeze-ability. Once it’s cooled, wrap it up and stash it in the freezer for those days when you’re too swamped to cook. It’s a lifesaver, trust me. And don’t fret about it being frozen. Just pop it in the oven and adjust the baking time. It’ll come out just as fantastic.
Feel free to play around with the recipe. Add in some extra spices or herbs if you want. It’s flexible and forgiving. So, go ahead and give this freezer chicken pot pie a shot. You won’t regret it. It’s a meal that delivers on taste, comfort, and convenience, making your life just a tad bit easier. Enjoy!

