Have you ever considered the blissful fusion of peanut butter, Oreos, and ice cream in one decadent pie? Imagine the creamy layers of peanut butter ice cream melding perfectly with chunks of crunchy Oreos, all encased in a chocolate-cookie crust. The simplicity of its preparation might surprise you, yet it never fails to impress at gatherings or provide that much-needed comfort after a long day. You’ll find that crafting this treat allows for a creative exploration of textures and flavors. But what might really catch your curiosity is how a few simple tweaks to the recipe can elevate this pie from delightful to sublime.
History
While the concept of sweet pies dates back to ancient times, the delicious twist of Peanut Butter Oreo Ice Cream Pie emerged much more recently.
It’s a dessert that brilliantly blends the creamy, nutty flavor of peanut butter with the iconic crunch of Oreo cookies, all set in a invigoratingly cool ice cream base.
You’d be intrigued to know how this pie isn’t just a random concoction but a thoughtful innovation that reflects modern dessert trends.
The rise of mixed-texture desserts can be traced back to the late 20th century, as bakers and chefs sought to surprise the palate with varied sensory experiences.
The combination of crispy and smooth textures in this pie is a perfect example of such culinary creativity.
It’s fundamentally an American creation, growing in popularity as both Oreo cookies and peanut butter became pantry staples across the nation.
Ice cream, always a beloved treat, simply heightened the irresistible appeal of this pie.
It’s been a hit especially in informal gatherings and summer parties, where a cool, easy-to-serve dessert is often the centerpiece.
When you next savor a slice, think about how it’s a reflection of modern dessert evolution, turning everyday ingredients into an extraordinary treat.

One 48 fluid ounce box of Chocolate Peanut Butter Cup Ice Cream

HÄAGEN-DAZS Chocolate Peanut Butter Ice Cream is the essence of elegance and sophistication in one perfectly portioned 14-oz. container

150+ banned colors, flavors, preservatives and other ingredients often found in food
Recipe
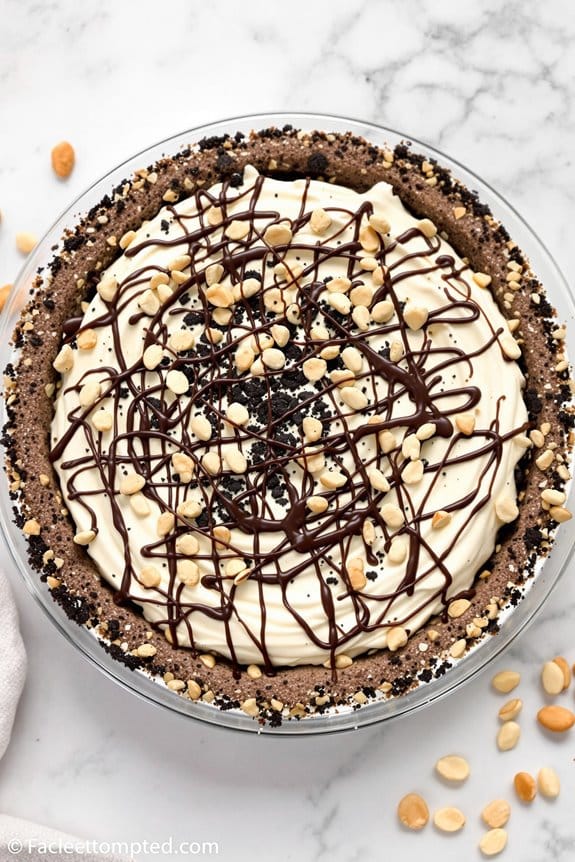
Peanut Butter Oreo Ice Cream Pie is a delightful treat that combines the rich flavors of peanut butter and chocolate with the cool, creamy texture of ice cream. This dessert isn’t only incredibly easy to make but also sure to impress at any gathering.
The buttery Oreo crust provides a crunchy base that perfectly complements the smooth, peanut butter-infused ice cream. With layers of whipped topping and a sprinkle of crushed Oreos, this dreamy confection hits all the right notes for a satisfying dessert.
Perfect for summer picnics, family gatherings, or simply a quiet night in, this Peanut Butter Oreo Ice Cream Pie requires minimal cooking and can be prepared ahead of time. The key to a successful ice cream pie lies in allowing enough freezing time, so it retains its shape and texture when served.
Here’s how you can make your own mouth-watering version of this delicious dessert.
Ingredients:
- 25 Oreo cookies
- 4 tablespoons melted butter
- 1/2 gallon vanilla ice cream, softened
- 1 cup creamy peanut butter
- 1 cup whipped topping, plus extra for garnish
- 1/4 cup crushed peanuts
- Additional crushed Oreos for topping
Cooking Instructions:
Begin by crushing the Oreo cookies into fine crumbs using a food processor or a rolling pin. Mix the crushed Oreos with melted butter until well combined, then press the mixture into the bottom and up the sides of a 9-inch pie dish to form the crust.
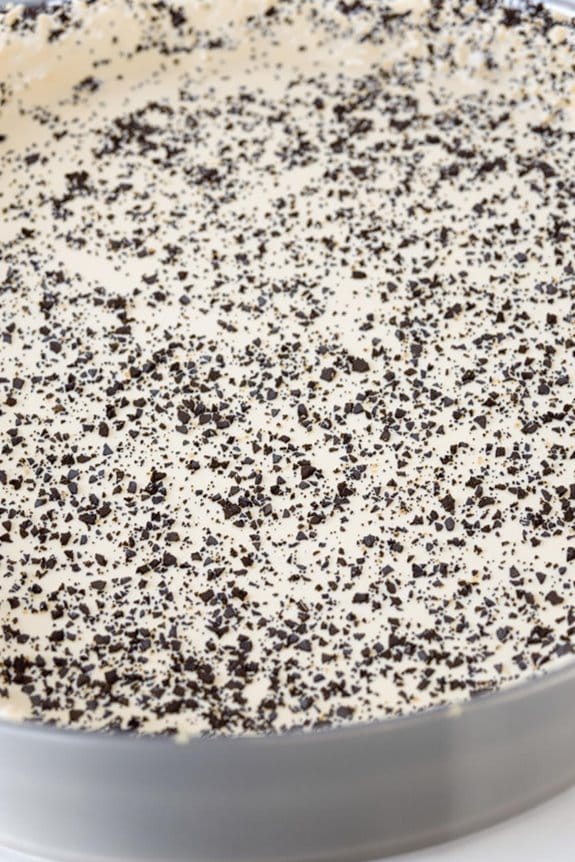
Freeze for 10 minutes until firm. In a separate bowl, mix the softened ice cream with creamy peanut butter until evenly blended. Pour this mixture over the chilled crust, smoothing the top with a spatula. Freeze the pie for at least 4 hours or until firm.
Before serving, top the pie with whipped topping, a sprinkle of crushed peanuts, and additional crushed Oreos for a delightful crunch.
Additional Tips:
For the best texture and ease of serving, remove the pie from the freezer about 10 minutes before cutting. Use a knife dipped in warm water to make slicing neater and easier.
If you’re a chocolate lover, drizzle some chocolate sauce over the top for that extra decadent touch. Store any leftovers in the freezer, covered, to maintain freshness. Experiment with different ice cream flavors like chocolate or cookies and cream to put a new twist on this versatile dessert recipe.
Step 1. Crush Oreos for Crust Base
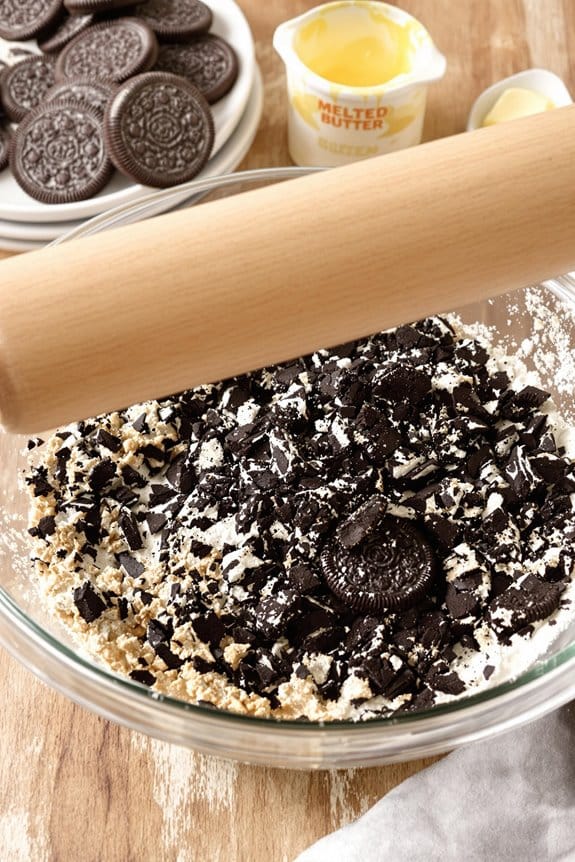
Begin by placing your Oreos in a large plastic bag and seal it tight, making sure no air escapes. This step is vital as you’re about to transform those whole cookies into fine crumbs that’ll serve as the base of your pie crust.
Lay the bag flat on your kitchen counter and use a rolling pin for this task. You’ll want to gently roll over the sealed bag, applying even pressure to avoid any forceful crushing that might tear the bag.
As you roll, the cookies should start breaking down into smaller pieces. Keep adjusting the cookies inside the bag for more uniform crumbs. It’s okay if you have some bigger pieces among the finer crumbs; a bit of texture can be quite nice in the crust. This process should feel somewhat therapeutic, giving you control over the texture of your crust base.
Once you’ve rolled over the cookies a few times, check to see if they’re finely crushed. At this point, you can press harder on any stubborn chunks that haven’t broken down.
You’ll need these Oreos to be well crushed to guarantee they mix properly with other ingredients later on, so take your time to get it right.
Step 2. Mix Melted Butter With Oreos
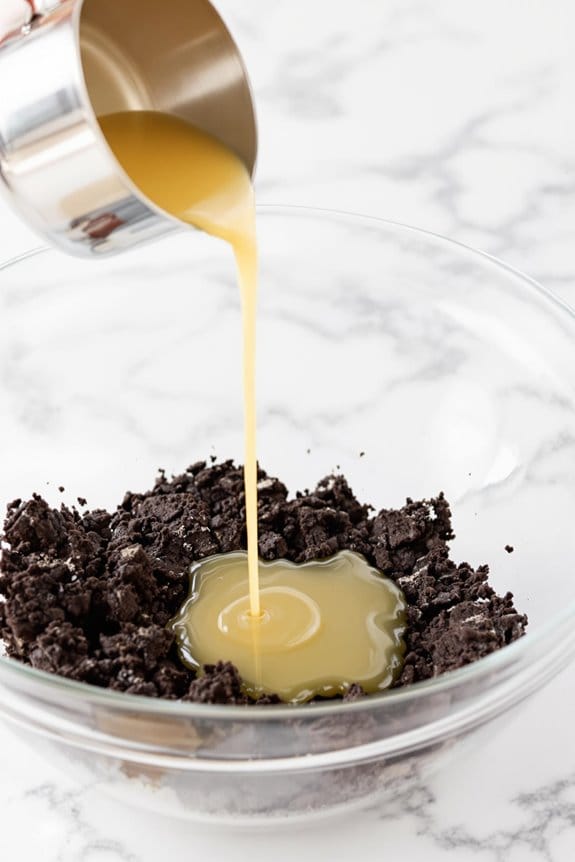
After crushing the Oreos to the desired consistency, the next step is to mix them with melted butter. You’ll need about half a cup of butter; melt it gently so it’s smooth and easy to combine with your cookie crumbs.
Pour the melted butter over the crushed Oreos and stir thoroughly until every crumb is moistened. This is important because the butter acts as a binding agent, helping your crust to hold together once it’s pressed into shape.
The mixing process isn’t just functional; it’s where the magic starts. As you stir, you’ll notice the aroma of the Oreos intensifying, mingling with the warm, comforting scent of butter.
The texture should be like wet sand—cohesive but still crumbly. It’s tempting to taste a spoonful, and why not? It’s delicious!
Make sure to mix well, ensuring there are no dry spots and no excess butter pooling anywhere. Achieving the right balance is key.
If the mixture is too dry, it could crumble later; too wet, and it might get soggy. You’re looking for that perfect middle ground where it just holds together nicely without feeling greasy.
Step 3. Press Crust Into Pie Pan
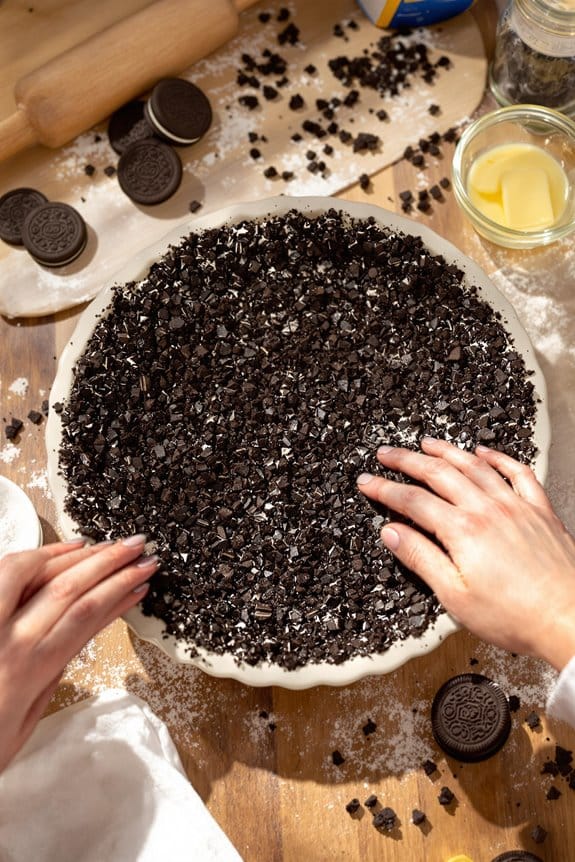
Transform your Oreo mixture into the base of your dessert by pressing it into a pie pan.
Begin by grabbing your crust mix — that delightful combination of finely crushed Oreos and melted butter you just prepared. Now, it’s time to make it the foundation of something truly special.
Pick a 9-inch pie pan, preferably with a removable bottom for easier serving later. Pour your crumbs into the pan, spreading them evenly across the bottom and up the sides.
Here’s where you get hands-on: using the back of a spoon or the bottom of a measuring cup, press the mixture firmly down onto the pan’s base and along the edges. You’re aiming for a compact, even layer that’ll hold up well once you add your filling.
Make sure to press hard enough to compact the mixture — this prevents it from crumbling when you slice the pie. If the crust feels too loose or crumbly, it’s usually a sign that you need to press it down more firmly or perhaps, that a bit more butter was needed to bind it together.
This crust doesn’t just taste fantastic; it also acts as a sturdy, flavorful base for the delicious layers to come.
Keep at it until you’ve got a beautiful, smooth crust ready for the next step.
Step 4. Prepare Peanut Butter Filling
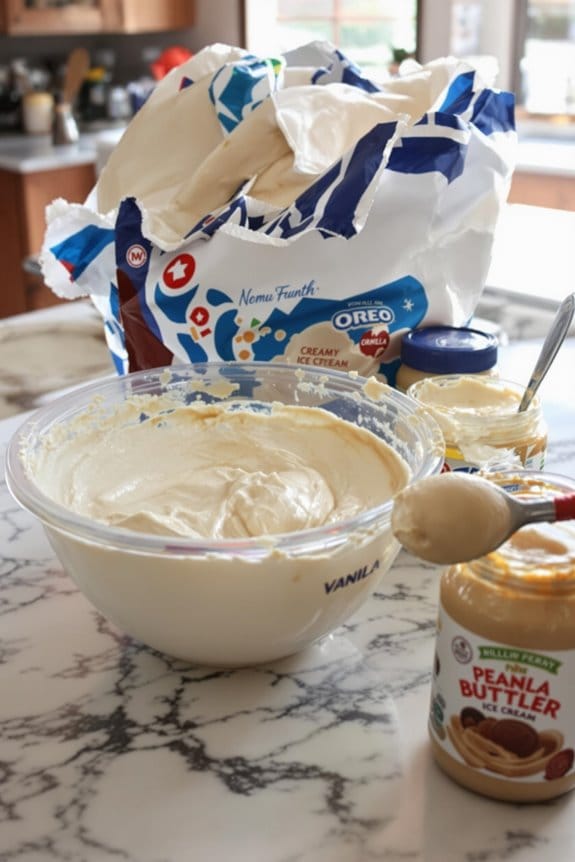
Once you’ve crafted your Oreo crust, it’s time to whip up the luscious peanut butter filling. Begin by measuring out one and a half cups of creamy peanut butter. You’ll want the richness of the peanut butter to really shine, so opt for a high-quality brand.
In a separate bowl, mix half a cup of powdered sugar to add a touch of sweetness that complements the savory notes of the peanut butter.
Next, pour in one cup of heavy cream into a mixing bowl. Use an electric mixer to beat it until it forms soft peaks — this usually takes about three to four minutes. You’re looking for a slightly firm yet fluffy texture that’ll add volume to your filling.
Once achieved, gently fold the whipped cream into the peanut butter mixture. Make sure to do this delicately to keep the air in the whipped cream from deflating too much, which is essential for that creamy consistency you’re aiming for.
Finally, blend in a teaspoon of vanilla extract to enhance the flavors. Stir everything together until it’s uniform and smooth. This heavenly peanut butter filling is now ready to layer over your Oreo crust.
Step 5. Chill Crust Before Filling
Before you add your peanut butter filling, make certain your Oreo crust has been properly chilled. This vital step guarantees that your crust maintains its shape and provides a solid foundation for the creamy topping to come. Chilling prevents any potential sogginess from the filling seeping into the crust, keeping the textures distinct and enjoyable.
Why chill the crust? Here’s a breakdown:
- Structural Integrity: A chilled crust is stiffer, so it holds up better when you add the wet filling.
- Texture Contrast: The firm, crunchy crust complements the smooth, creamy filling, enhancing the overall eating experience.
- Flavor Development: Cooling the crust allows the butter to solidify, which concentrates the rich, chocolatey flavor of the Oreos.
- Slicing Ease: A firm crust makes your pie easier to cut into clean, sharp slices for serving.
It’s best to chill the crust in the refrigerator for at least an hour before you proceed with the filling. If you’re pressed for time, a stint in the freezer for about 30 minutes should suffice.
Just be certain it’s thoroughly set before moving on—patience here really pays off in the final dessert!
Cooking Tips
If you’re enthusiastic to make your Peanut Butter Oreo Ice Cream Pie a standout dessert, paying attention to a few key cooking tips can make all the difference.
To begin with, verify your Oreo crust is finely crushed; this creates a solid base that holds well when sliced. Opt for a food processor, if you have one, to get that perfect, even texture.
When it comes to the ice cream, allow it to soften slightly before mixing it with the peanut butter. This means leaving it out for about 10-15 minutes depending on the room temperature. Mixing is easier and smoother when the ice cream isn’t rock hard — you’re aiming for a creamy, uniform blend without overdoing it.
For a truly professional touch, temper your mixed ice cream back in the freezer for just a bit after combining it with the peanut butter. This keeps the pie from becoming too soft or melting unevenly when you serve it.
Also, when spreading the ice cream mixture over the crust, use a spatula to smooth it out for a beautiful, flat top.

Perfect addition to ice cream, milkshakes, cheesecakes, dessert bars, and pies

One 24.16 oz party size pack of OREO Chocolate Sandwich Cookies (packaging may vary)

For over 100 years, OREO has been bringing families together with our iconic cookie found in more than 100 countries around the world. Our beloved cookie is also available in the freezer aisle as playfully reimagined frozen treats.
Final Thoughts
Following the outlined cooking tips will greatly enhance your Peanut Butter Oreo Ice Cream Pie. Not only does it assure a delightful treat, but it also offers a unique culinary adventure. Taking the time to carefully mix your ingredients and chill your dessert guarantees that each slice is as delicious as the last, creating a memorable experience for everyone involved.
To guarantee your pie really stands out, keep these key points in mind:
- Ingredient Quality: Select high-quality peanut butter and fresh Oreos to maximize flavor.
- Temperature Control: Keep ingredients and the assembled pie cool to maintain texture and prevent melting.
- Serving Suggestions: Serve immediately after preparation or store in the freezer until ready to delight your guests.
- Decorative Touches: Add a drizzle of chocolate sauce or a sprinkle of crushed peanuts for an eye-catching finish.
Crafting this dessert isn’t just about following a recipe; it’s about creating joy and sharing a piece of culinary art with those you care about.
Take pride in your creation, knowing that you’ve put together something truly special. Enjoy the process, relish in the accomplishment, and most importantly, savor every bite.

BETTY, REESE'S & HERSHEY’S: This Betty Crocker No Bake Mix combines an irresistible REESE’S Peanut Butter base and rich HERSHEY’S Milk Chocolate frosting for a sweet dessert sensation

CLASSIC COOKIE MIX: Peanut butter cookies for the family to enjoy; each 7.2-oz. bag makes twelve 2-inch cookies

REESE'S PEANUT BUTTER: Refrigerated cookie dough made with real REESE'S Peanut Butter brings out smiles any day of the week; You can even eat the refrigerated cookie dough uncooked (look for the “safe to eat raw” seal!)